
Propagation
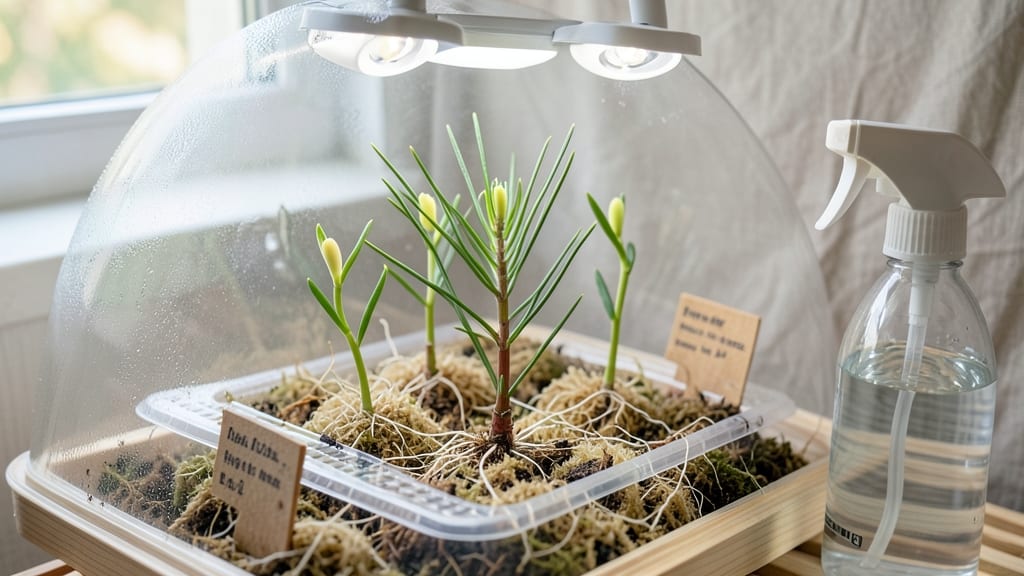
Pine tree seed germination requires a cold stratification trick that mimics nature’s timing—skip it, and you’ll wait years for sprouts. 🌲 I’ve struggled with this myself, watching seeds languish in warm soil only to finally break dormancy after months of patience (and a freezer). The secret lies in replicating winter’s chill, which preps the seed to burst into life when spring arrives.
You’ll need just three things: pine seeds (collected fresh, not store-bought), a damp paper towel or peat moss, and a cold spot—your fridge’s crisper drawer works perfectly. Moisten the seeds, seal them in a bag, and let them chill for 90–120 days.
This isn’t just waiting; it’s tricking the seed into thinking winter has passed, so when you plant, it’s ready to grow.
Once stratified, sow seeds in a well-draining mix of sand and peat, barely covering them. Keep the soil damp (not soggy) under grow lights or bright, indirect sunlight. Germination can take 3–6 months, but with this method, you’ll see those first tiny green needles emerge reliably—no more guessing games.
For best results, start in late summer so seeds stratify over winter and sprout by spring. If mold appears, reduce moisture and improve airflow. Patience is key: pine seeds move at their own pace, but this blueprint cuts the waiting time dramatically.
📚 In This Guide
- What you need
- Instructions
- Tips and common mistakes
- Wrapping up and next steps
What you need
- ● Pine tree seeds: Fresh, viable seeds (collect or purchase from reputable suppliers). Aim for at least 50 seeds for better success rates.
- ● Cold stratification setup: Moistened peat moss or coco coir (1 part peat to 1 part perlite/sand for drainage) – ~2 cups.
- ● Sealed ziplock bag or airtight container (e.g., plastic tub with lid).
- ● Refrigerator (set to 34–40°F (1–4°C)) for stratification.
- ● Planting medium: Well-draining mix like 50% peat moss + 50% perlite/vermiculite – ~1 gallon.
- ● Small pots or seed trays: 2–3 inch pots or trays with drainage holes (for 10–20 seeds per pot).
- ● Misting bottle or spray nozzle (to keep moisture consistent).
- ○ Plastic wrap or humidity dome (optional, for extra moisture retention).
- ● Seed scarification tools: Sandpaper (fine-grit) or a knife (to nick seeds if needed).
- ● pH meter or test kit: Ideal soil pH for pine seeds is 4.5–6.0 (acidic).
- ● Grow lights or sunny windowsill: Bright, indirect light (12–16 hours/day) post-stratification.
- ○ Heating mat: (Optional for faster germination in warm climates).
- ● Labeling tags: To track seed varieties and planting dates!
Step-by-Step guide to cold stratifying pine tree seeds
Here's how I've reliably germinated pine seeds after years of trial and error.
🌱 Step 1: Collect and Prepare Fresh Pine Seeds
Harvest seeds from fully mature pine cones—look for cones that have opened naturally and released their seeds. The fresher the seed, the higher your germination rate. I collect seeds in late fall or early winter when cones are fully open but before heavy rains can damage them.
Remove any remaining cone scales or debris by gently brushing the seeds with your fingers. Store them in a paper bag in a cool, dry place until you're ready to stratify. Never use plastic bags—they trap moisture and cause mold. The key here is patience: pine seeds need time to break their natural dormancy.
❄️ Step 2: Perform Cold Stratification for 60-90 Days
Place the seeds in a container with a mix of moistened peat moss and perlite (equal parts) to simulate winter conditions. I use a shallow tray lined with damp paper towels for this process. The moisture level should feel like a wrung-out sponge—damp but not soggy.
Seal the container in a plastic bag with small holes for airflow, then refrigerate at 35-40°F for 60-90 days. This mimics the natural winter cold period pine seeds require to break dormancy. Check monthly to ensure the mix stays moist—never let it dry out completely. You'll see tiny cracks in some seeds after about 30 days—that's a good sign they're starting to wake up.
☀️ Step 3: Sow Stratified Seeds in Warmth
After stratification, remove the seeds and plant them ¼ inch deep in a well-draining mix of 50% peat moss, 30% perlite, and 20% coarse sand. I use small pots or a seed tray with drainage holes to prevent waterlogging. Keep the soil consistently moist but never waterlogged—pine seedlings hate soggy roots.
Place the container in a warm spot (70-75°F) with bright, indirect light. A sunny windowsill works well, but avoid direct midday sun which can overheat the soil. You'll see the first signs of germination in 4-12 weeks—watch for the tiny green tips pushing through the soil surface. Be patient; pine seeds are slow starters compared to many other tree species.
🌿 Step 4: Provide Ideal Growing Conditions
Once seedlings emerge, move them to a location with full sun (at least 6 hours daily) and maintain 60-70°F temperatures. I use a grow light on a timer for 14 hours daily during cloudy periods. The seedlings will be delicate at first, so handle them carefully—pine trees are sensitive to root disturbance.
Water gently at the base when the top ½ inch of soil feels dry. Avoid wetting the needles to prevent fungal diseases. You'll notice the first true needles appear after about 6-8 weeks of growth. This is when the seedlings look most like miniature pine trees. At this stage, they're ready for their first transplant into slightly larger containers.
Tips & tricks for perfect pine tree seed germination
Cold stratification might seem intimidating, but these key insights will help you achieve reliable germination every time.
Seed Quality Matters: Freshness is everything with pine seeds. I've found that seeds collected from fully open cones in late fall have the highest germination rates. If you're working with older seeds, soak them in warm water for 24 hours before stratification to help break dormancy. The fresher the seed, the better your chances—pine seeds lose viability quickly once removed from their cones.
Temperature Consistency: Maintaining that 35-40°F range during stratification is crucial. I use the vegetable crisper drawer in my fridge, which stays consistently cold. If your fridge fluctuates, consider using a dedicated seed stratification fridge or a cooler with ice packs. The goal is to mimic winter conditions precisely—any warmer and the seeds won't break dormancy properly.
Moisture Management: The peat moss-perlite mix should stay damp like a wrung-out sponge throughout the 60-90 day stratification period. I check it monthly by squeezing a handful—if water drips out, it's too wet; if it feels dry, add a little more moisture. Proper moisture levels prevent both mold and dehydration, both of which can kill your seeds before they even sprout. A spray bottle makes this easy to maintain without over-saturating.
Light Transition Strategy: When moving seeds from cold stratification to warmth in Step 3, I gradually introduce light over 3-5 days rather than sudden exposure. Start with bright indirect light for just 2 hours daily, then increase by 1 hour each day until reaching 14 hours daily. This gradual adjustment helps prevent seedling shock, especially for delicate pine seedlings that need time to acclimate to photosynthesis.
Pro Tips for Pine Tree Seed Germination
- Cold stratification might seem intimidating, but these key insights will help you achieve reliable germination every time.
- Seed Quality Matters: Freshness is everything with pine seeds.
- Temperature Consistency: Maintaining that 35-40°F range during stratification is crucial.
Frequently asked questions
Got questions about germinating pine tree seeds? You’re not alone—this process can be tricky! Below, we’ve rounded up the most common queries to help you avoid pitfalls and boost your success rate.
How long does cold stratification take for pine seeds?
Cold stratification typically requires 60–120 days in moist, chilled conditions (33–41°F). Some pine species, like white pine, may sprout faster (4–8 weeks), while others, such as ponderosa pine, might need up to 6 months. Monitor moisture levels—too dry delays germination, while too wet risks mold. Patience is key!
Can I germinate pine seeds without cold stratification?
While possible, cold stratification mimics natural winter conditions and significantly improves germination rates (often from <10% to 50%+). Without it, seeds may stay dormant for years. If you skip stratification, try soaking seeds in warm water for 24–48 hours or use a heat mat (70–80°F) for a few weeks—but expect slower, less reliable results.
What’s the best soil mix for pine seed germination?
Use a light, well-draining mix like:
- 50% peat moss or coco coir (retains moisture)
- 30% perlite or coarse sand (prevents compaction)
- 20% compost or worm castings (adds nutrients)
Why aren’t my pine seeds sprouting after stratification?
Several factors could be at play:
- Improper stratification: Check temps (too warm = no dormancy break) and moisture (seeds should feel damp, not soggy).
- Old or low-quality seeds: Freshness drops after 1–2 years; source seeds from mature, healthy cones.
- Light requirements: Some pines (like Pinus strobus) need light to germinate—don’t bury seeds deeper than ¼ inch.
- Patience: Germination can take weeks to months; avoid disturbing seeds prematurely.
How do I transplant pine seedlings without killing them?
Timing and care are critical:
- Wait until seedlings have 2–4 true needles (usually 6–12 months post-germination).
- Harden off gradually: Move pots outdoors for 1–2 hours daily over 10–14 days.
- Use a shallow hole (same depth as the nursery pot) and mix in compost.
- Avoid transplanting in extreme heat or frost; early spring or fall is ideal.
Wrapping up and next steps
Germinating pine tree seeds successfully boils down to patience, precision, and proper cold stratification—but with the right steps, you’re well on your way to nurturing those tiny seeds into sturdy saplings! 🌱 Whether you’re a gardening newbie or a seasoned green thumb, your efforts will soon reward you with the promise of towering pines. Next up? Once your seeds sprout, focus on transplanting them into nutrient-rich soil and giving them the sunlight and care they’ll need to thrive.
Happy growing!