
Lawn
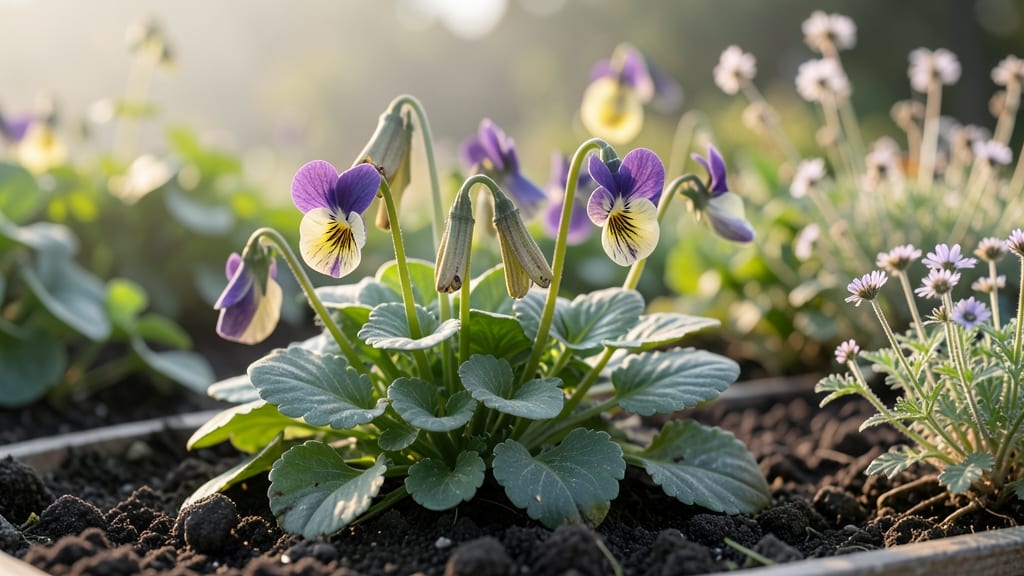
Saving pansy seeds from their pods is where gardening gets satisfyingly circular. 🌱 The moment those little green pods turn brown and crispy, they’re packed with next year’s blooms—if you know how to coax them open without wasting a single seed.
I’ve collected thousands of pansy seeds this way, and the secret lies in patience and a few simple tricks that turn dry pods into a treasure trove of potential.
The pods themselves look like tiny, swollen capsules—nothing like the bright flowers they’ll produce. When fully mature, they’ll pop open on their own, but if you’re eager (or impatient), a gentle squeeze or a warm, dry spot will encourage them to release seeds without breaking.
Store them in a paper envelope until spring, and you’ll have a head start on next season’s color.
What you’ll end up with is a batch of tiny, wrinkled seeds that’ll sprout into sturdy seedlings by late winter. The key is timing: sow them indoors 6-8 weeks before your last frost, and you’ll have blooms by early summer.
No more buying flats of pansies—just a handful of seeds and a little care.
This method works for any pansy variety, whether you’re growing them in garden beds, containers, or even window boxes. The only real mistake is rushing—let those pods dry completely before handling, or you’ll end up with empty shells. Here’s how to do it right the first time.
📚 In This Guide
- What you need
- Instructions
- Tips and common mistakes
- Wrapping up and next steps
What you need
- ● Mature pansy plants – Choose healthy, well-established plants with fully developed seed pods (usually late summer to early fall).
- ● Pruning shears or sharp scissors – Sterilized and clean to avoid spreading disease.
- ● Paper bags or breathable fabric sacks – 2-3 medium-sized bags (12x15 inches) for collecting pods. Avoid plastic to prevent moisture buildup.
- ○ Gloves (optional but recommended) – Nitrile or cotton to protect hands from thorns or sap.
- ● Labeling tags & permanent marker – To mark varieties (e.g., "Heirloom Purple Pansy – 2024").
- ● Small cardboard box or tray – For temporary storage before drying pods indoors.
- ● Damp paper towels – For cleaning pods if dirt or debris is present.
- ● Fine-mesh sieve or colander – Helps separate seeds from chaff during processing.
- ● Seed envelope kit – Pre-made paper envelopes for long-term storage (available at garden centers).
- ● Desiccant packets – Place in storage containers to absorb excess moisture and prevent mold.
- ● Notebook & pencil – To log planting dates, varieties, and germination notes.
- ● Sunny windowsill or dehydrator – For drying pods (if not using natural outdoor methods).
Step-by-step guide to harvesting pansy seeds naturally
Watch those seed pods pop open—it’s nature’s way of telling you it’s time to save seeds.
🌱 Step 1: Identify and Select Healthy Seed Pods
Start by scanning your pansy plants for mature seed pods. These will be the ones that have turned from green to brown and feel dry to the touch. I always pick pods from the healthiest plants—avoid any that look diseased or wilted, as their seeds may not grow true.
Gently twist the pod between your fingers until it releases. If it doesn’t pop open easily, leave it on the plant a day or two longer. The pods should split naturally along their seams, revealing tiny, wrinkled seeds inside. Collect these seeds in a small paper envelope or container—no need for fancy tools.
💧 Step 2: Dry and Store Seeds Properly
Spread the harvested seeds on a clean, dry paper towel or in a single layer on a mesh screen. Place them in a warm, dry spot with good airflow, like a sunny windowsill or a well-ventilated shelf. This ensures they dry completely, which prevents mold and keeps them viable for years.
After about 3-5 days, check the seeds. They’re ready when they feel completely dry and brittle. Store them in a sealed, airtight container—like a small glass jar or envelope—label it with the date and variety, and keep it in a cool, dark place. Properly stored, pansy seeds can last 2-3 years.
☀️ Step 3: Test Seed Viability Before Planting
Before you rush to plant, do a quick viability test. Place a few seeds between damp paper towels in a sealed plastic bag. Keep them in a warm spot (around 65-75°F) and check daily. If most seeds sprout within 7-10 days, they’re ready to grow. If fewer than half sprout, they may need more time or a different storage environment.
Once you confirm viability, plant the seeds in well-draining soil, about ¼ inch deep. Keep the soil consistently moist but not soggy, and place the container in bright, indirect light. You’ll see tiny seedlings emerge in about 2-3 weeks—a sure sign your zero-waste saving worked!
⏰ Step 4: Time Your Planting for Best Results
Pansies thrive in cool weather, so time your planting for early spring or late summer. Start seeds indoors 6-8 weeks before the last frost date in your area. This gives them enough time to grow strong before transplanting outdoors.
When seedlings have 2-3 sets of true leaves and are about 2-3 inches tall, they’re ready to move outside. Harden them off by gradually exposing them to outdoor conditions over 7-10 days. Plant them in well-draining soil with partial shade, and water them regularly to keep the soil moist but not waterlogged.
Tips & tricks for perfect pansy seed pod harvesting
Here's what nobody tells you about getting every last seed from those tricky pods.
Timing Secret: The pods are ready when they've fully dried and turned brown, but don't wait too long—they'll eventually burst open naturally on the plant. I've found that morning harvests work best because the pods are firmer and less likely to crumble when you handle them. If you're harvesting in humid conditions, spread them out to dry for an extra day to prevent mold from developing during storage.
Collection Technique: Use a small paper envelope or even a folded piece of paper to catch the seeds as you open the pods. The seeds are tiny and can easily scatter, so having a container ready makes all the difference. I like to gently tap the opened pod over the envelope to dislodge any seeds that might be stuck inside. This method captures nearly every seed without waste.
Drying Wisdom: While the instructions call for 3-5 days of drying, I've learned that the actual time depends on your climate. In dry conditions, you might be ready in 2-3 days, while humid weather could require up to a week. Check daily by gently pressing a seed—if it feels completely dry and brittle, it's ready for storage. This simple test saves you from storing seeds that might still contain moisture.
Pro Tips for Pansy Seed Pods
- Here's what nobody tells you about getting every last seed from those tricky pods.
- Timing Secret: The pods are ready when they've fully dried and turned brown, but don't wait too long—they'll eventual...
- Collection Technique: Use a small paper envelope or even a folded piece of paper to catch the seeds as you open the p...
Frequently asked questions
Got questions about harvesting those adorable pansy seed pods? You’re not alone! Here are the answers to the most common queries—because even the simplest tasks deserve a little clarity.
When do pansy seed pods pop open naturally?
Pansy seed pods typically pop open in late spring to early summer (May–June in most climates), once they’ve fully ripened and turned brown. Wait until the pods are dry and crispy—if they’re still green or moist, they won’t release seeds yet. Pro tip: Give them a gentle shake over a paper bag to test readiness!
What if my pansy seed pods won’t pop open?
If pods stay stubbornly closed, they might need a little help! Try these tricks:
- Sun-dry them: Place pods in a warm, sunny spot for 2–3 days to speed up drying.
- Freeze & thaw: Pop them in the freezer overnight, then thaw—this mimics nature’s moisture cycle.
- Hand-crack them: Use a butter knife to gently pry open stubborn pods (wear gloves—seeds can be itchy!).
Can I save pansy seeds from store-bought flowers?
Yes, but with a caveat: Store-bought pansies are often hybrids bred for vibrant colors or disease resistance. While you can save seeds, the resulting plants might not match the parent’s traits. For true-to-type seeds, grow from heirloom or open-pollinated varieties instead.
How long do pansy seeds stay viable?
Pansy seeds are short-lived—they lose viability quickly! Store them in a paper envelope (not plastic) in a cool, dry place (like your fridge’s crisper drawer). Under ideal conditions, they’ll stay good for 1–2 years. Pro tip: Label seeds with the date to avoid surprises!
What’s the best way to store harvested pansy seeds?
Once pods pop, separate seeds from chaff by wafting them onto a sheet of paper or sifting through a fine mesh. Store in a dry, airtight container (like a glass jar with a silica packet) in the fridge. Avoid humidity—moisture = mold!
| Storage Method | Lifespan |
|---|---|
| Paper envelope (room temp) | 6–12 months |
| Glass jar + silica (fridge) | 1–2 years |
Wrapping up and next steps
Saving pansy seed pods is a simple, rewarding way to embrace zero-waste gardening while nurturing next year’s blooms! 🌱 With just a few tools and a little patience, you can effortlessly collect seeds and reduce waste—all while supporting pollinators.
Whether you’re a seasoned gardener or just starting out, this natural technique makes seed-saving fun and easy.
Ready to try it? Grab your pods, follow the steps, and soon you’ll be sharing your homemade pansy seeds with fellow green thumbs—or even gifting them to neighbors! Happy gardening! 🌸