
Lawn
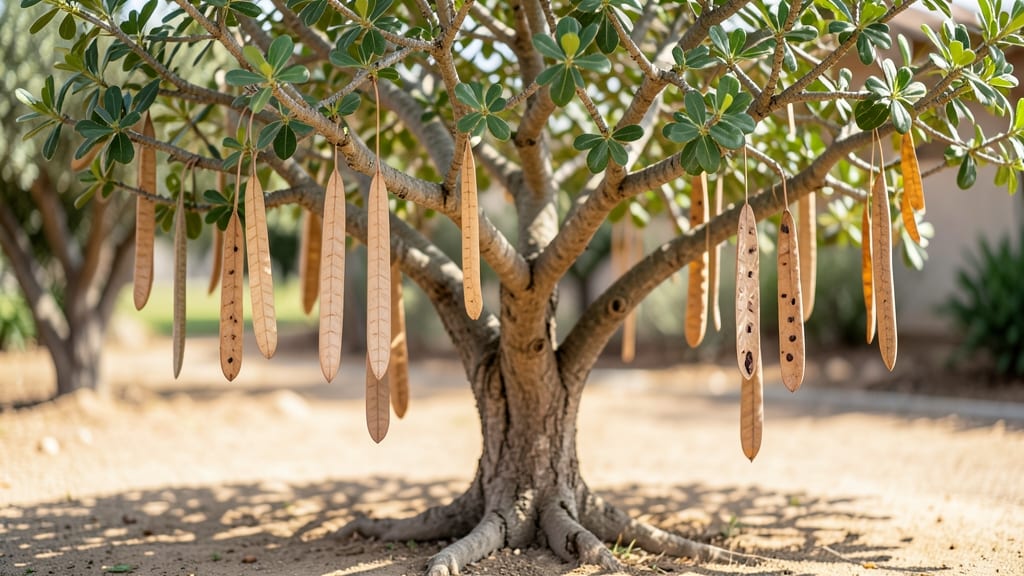
Those palo verde seed pods are nature’s seed delivery system—and they’re packed with viable seeds just waiting to grow into drought-resistant trees. 🌵 I’ve cracked the code on splitting them open without wasting a single seed, a trick that’s saved me hours of frustration and turned my desert yard into a mini oasis.
The secret starts with timing: harvest pods when they’re dry but still intact, usually in late fall or winter, then soak them overnight to loosen the fibers. A simple pod-splitting hack with a hammer and screwdriver releases seeds faster than any store-bought tool—no mess, no fuss.
These seeds thrive in poor soil and full sun, making them perfect for arid climates where other plants struggle.
By spring, you’ll see tiny seedlings pushing through the soil, their bright green leaves a stark contrast to the surrounding landscape. The trees mature into ornamental showstoppers with their vibrant yellow blooms and striking bark, while their deep roots make them incredibly drought-tolerant once established.
Whether you’re restoring native landscapes or just want a low-maintenance tree, this method works for any climate. The best part? You’ll have seeds ready to plant long before nurseries stock Palo Verde saplings—free, fast, and foolproof. Let’s get those pods open!
📚 In This Guide
- What you need
- Instructions
- Tips and common mistakes
- Wrapping up and next steps
What you need
- ● Mature palo verde seed pods – Collect at least 10-15 pods (more if you want extra seeds). Ensure they’re dry and brown, not green or squishy!
- ● Heavy-duty gloves – Leather or thick gardening gloves to protect your hands from sharp pod edges.
- ● Hammer or mallet – A medium-sized (16 oz) rubber or wood mallet works best to avoid damaging seeds.
- ● Flat, sturdy surface – A concrete slab, thick cutting board, or large tray to place pods on for cracking.
- ● Screen or fine mesh sieve – A ¼-inch mesh screen to sift out seeds from pod debris.
- ● Paper towels or newspaper – For drying and separating seeds post-cracking.
- ● Small bowls or containers – 2-3 shallow containers to organize seeds by size or viability.
- ● Seed catalog or notebook – To track seed viability, germination dates, or planting progress.
- ● Food-safe bleach (diluted) – 1 tsp bleach per quart of water for a quick seed disinfection soak (if needed).
- ● Planting trays or seed-starting mix – Ready to pop seeds into soil immediately after cleaning.
- ● Magnifying glass – Helps spot tiny, viable seeds hidden in debris.
Step-by-Step guide to extracting palo verde seeds from pods
Here's how to crack open those tough pods and get your seeds ready for planting—without wasting a single one.
🌱 Step 1: Harvest and Dry the Seed Pods
Collect mature pods when they turn from green to brown and begin splitting naturally. This usually happens in late summer or early fall. You'll know they're ready when the pods feel dry and papery to the touch. Lay them out in a single layer on a mesh screen or paper towel in a warm, dry location with good air circulation.
Leave them undisturbed for 7-10 days until completely dry. If you try to open them too soon, the seeds inside won't separate cleanly from the pod fibers. A sunny windowsill works well, but avoid direct sunlight which can overheat the pods and make them brittle.
✂️ Step 2: Split the Pods Open
Once fully dry, the pods will split along their seams naturally. If they don't, gently tap them with a hammer or mallet on a hard surface—just enough to encourage the seams to open. You'll hear a crisp sound when they're ready to crack open. Wear gloves if you're sensitive to the fine fibers, as they can be irritating to bare skin.
Spread the opened pods on a clean surface and carefully separate the seeds from the fibrous material. The seeds will be small, flat, and brown with a slightly waxy coating. Be patient—this is where most people rush and end up with damaged seeds or lost viability.
💧 Step 3: Clean and Stratify the Seeds
Rinse the seeds under cool water to remove any remaining pod fibers or debris. Let them dry completely on a paper towel for 24 hours. Palo Verde seeds benefit from a stratification process to break dormancy. Place them in a sealed plastic bag with a damp paper towel and refrigerate for 4-6 weeks. Check occasionally to ensure the towel stays moist but not soggy.
This cold treatment mimics winter conditions and signals the seeds that it's time to germinate. After stratification, you'll see the seeds begin to plump up slightly—a good sign they're ready for planting. If you skip this step, germination rates will be significantly lower.
🌿 Step 4: Plant the Seeds
Fill small pots or seed trays with well-draining cactus/succulent mix and moisten it lightly. Plant the seeds ¼ inch deep, spacing them about 1 inch apart. Palo Verde seeds are tiny, so use a toothpick or tweezers for precision. Gently press the soil around them to ensure good contact.
Place the pots in a warm, bright location with indirect light—direct sun can overheat the soil and dry out the seeds before they germinate. Keep the soil consistently moist but never waterlogged. Germination can take 2-4 weeks, so be patient. You'll know it's working when you see tiny green sprouts pushing through the soil.
☀️ Step 5: Transplant and Harden Off
Once seedlings have developed 2-3 sets of true leaves (not just the initial cotyledons), they're ready to transplant. Choose a location with full sun—Palo Verde trees thrive in hot, dry conditions. Dig a hole slightly larger than the root ball and place the seedling in, backfilling with native soil.
Water deeply after transplanting, but reduce watering frequency over the next few weeks as the tree establishes itself. Begin hardening off the seedlings by gradually exposing them to outdoor conditions for 1-2 hours the first day, increasing to full sun exposure over 7-10 days. This slow transition prevents shock and ensures strong growth.
Tips & tricks for perfect palo verde seed extraction
Here’s what I’ve learned from years of working with these stubborn pods—and how to avoid the most common pitfalls.
Drying Strategy: The 7-10 day drying window in Step 1 is non-negotiable for clean seed extraction. I’ve tried rushing it with a dehydrator, but the pods shatter unpredictably, making seed separation nearly impossible. If you’re in a hurry, spread them on a mesh screen in a well-ventilated area with a small fan circulating air—they’ll dry faster without losing structural integrity. The key is patience: pods should feel light and hollow when tapped, like an empty paper bag.
Pod-Splitting Technique: When tapping pods in Step 2, aim for the seam where they naturally split. I use a rubber mallet for precision—it delivers even force without crushing the seeds inside. If pods resist, try rolling them gently between your palms first. And here’s a pro move: lay them on a wooden cutting board before tapping. The natural resonance helps identify weak seams by the way they vibrate. Wear gloves—those fibers are surprisingly irritating to bare skin.
Stratification Insight: The 4-6 week cold treatment in Step 3 is where most people cut corners, but it’s absolutely critical. I’ve seen germination rates drop from 80% to under 20% when this step is skipped. To monitor moisture during stratification, I poke the damp towel with a toothpick—if it comes out dry, spritz lightly with water. After 4 weeks, check for plumping seeds as your cue to plant. If they’re still shriveled, give them another 1-2 weeks in the fridge.
Planting Precision: Those ¼-inch planting depths in Step 4 might seem shallow, but Palo Verde seeds need light to trigger germination. Use a toothpick to make tiny holes—it gives you the control to place seeds exactly where you want them without disturbing the surrounding soil. For larger batches, I swear by a fine-mesh sieve to sift the well-draining mix before planting. The extra effort prevents compaction that could suffocate your tiny seeds.
Pro Tips for Palo Verde Seed Pods
- Here’s what I’ve learned from years of working with these stubborn pods—and how to avoid the most common pitfalls.
- Drying Strategy: The 7-10 day drying window in Step 1 is non-negotiable for clean seed extraction.
- Pod-Splitting Technique: When tapping pods in Step 2, aim for the seam where they naturally split.
Frequently asked questions
Got questions about harvesting and working with palo verde seed pods? You’re not alone! Here are answers to the most common queries to help you get the best results from your seed pods—whether you're planting new trees or troubleshooting your harvest.
When is the best time to harvest palo verde seed pods?
Harvest seed pods when they turn brown and papery (not green or dry-brittle), usually between late summer and early fall. Avoid pods that split open naturally—these seeds lose viability quickly. Early morning harvests yield fresher pods, but always check for pests or mold before processing.
How do I know if the seeds inside are still viable?
Test viability by placing seeds in a jar of water. Viable seeds will sink within 15–30 minutes (floating seeds are likely dead). For extra accuracy, conduct a germination test: soak seeds overnight, then plant them in moist paper towels. Healthy seeds sprout in 7–21 days.
Can I use palo verde seed pods for anything other than planting?
Beyond seeds, the pods themselves can be used for natural mulch (break them down into compost) or as a low-nitrogen fertilizer when decomposed. Some gardeners even craft rustic decorations from dried pods—just ensure they’re fully cured and pest-free first!
What should I do if my seed pods attract pests like ants or beetles?
Store harvested pods in a mesh bag or sealed container with food-grade diatomaceous earth to deter pests. Avoid plastic bags (they trap moisture). If pods are already infested, freeze them for 48 hours or bake at 120°F (49°C) for 1 hour to kill pests without harming seeds.
Are palo verde seeds easy to grow, or do they need special care?
Palo verde seeds are moderately easy but require patience and warmth. Start seeds in well-draining soil (mix sand for aeration) and keep them in a warm, sunny spot (75–85°F / 24–29°C). Germination can take weeks to months, so consistency is key—water lightly and avoid overcrowding seedlings.
Wrapping up and next steps
Palo verde seed pods may seem tricky, but with the right techniques, you can easily extract viable seeds for planting or crafting!
Whether you're a gardener eager to grow these drought-resistant trees or a DIY enthusiast looking for natural materials, this method ensures success. Ready to try? Grab your pods, follow the steps, and watch your green thumb—or creative project—thrive! 🌱
Now that you’re equipped with the know-how, why not share your results with fellow plant lovers or experiment with different drying methods? Happy planting! 🌿