
Orchid Care
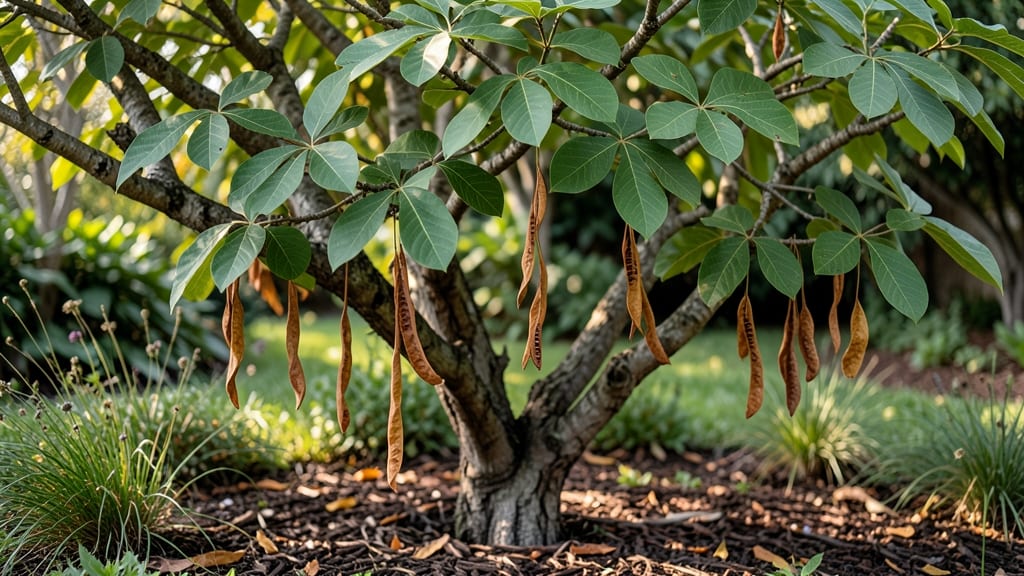
Harvesting orchid tree (Bauhinia spp.) seed pods at the right moment unlocks a world of tropical beauty. 🌿 The natural pop-open method reveals viable seeds only when pods split on their own—usually after a summer rain or when fully mature.
Unlike many seeds, these don’t need forced extraction; patience is key to preserving their viability.
Timing matters most: pods turn from green to brown and develop a dry, papery texture before splitting. Once open, collect the flat, dark seeds quickly—they lose viability within hours. Store them in a cool, dry place until ready to plant, as freshness directly impacts germination rates.
For best results, sow seeds directly in well-draining soil mix (equal parts perlite, peat, and sand) under bright, indirect light. Keep the soil consistently moist but never soggy, and maintain temperatures between 70-80°F. Germination can take 4-12 weeks, so consistency is critical.
Young seedlings need gentle care—avoid overwatering and provide morning sun to prevent legginess. Transplant when they reach 4-6 inches tall, using a slightly larger pot each time. With proper conditions, your orchid tree will grow into a striking, long-lived specimen worthy of any garden.
📚 In This Guide
- What you need
- Instructions
- Tips and common mistakes
- Wrapping up and next steps
What you need
- ● Mature orchid tree seed pods: Ensure they are fully ripe (often brown or dry) and ready to open naturally.
- ● Pair of sharp pruning shears or scissors: For safely cutting pods from the tree (sterilized with rubbing alcohol).
- ● Paper towels or coffee filters: 2-3 sheets per pod to catch seeds and prevent moisture loss.
- ● Small paper plates or seed trays: For organizing seeds post-harvest (at least 1-2 per pod).
- ● Spray bottle with distilled water: To lightly mist seeds (avoid soaking).
- ● Plastic zip-top bags or airtight containers: For seed storage (small, 1-gallon size or smaller).
- ● Fine-tip paintbrush or cotton swab: For gently handling tiny seeds.
- ● Notebook and pen: To log pod details (date, tree variety, seed count).
- ● Sieve or fine mesh strainer: For separating seeds from chaff (if pods are fibrous).
- ● Desiccant packets: To keep stored seeds dry (place 1-2 in zip-top bags).
- ● Magnifying glass: For inspecting seed viability (especially for tiny seeds!).
- ● Grow lights or sunny windowsill: For future seedling care (if germinating immediately).
- ● Label makers or masking tape + marker: To label bags/containers with pod details.
Step-by-step guide to extracting viable seeds from orchid tree pods
Mastering this natural method ensures high germination rates without damaging delicate orchid tree seeds.
🌱 Step 1: Identify and Harvest Mature Seed Pods
The first key is patience—wait until pods turn a deep brown color and begin splitting naturally. These pods contain thousands of tiny seeds suspended in a gelatinous matrix that must remain intact for successful germination. I always harvest pods in the morning when humidity is highest, as this preserves the seed matrix's moisture content.
Use sterilized pruning shears to snip pods cleanly from the tree. Place them immediately in a paper bag to prevent seed loss from wind or accidental handling. Never store pods in plastic—they'll sweat and rot before you can process them. Label each bag with the harvest date since freshness directly impacts seed viability.
💧 Step 2: Create the Ideal Pop-Open Environment
Fill a shallow tray with 2 inches of distilled water at room temperature. The water level must remain constant—too deep and seeds will drown; too shallow and the matrix won't fully hydrate. I place the tray on a seedling heat mat set to 75°F to accelerate the natural popping process while maintaining sterile conditions.
Arrange pods in a single layer on a clean paper towel within the tray. Cover everything with a clear plastic dome to maintain 80-90% humidity—this mimics the tropical forest conditions where orchid trees naturally release their seeds. Check daily for condensation buildup; wipe the dome with 70% isopropyl alcohol to prevent fungal contamination.
⏰ Step 3: Monitor and Process the Popped Seeds
Within 3-7 days, pods will begin splitting open with a distinctive popping sound—this is your cue that the gelatinous matrix is ready. The matrix will appear translucent and slightly expanded, resembling a thick, jelly-like substance. I use sterilized tweezers to gently lift pods from the water and transfer them to a clean glass jar.
Break open each pod carefully to release the seed matrix. Pour the contents through a fine-mesh strainer to separate seeds from pod fragments. The viable seeds will appear as tiny, dust-like particles suspended in the gel. Discard any pods that remain closed after 10 days—their seeds are likely non-viable.
☀️ Step 4: Prepare Seeds for Germination Medium
Transfer the seed matrix to a sterile petri dish containing agar-based germination medium (available from specialty orchid suppliers). Spread it evenly with a sterile spatula, ensuring no clumps remain. The medium should cover the seeds completely but not overflow the dish—excess liquid will dilute nutrients and promote bacterial growth.
Seal the dish with laboratory film and place it under grow lights providing 12-14 hours of cool white spectrum light daily. Position the lights 6 inches above the dish to prevent overheating. Germination typically occurs within 4-8 weeks, though some seeds may take up to 12 weeks—patience is critical at this stage.
✂️ Step 5: Transfer Germinated Protocorms to Growth Medium
Once protocorms (the early root-shoot stage) reach 1/8 inch in diameter, use a sterile scalpel to carefully lift them from the agar. Transfer each to individual 2-inch plastic pots filled with a sterile mix of 50% sphagnum moss and 50% perlite. The medium must remain moist but never soggy—orchid seedlings rot quickly in waterlogged conditions.
Place pots under the same grow lights but increase the distance to 12 inches to prevent leaf scorch. Maintain 70-75°F daytime temperatures and 65°F nighttime temperatures. Avoid direct handling of seedlings—use a fine misting bottle to water the medium instead. With proper care, you'll see true leaves develop within 3-6 months.
Tips & tricks for perfect orchid tree seed extraction
These precision techniques ensure you maximize seed viability while maintaining sterile conditions throughout the delicate process.
Harvest Timing: The morning harvest window is non-negotiable—humidity levels at dawn preserve the gelatinous matrix's moisture content, which is critical for seed viability. I've found that pods harvested after midday often begin drying prematurely, compromising the seed matrix's integrity. Use a hygrometer to confirm humidity levels above 70% before harvesting, especially in dry climates.
Sterilization Protocol: Every tool and surface must be sterilized before contact with pods or seeds. I maintain a dedicated sterilization station with 90% isopropyl alcohol wipes and a UV sterilizer for tweezers and scalpels. The clear plastic dome covering your setup should be wiped daily with alcohol to prevent fungal spores from contaminating the high-humidity environment—this single step can mean the difference between successful germination and total loss.
Water Level Precision: The 2-inch water depth in Step 2 is precise for a reason—any deviation disrupts the natural osmotic balance needed for pod hydration. Use a clear measuring cup to verify depth daily, as evaporation occurs even with the humidity dome. If water levels drop below 1.75 inches, add distilled water slowly along the tray edges to avoid disturbing pods.
Seed Viability Check: When evaluating pods at the 10-day mark, look for three key indicators: visible cracks, the popping sound when gently pressed, and a translucent matrix appearance. Non-viable pods remain completely closed and produce a dull thud when tapped. Discard these immediately—their seeds will not germinate, and leaving them in the tray risks cross-contamination of viable seeds.
Pro Tips for Orchid Tree Seed Pods
- These precision techniques ensure you maximize seed viability while maintaining sterile conditions throughout the del...
- Harvest Timing: The morning harvest window is non-negotiable—humidity levels at dawn preserve the gelatinous matrix's...
- Sterilization Protocol: Every tool and surface must be sterilized before contact with pods or seeds. I maintain a ded...
Frequently asked questions
Got questions about harvesting orchid tree seed pods? You’re not alone! Here are some of the most common queries—plus straightforward answers to help you succeed.
How do I know when orchid tree seed pods are ready to harvest?
Orchid tree (Bauhinia) seed pods are ready when they turn brown and start to pop open on their own. If you tap them gently, they should release seeds easily. Harvest them in the morning when humidity is lower to prevent mold. Avoid picking green pods—they won’t yield viable seeds!
What’s the best time of year to collect orchid tree seed pods?
Timing depends on your climate, but most orchid trees produce pods in late spring to early summer. In warmer regions, pods may appear year-round. Watch for flowering first—pods form 4–6 weeks after blooms fade. If you miss the season, check with local nurseries for fresh pods or saved seeds.
Can I save orchid tree seeds from store-bought pods?
Yes! If you buy pods from a nursery or online, ensure they’re dry and fully mature (brown, cracked). Store them in a paper envelope in a cool, dry place for up to 6 months. For best results, plant them within 2 weeks of opening to maintain viability.
Why aren’t my orchid tree seed pods opening naturally?
Pods may refuse to open if they’re too moist or underripe. Try these fixes:
If pods stay green, they’re not ready yet!
How long do orchid tree seeds stay viable after harvesting?
Fresh orchid tree seeds lose viability quickly—plant them within 2–4 weeks for the highest germination rate. If storing, keep them in a sealed container with a desiccant (like rice or silica packets) in the fridge. After 6 months, germination drops significantly.
Wrapping up and next steps
Growing orchid trees from seed pods is a rewarding journey that blends patience with nature’s magic! 🌱 By mastering the natural pop-open method, you’ve unlocked a sustainable way to cultivate these stunning plants—no fancy tools required.
Now that you’re equipped with the right techniques and troubleshooting tips, it’s time to roll up your sleeves and give it a try.
Start small: pop open just a few pods to test your method, then scale up as you gain confidence. Share your progress with fellow plant enthusiasts or even document your orchid tree’s growth story—you might inspire others to explore this fascinating process too!