
Size
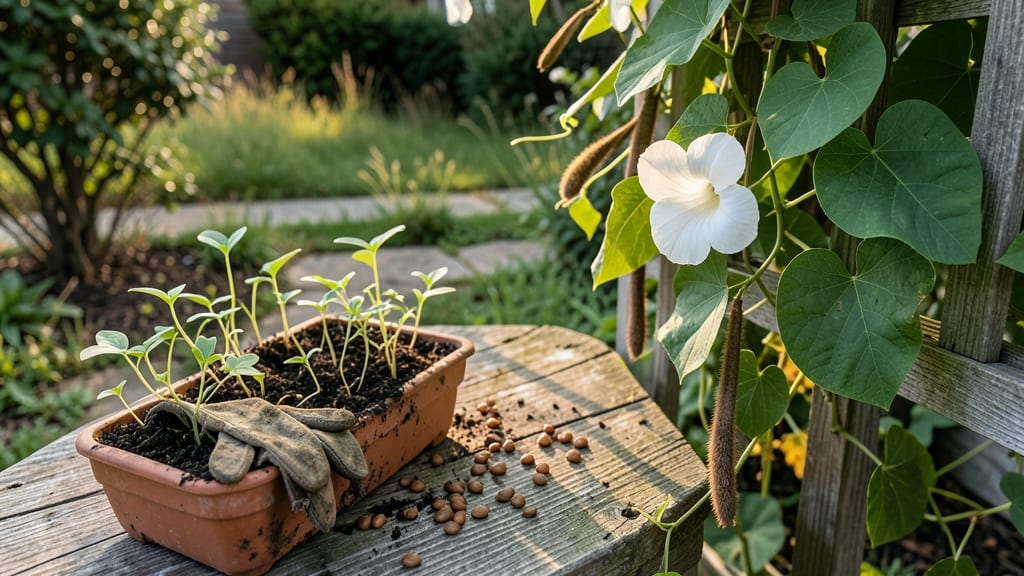
Growing moonflowers from seed feels like unlocking a magical nighttime garden. 🌙 Their dramatic, lantern-like blooms unfold at dusk, revealing delicate white petals that last just one evening—but the experience is unforgettable.
The secret starts with those fascinating seed pods that pop open on their own, scattering seeds without any help from you.
Moonflowers thrive in warm climates and need full sun to bloom reliably. Plant seeds directly in the garden after your last frost date, about ½ inch deep in well-draining soil.
They germinate quickly in warm conditions, often within 7-14 days, so keep the soil consistently moist but not soggy during their early growth phase.
Once established, these vining plants grow aggressively—up to 10 feet in a single season—so give them plenty of space or provide a trellis. The real magic happens at night when the blooms open, revealing their sweet fragrance that attracts moths and hummingbirds.
With minimal care, you'll enjoy these ephemeral flowers from late summer through early fall.
The biggest challenge is their short bloom time, but the trade-off is worth it. If you want more flowers, deadhead spent blooms in the morning before they close.
These plants are also sensitive to frost, so plan to harvest seeds before the first cold snap if you want to save them for next year.
📚 In This Guide
- What you need
- Instructions
- Tips and common mistakes
- Wrapping up and next steps
What you need
- ● Moonflower seeds – 10–20 seeds (or more, if you’re dreaming big! 🌙). Choose Ipomoea alba for classic white blooms or Ipomoea violacea for lavender varieties.
- ● Growing containers – 5–10-inch pots (1–2 per seedling) with drainage holes, or a well-draining garden bed (6+ inches deep).
- ● Potting mix – 2–3 bags of high-quality, well-draining soil (like a mix of peat moss, perlite, and compost—think fluffy, not muddy!).
- ● Watering can or spray bottle – For gentle hydration (no drowning the seeds!).
- ○ Support structures (optional but fun!) – Trellises, stakes, or fences (4–6 feet tall) for climbing vines. Bamboo or metal works great!
- ● Fertilizer (light touch!) – A balanced, low-nitrogen fertilizer (5-10-5 ratio) or compost tea. Pro tip: Too much nitrogen = leafy monsters, fewer flowers! 🌿
- ● Seed-starting trays – For germinating indoors before transplanting (especially in cooler climates).
- ● Grow lights – If starting seeds early (12–16 hours of light/day).
- ● Mulch – Straw or shredded leaves to retain moisture and suppress weeds.
- ● Gloves – For handling prickly vines (though moonflowers are generally gentle!).
- ● Moonflower companion plants – Marigolds or nasturtiums to deter pests naturally.
Step-by-Step instructions for growing moonflowers from seed
Watch as these night-blooming beauties unfurl their giant, moon-shaped flowers—here's how to grow them from scratch.
🌱 Step 1: Start Seeds Indoors 8-10 Weeks Before Last Frost
Moonflower seeds need warmth to germinate, so I begin them indoors under grow lights. Fill small seed-starting trays with the seed-starting mix (not garden soil) and moisten it until damp but not soggy. Press the mix down gently to create a firm, even surface—this helps tiny roots establish contact.
Plant 2-3 seeds per cell just beneath the soil surface, about ¼ inch deep. The key here is keeping the soil consistently warm—place the trays on a seedling heat mat set to 75-80°F. Without this warmth, germination can take weeks instead of days. Cover the trays with plastic wrap to retain moisture, then place them in a bright, 65-70°F room.
Check daily for sprouts, which should appear in 7-14 days. Once they do, remove the plastic wrap immediately to prevent fungal growth. You'll know it's time when the first tiny green leaves (cotyledons) push through the soil.
☀️ Step 2: Provide Bright Light and Prevent Legginess
Moonflower seedlings grow fast but need 14-16 hours of light daily to stay strong. A south-facing window won't cut it—these plants stretch toward any available light, becoming weak and spindly. I use a full-spectrum LED grow light mounted 2-3 inches above the seedlings, adjusting the height as they grow.
Leggy seedlings (long, thin stems with widely spaced leaves) signal insufficient light. If you see this, move the light closer or extend photoperiod with a timer. Healthy seedlings have thick stems, dark green leaves, and compact spacing between nodes. Rotate the trays daily so plants grow straight rather than leaning toward the light.
Water gently from the bottom by placing trays in 1 inch of water for 10 minutes. This prevents soil crusting and keeps roots healthy. Let the top inch of soil dry between waterings—overwatering is the fastest way to kill young moonflowers.
🪴 Step 3: Harden Off and Transplant After Frost
Two weeks before your last frost date, begin hardening off seedlings by moving them outdoors to a shaded, sheltered spot for 1-2 hours the first day. Gradually increase their outdoor time by 1 hour daily, eventually leaving them out overnight when temperatures stay above 55°F. This slow acclimation prevents transplant shock.
Choose a sunny location with well-draining soil—moonflowers hate soggy roots. Dig holes twice as wide as the root ball but no deeper. Space plants 3-4 feet apart to give their sprawling vines room to climb. Water deeply before and after transplanting to settle the soil and reduce stress.
After planting, mulch with 2-3 inches of organic mulch to retain moisture and suppress weeds. Moonflowers are tender perennials in warm climates but often treated as annuals in cooler zones. If you live in USDA zones 9-11, they may return the following year.
✂️ Step 4: Train Vines and Encourage Climbing
Moonflowers grow 10-15 feet tall in a single season, so provide sturdy trellises, fences, or arbors for support. I use powder-coated metal trellises because they last years and won’t rot. Gently weave the main vine through the trellis as it grows—don’t force it, or you’ll snap tender stems.
Prune leggy side shoots to encourage upward growth. Remove any flowers that appear before mid-summer—this redirects energy into stronger vines. You’ll know you’re doing it right when new leaves emerge lush and dark green along the main stem.
Deadhead spent blooms in the morning to keep the plant focused on producing more flowers. Moonflowers are self-cleaning (their pods twist open naturally), but removing faded blooms extends the flowering season. Water 1 inch per week during dry spells, keeping soil consistently moist but never waterlogged.
Tips & tricks for growing moonflowers from seed
Here's what nobody tells you about growing these magical night-bloomers from scratch.
Warmth is Everything: Those 75-80°F soil temperatures in Step 1 are non-negotiable for germination. I've seen seeds take 3 weeks to sprout when soil stayed below 70°F—patience wears thin fast! Use a seedling heat mat if your home stays cool, and avoid placing trays on cold windowsills. The plastic wrap helps trap warmth too, so don't rush to remove it before sprouts appear.
Lighting Strategy: The 14-16 hours of light in Step 2 is your secret weapon against leggy seedlings. I set my grow light timer for 6 AM to 8 PM to match natural daylight. If you notice seedlings stretching toward the light, lower the light 1-2 inches closer—they'll grow toward it again, signaling you need to adjust. A south-facing window won't provide enough intensity, so supplement with artificial light if natural light falls short.
Transplanting Made Easy: When hardening off in Step 3, start with just 1-2 hours in shade to avoid shocking tender seedlings. I place mine under a patio cover where they get dappled sunlight. Gradually increase exposure over 7-10 days—this slow transition prevents sunburn and stress. For transplanting, dig holes twice as wide as the root ball to encourage root spread, but never deeper to avoid burying the stem.
Climbing Support: Your trellis choice matters more than you think. I've learned the hard way that flimsy wooden stakes bend under 10-15 foot vines. Metal trellises or sturdy wooden posts with cross-bracing work best. Start training vines early—gently loop the main stem through the trellis as soon as it's 12 inches tall. This prevents tangled messes later when vines get heavy with blooms.
Pro Tips for Moonflower Seed Grow A Garden
- Here's what nobody tells you about growing these magical night-bloomers from scratch.
- Warmth is Everything: Those 75-80°F soil temperatures in Step 1 are non-negotiable for germination.
- Lighting Strategy: The 14-16 hours of light in Step 2 is your secret weapon against leggy seedlings.
Frequently asked questions
Got questions about growing moonflowers from seed?
Here are answers to the most common ones—so you can enjoy those magical blooms with ease!
How long does it take for moonflower seeds to germinate?
Moonflower seeds typically sprout within 7–14 days when planted in warm soil (70–80°F). Keep them moist but not soggy, and place them in a sunny spot. If germination takes longer, check for proper moisture and warmth—patience is key!
When is the best time to plant moonflower seeds?
Plant moonflower seeds after the last frost when soil is warm (around late spring or early summer). They thrive in heat, so avoid planting too early—they won’t sprout in cold soil. For a longer bloom season, consider a second planting in early summer!
Can moonflower seeds be grown indoors before transplanting?
Yes! Start seeds indoors 4–6 weeks before the last frost in small pots with well-draining soil. Keep them in a sunny window or under grow lights until soil warms up. Harden off seedlings for a week before transplanting to avoid shock. Just remember—moonflowers love heat, so don’t rush it!
Why aren’t my moonflower pods opening to release seeds?
Moonflower pods open naturally when dry, but if they stay closed, check for excess moisture or lack of sunlight. Once dry, gently tap the pods to release seeds—or let nature take its course! If pods rot, ensure good airflow and avoid overwatering. Patience pays off!
Are there any alternatives to moonflowers for fast-growing vines?
If moonflowers aren’t your style, try morning glories (bloom in 6–8 weeks) or cup-and-saucer vine (fast-growing and drought-tolerant). Both are easy to grow from seed and offer stunning blooms. Just like moonflowers, they love heat and sunny spots!
Wrapping up and next steps
Growing moonflower seeds is a rewarding and low-maintenance way to add whimsy and charm to your garden—without the fuss of tangled vines! 🌙 These self-opening pods make harvesting seeds effortless, and their fast growth (just 60-90 days!) delivers quick, dreamy blooms.
Whether you’re a beginner or a seasoned gardener, moonflowers bring joy with minimal effort.
Ready to transform your space? Start small—plant a few seeds in a sunny spot, and watch your garden magically come alive. Next, explore companion plants like nasturtiums or morning glories to create an even more enchanting pollinator paradise! 🌸