
Lawn
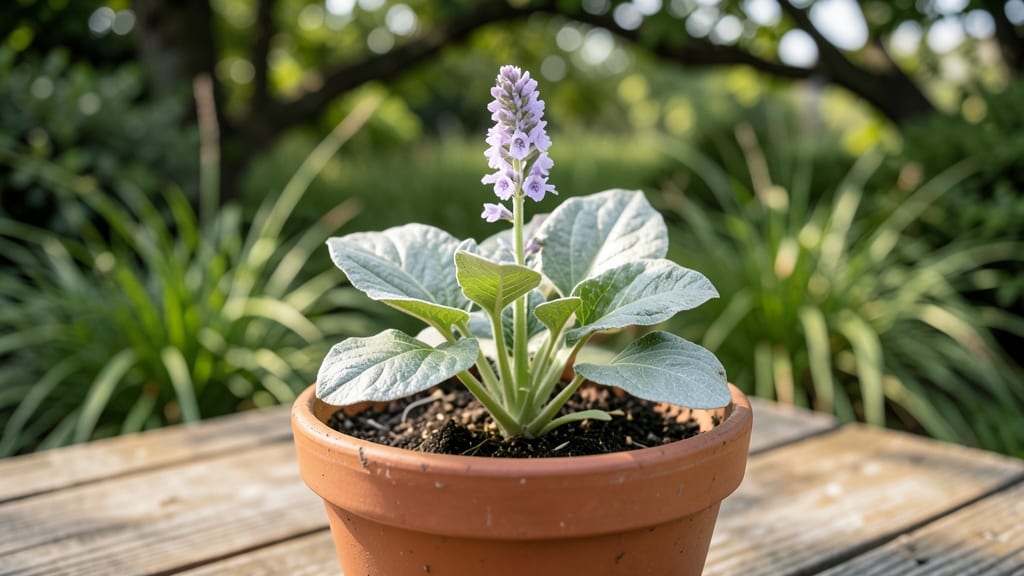
Growing Lunaria seed pods transforms your garden into a whimsical silver treasure chest. 🌿 These translucent "moonflower" pods are easier to harvest than you think—no more wrestling with stubborn stems or waiting for perfect timing.
The key is patience and knowing exactly when to snip them for that signature silvery sheen.
Start with seeds in early spring or late summer for two-season blooms. Lunaria thrives in partial shade, making it perfect for under trees or along fences where other plants struggle.
The papery pods develop after flowers fade, revealing their moon-like beauty once dried—no special equipment needed, just a pair of scissors and a little space.
By late summer, you'll have clusters of delicate pods ready for crafts or dried arrangements. They last for years, adding texture to winter wreaths or framed displays. The best part? Each pod contains tiny black seeds that can sprout new plants—nature's built-in recycling system.
For continuous harvests, deadhead spent flowers to encourage more blooms. Lunaria's self-seeding habit means fewer replanting chores. Whether you're a beginner or seasoned gardener, these pods bring unexpected elegance to any space with minimal effort.
📚 In This Guide
- What you need
- Instructions
- Tips and common mistakes
- Wrapping up and next steps
What you need
- ● Lunaria seeds – 1 packet (50-100 seeds), organic or heirloom for best results.
- ● Well-draining potting mix – 1 bag (10-15 lbs), or a blend of 60% garden soil + 40% perlite/sand.
- ● Containers or garden bed – Either: 5-6 biodegradable pots (3-4” diameter) for transplanting, or
- ● A raised bed or in-ground plot (12” deep, 2-3 ft wide).
- ● Watering can or hose with gentle spray – For consistent moisture without overwatering.
- ● Plant labels – To track varieties (e.g., ‘Silver Moon’ vs. ‘Alba’).
- ○ Gloves (optional but recommended) – To protect hands from soil and seed debris.
- ● Trowel or small hand shovel – For digging soil and planting seeds.
- ● Sunlight access – Full sun (6+ hours/day) or partial shade (4-6 hours).
- ○ pH test kit (optional) – Ideal soil pH: 6.0–7.0. Adjust with lime or sulfur if needed.
- ● Fertilizer (balanced 10-10-10 or compost) – Apply lightly at planting and mid-season.
- ● Pruning shears – For trimming dead foliage or shaping plants later.
- ● Patience! 🌙 – Lunaria takes 90–120 days to mature—plan ahead for those stunning seed pods!
Step-by-Step instructions for harvesting Lunaria seed pods
Here’s how to collect those stunning moonflower seed pods without losing them to wind or pests.
🌱 Step 1: Identify and Wait for Full Maturity
Lunaria pods ripen in late summer to early fall, but they won’t release seeds until they’re fully dry and papery. Look for pods that have turned from green to a light tan or beige—this is your cue they’re ready. If you harvest too early, the pods won’t open naturally, and you’ll miss the moon-shaped seeds inside.
Gently tap a mature pod—if it rattles, that’s a good sign. Avoid harvesting in damp weather, as moisture can cause the pods to rot before they dry properly. I like to check them in the morning when dew has evaporated, so I can see their true color without mistaking dampness for maturity.
✂️ Step 2: Harvest Pods at the Right Time
Use clean, sharp pruning shears to snip the stems just above the first set of leaves. This prevents damage to the plant and encourages more blooms next season. Place the harvested pods in a dry, well-ventilated area—like a mesh bag or open cardboard box—where they can finish drying for another 1-2 weeks.
If you’re impatient, you can speed up drying by placing them in a warm, dry spot (like a sunny windowsill) but avoid direct sunlight, which can cause the pods to crack prematurely. Watch for the pods to feel light as a feather—when they do, they’re ready for seed collection.
🪴 Step 3: Collect Seeds Without the Struggle
Once the pods are completely dry, hold one firmly in your hand and give it a gentle twist. The pod should split open easily, revealing the shiny, silver moon-shaped seeds inside. If it resists, let it dry a little longer—overly green pods won’t release seeds cleanly.
Shake the seeds into a bowl or envelope, then store them in a cool, dark place until spring planting. Lunaria seeds stay viable for years, so you can save them for future gardens. I like to label the envelope with the year and variety to keep things organized.
☀️ Step 4: Preserve and Plant Next Season
For best results, sow seeds in early spring after the last frost. Scatter them lightly on top of well-draining soil—no need to bury them, as they require light to germinate. Keep the soil consistently moist until seedlings appear, which typically takes 2-4 weeks.
Lunaria thrives in full sun to partial shade and tolerates a range of soil types, making it a low-maintenance perennial. Once established, the plants will self-seed, adding more of those magical moon pods to your garden each year.
Tips & tricks for perfect moonflower seed pod harvesting
These game-changing strategies will help you collect those stunning moonflower seeds without losing them to wind or pests.
Timing Secret: Harvesting in the morning after dew has evaporated gives you the clearest view of pod maturity. The light tan or beige color is your golden cue—green pods won't release seeds cleanly. I've learned this the hard way after trying to harvest damp pods that ended up rotting in my hands. Morning light also reveals any early signs of pest damage you might want to avoid.
Drying Strategy: The 1-2 week drying period in Step 2 is non-negotiable for seed viability. I recommend using a mesh bag with small holes for airflow—this prevents moisture buildup while allowing the pods to dry evenly. Place it in a spot with indirect light (like a well-ventilated closet) to avoid the cracking risk from direct sunlight. If you're truly impatient, a warm spot like a sunny windowsill can cut drying time by half, but monitor closely.
Seed Collection Technique: When twisting open the pods in Step 3, use a gentle but firm motion—think of it like unscrewing a jar lid. If a pod resists, it's not ready yet. I've found that wearing gloves helps prevent tiny seeds from sticking to your hands. Once opened, give the pod a final shake over your collection container to catch any seeds that might cling to the walls.
Storage Wisdom: Lunaria seeds are remarkably resilient, staying viable for years when stored properly. After collecting, I like to place the seeds in small paper envelopes with a silica gel packet to absorb any remaining moisture. Label each envelope with the harvest year and variety—this has saved me from planting mystery seeds in past seasons. Store them in a cool, dark place like a seed vault or even your refrigerator's crisper drawer.
Pro Tips for Lunaria Seed Pods
- These game-changing strategies will help you collect those stunning moonflower seeds without losing them to wind or p...
- Timing Secret: Harvesting in the morning after dew has evaporated gives you the clearest view of pod maturity. The li...
- Drying Strategy: The 1-2 week drying period in Step 2 is non-negotiable for seed viability. I recommend using a mesh ...
Frequently asked questions
Got questions about those stunning lunaria seed pods? You’re not alone! Here are some of the most common queries—plus quick, no-fluff answers to keep your moonflower magic on track.
When do lunaria seed pods turn translucent?
Lunaria seed pods typically develop their iconic moon-like translucency in late summer to early fall—usually 8–12 weeks after flowering. If yours stay green or brown, they may need more sunlight (6+ hours/day) or a warmer spot. Patience is key—some varieties take longer!
Can I harvest lunaria seed pods too early?
Yes, but avoid it! Harvesting too soon (before the pods turn papery-thin) means the paper-like "windows" won’t form properly. Wait until the pods dry completely on the plant (they’ll rattle when shaken). Early harvests also risk shriveled or weak seeds inside.
What’s the best way to store dried lunaria seed pods?
Store them in a cool, dry place (like a paper bag or cardboard box) away from direct sunlight. Avoid plastic—it traps moisture and can cause mold. For extra longevity, add a silica gel packet to absorb humidity. Label them with the harvest year!
Can I replant lunaria seeds from old pods?
Lunaria seeds stay viable for 2–3 years if stored properly. Simply open the pod, remove the seeds, and plant them in well-draining soil. They germinate best in spring or fall when temps are mild (50–70°F). No need to rush—these seeds are patient!
Why are my lunaria pods cracking open before I harvest them?
Pods crack open naturally when fully dry, but humidity or rain can speed this up. To prevent premature opening:
- Harvest pods before they split (shake them—if seeds rattle, they’re ready).
- Use a breathable cloth bag to dry them indoors.
- Check for overcrowded plants—thin stems if needed to improve airflow.
Are there alternatives to lunaria for moon-like seed pods?
If lunaria isn’t your vibe, try these ornamental seed pod plants for similar drama:
- Honesty (Lunaria annua) – The classic!
- Love-in-a-Mist (Nigella) – Lacy, papery pods.
- Poppy (Papaver) – Silky, seed-filled pods.
- Celosia – Velvet-textured seed heads.
Wrapping up and next steps
Lunaria seed pods—those stunning, translucent moonflower ornaments—are a gardener’s dream, blending beauty with ease! Whether you’re drawn to their whimsical charm or their low-maintenance growth, these pods prove that harvesting can be as delightful as the flowers themselves. 🌙✨
Ready to transform your garden? Start by planting a few seeds this season and watch as your space fills with enchanting blooms—and soon, those magical pods! Share your harvest with fellow green thumbs or craft them into unique decor; the possibilities are endless.