
Lawn
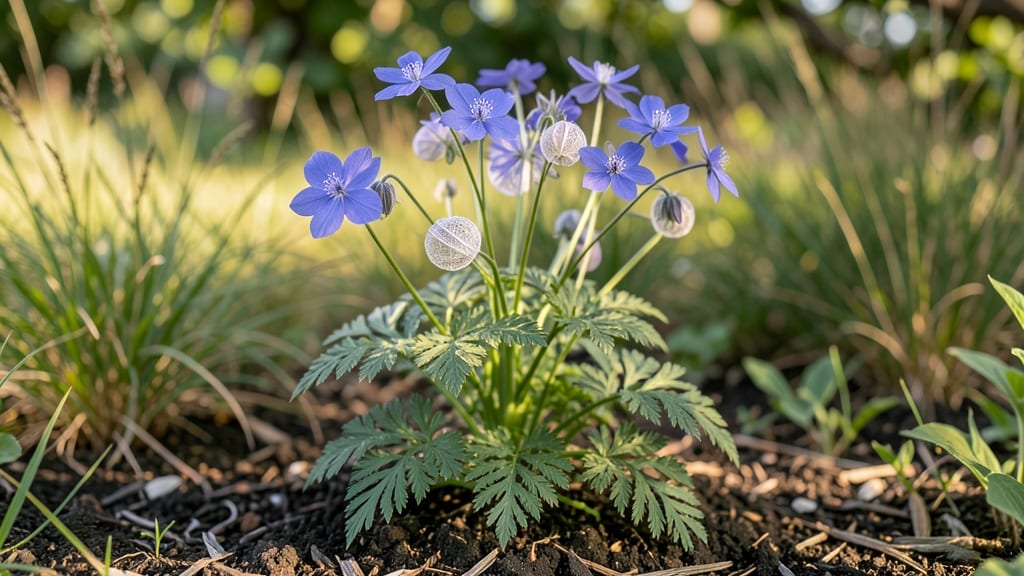
Love-in-a-mist seed pods twist open at the slightest breeze—until you know this trick. 🌿 The secret to collecting them lies in timing: harvest when the pods turn from green to papery brown but before they split. One wrong move, and those tiny seeds scatter like confetti.
You’ll need a pair of sharp scissors and a brown paper bag. Snip the stems cleanly, then lay pods on a mesh screen or newspaper in a dry, shaded spot. Within 7-10 days, they’ll dry completely—ready for storage or sowing. The key is patience; rushing leads to empty pods.
Once dry, rub the pods between your fingers to release seeds. Store them in an envelope labeled with the year—viability lasts 3-5 years if kept cool and dry. The payoff? Next spring, you’ll have delicate lace-like foliage blooming effortlessly. Common challenge: pods opening too soon.
Fix it by harvesting earlier or storing them in a sealed container. Now you’re ready for a garden full of these disease-resistant, self-seeding beauties.
📚 In This Guide
- What you need
- Instructions
- Tips and common mistakes
- Wrapping up and next steps
What you need
- ● Love in the Mist seeds (Nigella damascena) – 1 packet (~50-100 seeds, organic preferred).
- ● Biodegradable seed pods or mesh bags – 10-20 pods (3-4" diameter, breathable fabric or paper).
- ● Natural twine or jute string – 1 spool (¼" width, 50+ ft for securing pods).
- ● Compost or potting soil – 1 bag (sterilized, well-draining).
- ● Watering can or spray bottle – For gentle hydration.
- ● Pruning shears or scissors – For harvesting mature seed pods.
- ○ Gloves (optional) – To protect hands from prickly stems.
- ● Label tags & marker – For tracking seed varieties.
- ● Sunlight or grow lights – If starting indoors.
- ○ Mulch (optional) – Straw or shredded leaves to retain moisture.
How to use love in the mist seed pods for easy seed collection
Here’s my go-to method for collecting seeds from love-in-the-mist plants without the usual struggle.
🌱 Step 1: Identify Mature Seed Pods
Love-in-the-mist plants produce seed pods that turn from green to a papery brown when ready. Look for pods that feel dry and brittle—these are the ones to harvest. Gently twist the pod between your fingers; if it releases seeds easily, it’s ready. Avoid pods that are still green or soft—they won’t release seeds properly.
This is the moment that matters: harvest too early, and the seeds won’t fully mature. Too late, and the pods may split open on their own, scattering seeds everywhere. I like to check pods every 2-3 days during their drying phase to catch them at the perfect stage.
🪴 Step 2: Twist and Collect Seeds
Hold the pod firmly at its base and twist gently but firmly in a downward motion. The pod’s natural twist-resistant design means it won’t snap off easily—this is what makes these pods so convenient. As you twist, seeds will spill out into your hand or a small collection container.
Don’t rush this step. A slow, steady twist ensures you capture as many seeds as possible without damaging the plant. If a pod resists, it’s not fully dry yet—leave it on the plant for another day or two. I’ve found that collecting seeds in the morning, when the pods are dry from overnight, makes the process even smoother.
💧 Step 3: Dry and Store Seeds Properly
Spread the collected seeds on a clean, dry surface in a single layer. Let them dry for 24-48 hours in a warm, well-ventilated area, away from direct sunlight. This prevents moisture buildup, which can cause mold or rot. Stir the seeds occasionally to ensure even drying.
Once completely dry, transfer the seeds to a labeled envelope or small container. Store them in a cool, dark place—like a sealed jar in your pantry—to maintain viability for up to 2 years. I always label my seed packets with the date and plant variety to keep track of freshness.
⏰ Step 4: Prepare for Next Season’s Planting
When ready to plant, soak the dried seeds in warm water for 12-24 hours to soften their outer coating and speed up germination. This step is especially helpful if you’re planting in cooler months. After soaking, drain the water and plant the seeds ¼ inch deep in well-draining soil.
Keep the soil consistently moist but not soggy until germination, which typically occurs in 10-14 days. Love-in-the-mist plants thrive in partial shade to full sun, so choose a spot that gets at least 4-6 hours of sunlight daily. This natural twist-resistant design makes them easy to handle, but their care is just as simple once you know the basics.
Tips & tricks for perfect love in the mist seed collection
Here's what nobody tells you about making this process foolproof every time.
Timing Secret: The 2-3 day check interval in Step 1 is your best friend. I've found that pods mature fastest in warm, dry conditions—so if you're in a humid climate, check them daily. The key is catching that exact moment when pods feel brittle but still intact. If you miss it, you'll either have underripe seeds that won't germinate or scattered seeds all over your garden.
Twist Technique: When collecting seeds in Step 2, I recommend using a small bowl or plate to catch the seeds as they spill out. The natural twist-resistant design means you can actually use this method to collect seeds from multiple pods without damaging them. Just twist one pod at a time, collecting seeds in your container, then move to the next. This keeps everything organized and prevents seed loss.
Drying Strategy: For the 24-48 hour drying period in Step 3, I've had the best luck using a wire cooling rack placed over a baking sheet. This allows air to circulate on all sides of the seeds while keeping them contained. If you're in a particularly damp environment, you might need to extend the drying time slightly—just keep stirring occasionally to check for even dryness throughout.
Storage Wisdom: When storing your seeds for up to 2 years, I add a small packet of silica gel to my seed envelopes. This helps absorb any residual moisture that could compromise seed viability. I also store mine in the vegetable crisper drawer of my refrigerator, which provides the ideal cool, dark environment while keeping them separate from other produce that might release ethylene gas.
Pro Tips for Love In The Mist Seed Pods
- Here's what nobody tells you about making this process foolproof every time.
- Timing Secret: The 2-3 day check interval in Step 1 is your best friend. I've found that pods mature fastest in warm,...
- Twist Technique: When collecting seeds in Step 2, I recommend using a small bowl or plate to catch the seeds as they ...
Frequently asked questions
Got questions about Love in the Mist seed pods? You’re not alone!
Whether you’re a gardening newbie or a seasoned green thumb, these answers will help you navigate twist-resistant pods like a pro.
Why do Love in the Mist seed pods twist instead of opening normally?
Love in the Mist (Nigella damascena) pods twist as a natural mechanism to protect seeds from harsh weather and pests. This "twisting" is actually a defense strategy—once dry, the pods spiral to shield seeds until conditions are ideal for germination. No need to force them open! Just let nature take its course.
How long does it take for the pods to fully dry and twist?
Timing varies, but most pods twist within 4–6 weeks after flowering, especially in warm, dry conditions. If humidity is high, they may take longer. Pro tip: Harvest pods when they’re fully brown and crispy to the touch—this ensures maximum seed viability.
Can I still collect seeds if the pods don’t twist?
While twisting is classic, some pods may stay upright or split open naturally. Check for dryness first: If the pod snaps easily when bent, it’s ready. Gently squeeze or tap to release seeds—just avoid crushing them. No twisting? No problem!
What’s the best way to store Love in the Mist seeds?
Store seeds in a cool, dry place (like a paper envelope or airtight container) away from direct sunlight. Label them with the date! Seeds stay viable for 2–3 years under ideal conditions. Bonus: Freezing seeds extends their shelf life even longer.
Are twisted pods a sign of pests or disease?
Not usually! Twisting is normal, but if pods are mushy, discolored, or covered in holes, pests (like aphids) or fungal issues might be at play. Inspect leaves for signs of damage. Quick fix: Remove affected pods and treat with neem oil if needed.
Wrapping up and next steps
Love in the Mist seed pods offer a game-changing solution for gardeners tired of tangled vines and lost seeds! 🌱 Their twist-resistant design makes collecting seeds effortless, while their natural charm adds beauty to any garden. Whether you're a seasoned gardener or just starting out, these pods simplify the process—so you can focus on nurturing life, not wrestling with it.
Ready to elevate your seed-saving game? Start by planting a few Love in the Mist pods this season and experience the joy of stress-free seed collection. Happy gardening! 🌿