
Lawn
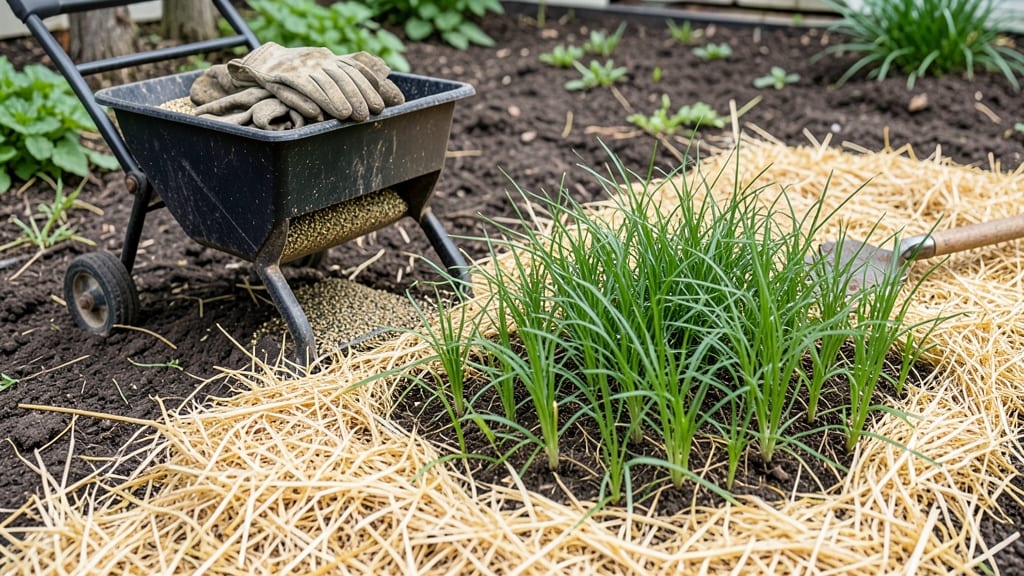
Your new lawn starts with a soil-moisture lock—that’s what lawn seed mulch delivers. 🌱 Without it, seeds dry out before sprouting, wasting your time and money.
I’ve seen bare patches turn into lush green in just 10 days thanks to this simple trick, especially in hot or windy climates where moisture evaporates fast.
The right mulch keeps soil cool, retains water, and blocks weeds—think straw, peat moss, or even shredded leaves spread thinly over seeds. Too much mulch suffocates them, so aim for ¼-inch thick (about the width of a dime).
In dry zones, reapply after watering; in humid areas, skip mulch if rain is frequent.
You’ll notice seedlings emerge 2-3 days sooner than without mulch, and they’ll stay vibrant longer. The key? Light application, consistent watering, and removing mulch once grass reaches 2-3 inches tall. It’s the difference between patchy results and a uniform, healthy lawn.
Works for cool-season grasses in fall or spring, and warm-season grasses in late spring. Just adjust timing to your climate—this method adapts everywhere. Ready to transform bare spots into thick turf?
📚 In This Guide
- What you need
- Instructions
- Tips and common mistakes
- Wrapping up and next steps
What you need
- ● Lawn seed: Choose a high-quality blend suited to your climate (e.g., 10-15 lbs per 1,000 sq ft for cool-season grasses or 8-12 lbs for warm-season varieties).
- ● Organic mulch: Straw: 10-20 lbs per 1,000 sq ft (avoid hay—it contains weed seeds!)
- ● Peat moss or coconut coir: 2-3 lbs per 1,000 sq ft (for moisture retention in sandy soils).
- ● Composted wood fibers: 1-2 lbs per 1,000 sq ft (great for structure).
- ○ Broadcast spreader: For even distribution of seed and mulch (optional but highly recommended).
- ● Rake: A plastic or metal garden rake with fine teeth to gently blend mulch into soil.
- ● Water source: Hose with a soft spray nozzle or a watering can for gentle hydration.
- ○ Lawn roller (optional but helpful): A lightweight (30-50 lb) roller to press seed/mulch mix into the soil.
- ● Seed starter fertilizer: A low-nitrogen (5-10-10) blend to kickstart growth (1-2 lbs per 1,000 sq ft).
- ● Soil test kit: To check pH and nutrient levels before seeding (ideal range: 6.0-7.5).
- ● Mulch mat or erosion control blanket: For sloped areas to prevent washout.
- ● Garden gloves: To protect your hands from straw or sharp mulch fibers.
Step-by-Step guide to applying lawn seed mulch for faster germination
Here’s how to create the perfect moisture-locking layer that speeds up seedling growth while protecting your investment.
🌱 Step 1: Prepare the Soil for Optimal Seed Contact
Start by tilling the soil to a depth of 2-3 inches to loosen compacted layers and create a fine, crumbly texture. This ensures seeds make direct contact with moisture-rich soil—critical for rapid germination. I like to use a rake afterward to smooth the surface and remove any debris that could block seed-to-soil contact.
Test the soil’s moisture by squeezing a handful—it should hold together but not drip water. If it’s too dry, water lightly until the top ½ inch feels damp. Too much moisture now leads to seed rot, but too little means your mulch won’t work as intended. Aim for that sweet spot where the soil feels like a wrung-out sponge.
💧 Step 2: Distribute Seed Evenly for Uniform Growth
Spread the lawn seed evenly using a broadcast spreader or by hand, following the recommended rate on the seed packet. I like to walk in a grid pattern to avoid missing spots or overcrowding. For a 4,000 sq ft lawn, this typically means using about 5-8 lbs of seed, depending on the grass type.
Lightly rake the seeds into the soil with a stiff-bristled rake, pressing them just enough to ensure good soil contact without burying them too deep. Most grass seeds germinate best when planted at a depth of ¼ inch or less. This step is where patience pays off—rushing here means uneven sprouting later.
☀️ Step 3: Apply Mulch to Lock in Moisture and Protect Seeds
Use straw mulch (not wood chips or hay, which can introduce weeds) and spread it evenly over the seeded area at a rate of ½ pound per 100 sq ft. The mulch should cover the seeds lightly—just enough to shield them from drying winds and bird predation, but not so thick that it smothers them.
Gently press the mulch down with a rake to ensure full contact with the soil. This creates a moisture barrier that keeps the soil consistently damp for 2-3 weeks, the critical period for germination. Water lightly after applying mulch to settle everything in place. You’ll see the difference immediately—the mulch will hold its shape without blowing away.
🌿 Step 4: Maintain Consistent Moisture for Germination
Water the lawn lightly but frequently—about ¼ inch per day—for the first 2-3 weeks to keep the mulch and soil evenly moist. Use a sprinkler with a fine mist setting to avoid displacing the mulch or seeds. The goal is to maintain a damp environment without creating puddles, which can suffocate seeds.
Check the soil moisture daily by lifting a corner of the mulch—it should feel damp but not soggy. If the top layer dries out, water immediately. Once you see 50% germination (usually within 10-14 days), you can reduce watering slightly but keep the area moist until the grass reaches 2-3 inches tall. This is where the mulch earns its keep—fewer watering sessions mean stronger, faster-growing seedlings.
⏰ Step 5: Monitor and Adjust for Optimal Conditions
Keep an eye out for uneven germination or bare patches—these often signal areas where mulch was too thin or seeds weren’t pressed into the soil well enough. If you spot dry spots, add a thin layer of mulch and water gently. Avoid walking on the lawn until the grass is at least 1 inch tall to prevent disturbing the young seedlings.
After 4-6 weeks, when the grass is 3-4 inches tall, you can remove the mulch by raking it up and composting it. The roots will be deep enough to handle regular watering and mowing. This is also the time to fertilize lightly if your soil test suggests it—strong seedlings grow best with a steady supply of nutrients now that they’re established.
Tips & tricks for perfect lawn seed mulching
Took me a while to figure these out, so here goes—tricks that'll make your seed mulching effortlessly effective.
Soil Preparation is Everything: In Step 1, don't just till—break up any remaining clumps with your rake until the soil resembles fine sand. This ensures seeds make direct contact with moisture, which is critical for that 2-3 inch depth we're aiming for. I've seen seeds fail to sprout simply because they were nestled in tiny soil pockets rather than making full contact. Think of it like creating a cozy blanket for your seeds where every fiber touches their skin.
Seed Depth Matters More Than You Think: When you're pressing seeds into the soil in Step 2, aim for that ¼ inch or less depth by gently dragging the rake teeth across the surface. Too deep and they'll struggle to break through; too shallow and they'll dry out. I like to use the tip of my finger as a guide—if the seeds are buried deeper than the first knuckle, you've gone too far. This tiny detail makes all the difference in germination rates.
Mulch Application Technique: For Step 3, spread the straw mulch with a light hand—you want it to look like you've dusted the seeds with a thin layer of insulation. The ½ pound per 100 sq ft recommendation isn't just a number; it's about creating that perfect balance where seeds get protection without suffocation. I've learned the hard way that thicker mulch can actually trap too much moisture, leading to rot rather than growth. Think "light as a feather" when applying.
Watering Strategy for Maximum Impact: In Step 4, that ¼ inch per day measurement is your golden rule, but here's the secret: water in the early morning. This gives the mulch time to absorb moisture before the heat of the day. I use a rain gauge to measure my watering—it's the only way to be precise about that ¼ inch. The goal is to keep the mulch damp to the touch, not soggy. You'll notice the difference in how quickly your seeds respond when you maintain this consistency.
Pro Tips for Lawn Seed Mulch
- Took me a while to figure these out, so here goes—tricks that'll make your seed mulching effortlessly effective.
- Soil Preparation is Everything: In Step 1, don't just till—break up any remaining clumps with your rake until the soi...
- Seed Depth Matters More Than You Think: When you're pressing seeds into the soil in Step 2, aim for that ¼ inch or le...
Frequently asked questions
Got questions about lawn seed mulch?
You’re not alone! Here are answers to the most common concerns—from timing to troubleshooting—so you can get your lawn off to the best start.
What’s the best time of year to apply lawn seed mulch?
The ideal window is early spring or fall when soil temps hover between 60–75°F. Avoid summer heat or winter frost—both can stress seeds. For cool-season grasses (like fescue or ryegrass), aim for late summer to early fall. Warm-season grasses (like Bermuda or zoysia) thrive with late spring mulching.
Can I use straw or leaves as mulch instead of store-bought?
Straw
(especially wheat or oat) is the gold standard—it’s lightweight, decomposes slowly, and insulates seeds perfectly. Leaves work too, but shred them first to avoid smothering. Skip disease-prone hay or leaves from treated lawns (like those sprayed with herbicides). Pro tip: Rake lightly after germination to prevent mold.
What if my mulch smells bad or molds after applying?
Bad smells or fuzzy mold mean too much moisture or old/decomposed mulch. Fix it by:
- Fluffing the mulch layer gently to improve airflow.
- Watering lightly (soil should stay damp, not soggy).
- Removing any moldy spots and replacing with fresh straw.
How long should I keep the mulch on my new lawn?
Leave it in place until seeds sprout and reach 2–3 inches tall (usually 3–6 weeks). After that, rake it out to avoid smothering young grass. For overseeding, you can lightly top-dress with mulch again if the soil dries out. Never let mulch pile up against plant stems—keep it even!
Will mulch prevent weeds from growing in my new lawn?
Mulch does suppress weeds by blocking sunlight, but it’s not foolproof. Weeds may still pop up in thin spots. To minimize them:- Use dense seed coverage (follow package rates).
- Apply a pre-emergent herbicide after germination (check local laws).
- Hand-pull weeds early before they seed.
Wrapping up and next steps
Using lawn seed mulch is a game-changer for achieving a lush, vibrant lawn with minimal effort!
By locking in moisture, protecting seeds from harsh elements, and promoting faster germination, you’ll enjoy a healthier grass cover in no time. 🌱 Whether you’re a seasoned gardener or just starting out, this simple technique makes lawn care a breeze.
Ready to transform your lawn? Gather your supplies, follow the steps, and watch your seeds sprout into a thriving carpet of green. Start small—try a patch first—and soon, your entire yard will thank you!