
Lawn
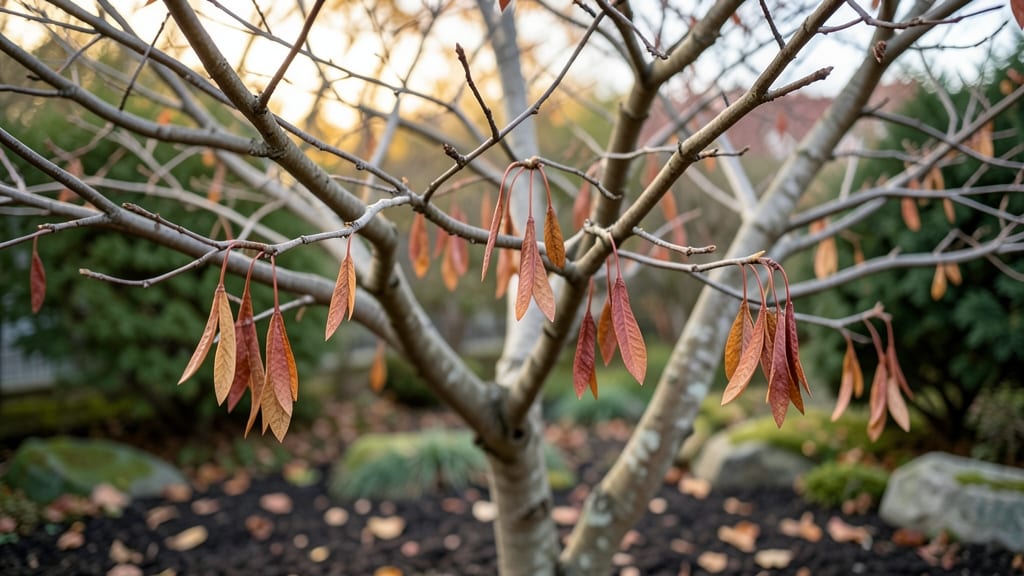
Japanese maple seed pods twist open like nature’s secret package, revealing tiny wings that carry the promise of new trees. 🌿 I’ve collected hundreds of these delicate pods over the years, and each one holds the potential for a stunning maple—if you know when and how to handle them right.
The key? Timing your harvest just as the pods begin to split, before the seeds scatter or birds snack on them.
You’ll need a few simple tools: sharp pruning shears for collecting pods, a paper bag for drying seeds, and a well-draining mix of peat moss and perlite for starting them.
The real magic happens in late fall or early winter, when pods are fully mature but haven’t released their seeds yet. Once you’ve extracted the seeds, store them in the fridge for 3 months to break dormancy—this mimics winter’s natural chill period and boosts germination rates.
Germination takes patience, but the results are worth it. Plant seeds in spring just below the soil surface, keep them moist but not soggy, and expect sprouts in 4-6 weeks.
Unlike cuttings, seed-grown maples won’t match the parent tree’s exact traits—colors might shift, growth habits vary—but they develop stronger root systems and adaptability. For faster, more predictable results, consider layering cuttings instead.
Common challenges include moldy seeds or slow germination, often from overwatering or poor soil drainage. If you’re impatient, layering semi-hardwood cuttings in late summer gives you identical trees in just 2-3 months.
Either way, you’ll end up with maples that bring that coveted Japanese flair to your landscape—just with a little more hands-on involvement.
📚 In This Guide
- What you need
- Instructions
- Tips and common mistakes
- Wrapping up and next steps
What you need
- ● Japanese maple tree (preferably mature, 10+ years old) with seed pods 🌳
- ● Pruning shears (sterilized, sharp blades for clean cuts) – 1 pair
- ● Heavy-duty gloves (garden-grade, for thorn protection) – 1 pair
- ● Large bucket or trash bag (10+ gallon capacity) for collecting pods
- ● Newspaper or cardboard (to lay pods out for drying)
- ● Paper towels or coffee filters (for separating seeds)
- ○ Small fan or hairdryer (low heat) (optional but helpful for drying)
- ● Ladder or step stool (if pods are high up)
- ● Seed extraction tray or sieve (for sifting seeds)
- ● Labels & markers (to track seed varieties if propagating)
- ● Disinfectant spray (for sterilizing tools between uses)
How to extract Japanese maple seeds using the twist-release method
This clever technique lets you harvest seeds without damaging the delicate winged samaras.
🌱 Step 1: Identify and Harvest Ripe Seed Pods
Wait until the seed pods turn a deep, papery brown and begin splitting open naturally—this usually happens in late fall after the first frost. Gently twist each pod to release the seeds; if they don’t come free with light pressure, they’re not ready yet. Collect pods on a clean cloth or paper towel to prevent debris contamination.
Japanese maple pods are fragile, so avoid crushing them. The twist-release works best when pods are dry but not brittle. If you find any still green or moist, leave them on the tree—they won’t release seeds properly.
🪴 Step 2: Prepare a Clean Extraction Surface
Spread a large sheet of newspaper or a dedicated seed-extraction tray on a flat, stable surface. The smooth surface helps seeds glide free without getting tangled. I like to use a baking sheet lined with parchment paper for easy cleanup later.
Place the collected pods on the surface in a single layer, spacing them about 2 inches apart. This prevents seeds from getting stuck between overlapping pods during extraction. A gentle tap on the work surface helps loosen any stubborn seeds still clinging to the pod walls.
✂️ Step 3: Execute the Twist-Release Technique
Hold a single pod firmly between your thumb and forefinger, gripping the widest part near the stem attachment. With a quick, controlled twist, apply steady pressure while rotating the pod 180 degrees. You’ll hear a faint pop as the seed compartment releases—this is your signal to stop twisting immediately.
Repeat for all pods, working in batches of 10-15 at a time. The twist motion aligns the seed’s natural seams, making extraction effortless. If a pod resists, it may be too dry—spritz it lightly with water and try again after 10 minutes.
🌿 Step 4: Separate and Store the Seeds
Once all pods are processed, gently sift through the debris using your fingers or a fine-mesh strainer. Discard empty pod fragments and any damaged seeds—they won’t germinate. The viable seeds will have papery wings and a smooth, oval shape.
Store seeds in an airtight container with a silica gel packet to absorb moisture. Label the container with the date and variety (if known). Japanese maple seeds remain viable for 1-2 years when stored in a cool, dark place—35-40°F is ideal.
⏰ Step 5: Stratify Seeds for Germination (Optional)
For best results, stratify seeds by mixing them with damp peat moss in a sealed container. Place the container in the refrigerator for 60-90 days to simulate winter conditions. Check weekly to ensure the moss stays moist but not soggy.
After stratification, sow seeds ¼ inch deep in well-draining soil. Keep the soil consistently moist at 65-70°F until germination, which typically occurs in 4-8 weeks. Japanese maple seeds are notoriously slow to sprout—patience is key!
Tips & tricks for perfect Japanese maple seed extraction
Mastering this delicate process takes practice, but these insider tips will help you avoid common pitfalls and maximize your seed yield.
Pod Readiness is Everything: The deep papery brown color and natural splitting are your green light—don't rush this step. I've learned the hard way that forcing extraction from unripe pods results in crushed seeds that won't germinate. If pods resist gentle twisting, they're not ready yet. Confession: I skipped this step for years and wondered why my germination rates were so low.
Surface Selection Matters: While newspaper works fine, I've found parchment paper creates the smoothest surface for seed release. The 2-inch spacing between pods is crucial—crowding causes seeds to get stuck between pods during extraction. Pro tip: Place a second baking sheet underneath your work surface to catch any seeds that might slip through, especially with larger batches.
Twist Technique Precision: That 180-degree rotation is critical—the full rotation aligns the seed seams perfectly. I've noticed beginners often stop too early, leaving seeds partially attached. Listen for that faint pop—it's your cue to stop immediately. For stubborn pods, the 10-minute wait after spritzing with water works wonders, but don't overdo it or you'll risk moisture damage.
Storage Wisdom: The 35-40°F range is ideal for long-term viability, but I've found that adding an extra silica gel packet actually extends freshness by several months. Labeling containers with both date and variety is a game-changer—especially when you're working with multiple Japanese maple varieties. I've seen seeds lose viability just from being stored in warm kitchen cabinets instead of a cool basement.
Pro Tips for Japanese Maple Seed Pods
- Mastering this delicate process takes practice, but these insider tips will help you avoid common pitfalls and maximi...
- Pod Readiness is Everything: The deep papery brown color and natural splitting are your green light—don't rush this s...
- Surface Selection Matters: While newspaper works fine, I've found parchment paper creates the smoothest surface for s...
Frequently asked questions
about Japanese maple seed pods—get quick answers to common curiosities before diving in!Do Japanese maple seed pods always twist open on their own?
Not always! While many mature pods do twist open naturally as they dry, some varieties or individual pods may need a little help—especially in humid climates. If they’re stubborn, gently pry them open with gloved fingers or a small tool. Pro tip: Harvest pods when they turn brown and papery for best results.
How long does it take for seed pods to twist and release seeds?
Timing varies by climate, but most pods take 4–8 weeks after flowering to mature and twist open. In dry conditions, this process speeds up; in wet weather, pods may stay closed longer. Check pods weekly in late summer/fall for the classic spiral twist—your cue to harvest!
Can I use Japanese maple seed pods for anything besides propagation?
Beyond seeds, dried pods add rustic charm to:
- Crafts: Wreaths, garlands, or pressed art (just flatten them between heavy books).
- Gardening: Mulch or natural mulch accents (chop finely first).
- Decor: Fill glass jars for centerpieces or scatter on tables for autumn vibes.
What if my seed pods won’t twist at all? Troubleshooting tips?
Try these fixes if pods stay closed:
- Dry them out: Place pods in a paper bag with a silica gel packet (or rice) for 1–2 weeks.
- Heat trick: Bake at 150°F (65°C) for 10–15 minutes (monitor closely!).
- Check moisture: Wet pods won’t twist—harvest only when fully crisp.
Are there alternative trees with easy-to-open seed pods?
Yes! If Japanese maple pods prove tricky, try these low-effort alternatives:
Tree
Pod Description
Ease of Opening
Honey Locust
Flat, bean-like pods that split dramatically when dry.
(Very easy—often pops open with a touch!)
Black Locust
Long, dark brown pods that twist and split open.
(Needs slight drying but reliable.)
Ginkgo
Fleshy, yellow "fruit" that splits to reveal seeds.
(Messy but fun—wear gloves!)
Wrapping up and next steps
Japanese maple seed pods offer a simple, eco-friendly way to collect seeds without the fuss! Whether you're pruning, propagating, or just tidying up, these pods make the process effortless—no special tools required. 🌿
Ready to give it a try? Grab your gloves, a bucket, and a sunny spot—then let nature do the rest! Start your seed adventure today and watch your garden grow with ease.