
Lawn
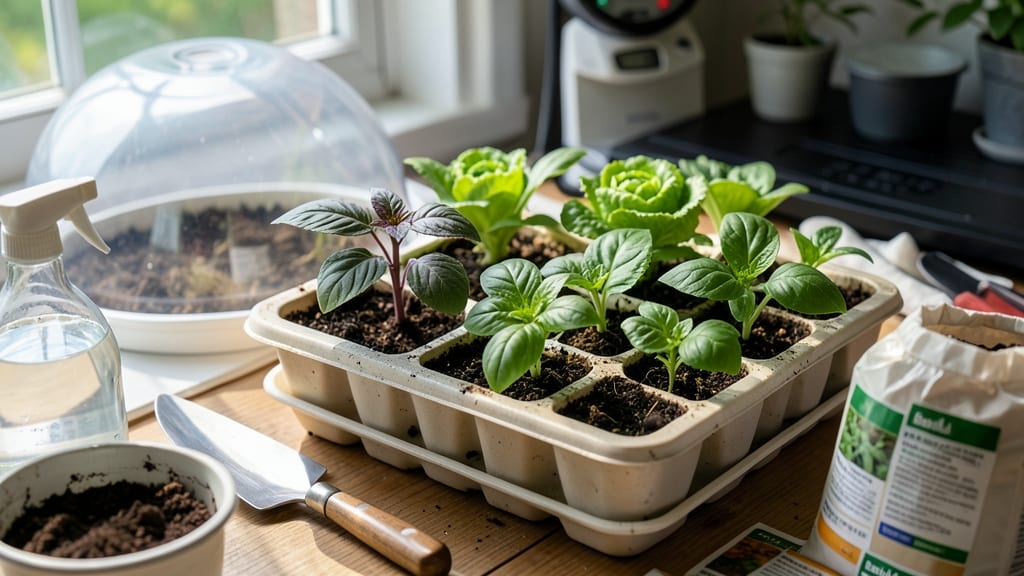
How to use a seed starter turns your kitchen counter into a mini greenhouse where tiny miracles happen. 🌱 The right setup means stronger seedlings, faster growth, and no more struggling with weak, leggy plants that can't survive transplanting. You'll need just three things: a seed tray with drainage holes, a quality seed-starting mix (not garden soil), and your chosen seeds. Most people overcomplicate this—keep it simple. Fill the tray, scatter seeds, and cover lightly with soil. That's it for the first step. Within three weeks, you'll have sturdy seedlings ready for the garden, not the sad, stretched-out plants from store-bought trays. The secret? Consistent moisture, bright light, and a warm spot (like on top of the fridge). No fancy equipment needed. This method works for tomatoes, peppers, herbs, and flowers alike. Once you master it, you'll never buy seedlings again—and your garden will thank you with bigger, healthier plants all season long.
📚 In This Guide
- What you need
- Instructions
- Tips and common mistakes
- Wrapping up and next steps
What you need
- ● Seed starter trays or pots – 10–20 (biodegradable or plastic, 2–4" deep)
- ● Seed starting mix – 1–2 bags (sterile, peat-free, or coco coir-based)
- ● Seeds – Your chosen variety (check seed packet for spacing/depth)
- ● Spray bottle – 1 (for gentle watering)
- ● Clear plastic dome or plastic wrap – 1 (to retain humidity)
- ● Grow lights or sunny windowsill – 1 (12–16 hrs/day, 6–12" above seeds)
- ● Labeled plant markers – 10+ (wooden or biodegradable)
- ● Heat mat (for cold-weather seeds)
- ● Fertilizer (balanced or seed-specific, ¼-strength)
- ● Tweezers (for tiny seeds)
- ● Fan (for airflow to prevent damping-off)
- ● Moisture meter (to track soil hydration)
Step-by-Step instructions for using a seed starter
Here's the simple method I rely on to avoid tangled roots and weak seedlings.
🌱 Step 1: Prepare Your Seed Starter Tray
Start by filling each cell of your seed starter tray with moistened seed-starting mix. I like to press it down gently so it's firm but not compacted—just enough to hold seeds in place without shifting. Fill to about ½ inch below the top of each cell, leaving room for seeds and a little growth space.
Water the tray thoroughly from the bottom by placing it in a shallow tray of water for 10-15 minutes. This ensures even moisture without disturbing the soil surface. Let it drain completely before planting—soggy soil suffocates seeds and causes rot. Tap the tray gently on the counter to settle the mix, then smooth the surface with your fingers.
🌱 Step 2: Plant Seeds at the Correct Depth
Check the seed packet for depth recommendations, but a good rule of thumb is to plant seeds at a depth of about twice their diameter. For tiny seeds like lettuce, this might be just ¼ inch deep, while larger seeds like beans need 1 inch of coverage. Use your finger or a small tool to create a tiny hole in the center of each cell.
Drop 1-2 seeds per cell—I always plant two in case one fails to germinate. Cover them lightly with more seed-starting mix, then mist the surface with a spray bottle until evenly damp. Avoid overwatering; the soil should feel like a wrung-out sponge. Label each cell with the seed variety and date to avoid confusion as they sprout.
💧 Step 3: Provide Ideal Conditions for Germination
Place the seed starter tray in a warm spot with a humidity dome or plastic wrap to trap moisture and warmth. Seeds germinate best at 70-75°F, so a seedling heat mat helps if your home runs cooler. Keep the tray in indirect light until seeds sprout—direct sunlight can overheat the soil and dry out the seeds.
Check daily for moisture, misting lightly if the soil surface feels dry. Once you see 50% of seeds sprouted, remove the dome immediately to prevent damping-off disease. This usually happens within 5-14 days, depending on the seed type. You’ll know it’s time when tiny green shoots push through the soil.
☀️ Step 4: Move to Light and Care for Seedlings
As soon as seedlings emerge, move the tray to a bright location with 12-16 hours of light daily. A south-facing window or grow light works best. If using a grow light, position it 2-4 inches above the seedlings and raise it as they grow. Leggy seedlings (long, pale stems) mean they need more light—adjust immediately to prevent weak growth.
Water from the bottom by placing the tray in ½ inch of water for 10 minutes, then drain thoroughly. This keeps roots healthy and prevents fungal issues. Fertilize lightly with a diluted seedling fertilizer after the first true leaves appear—usually 10-14 days after germination. Avoid over-fertilizing; seedlings are sensitive to salt buildup.
⏰ Step 5: Transplant When Ready
Seedlings are ready to transplant when they have 2-3 sets of true leaves and the first set of leaves is about 1 inch tall. Gently remove them from the starter tray, being careful not to damage the roots. If roots are circling or tightly packed, it’s time to transplant sooner—this prevents root-bound shock later.
Hardening off begins 1-2 weeks before the last frost date. Start by placing seedlings outside in a shaded spot for 1-2 hours the first day, gradually increasing time and sun exposure. By the end of the week, they should handle a full day outdoors. Transplant in the evening or on a cloudy day to reduce stress. Water deeply after transplanting to help roots establish.
Tips & tricks for perfect seed starting
These simple strategies will help you avoid common pitfalls and grow strong, healthy seedlings every time.
Soil Preparation Secret: In Step 1, when pressing down the seed-starting mix, aim for a texture similar to a damp sponge—not too loose, not too compacted. The right firmness prevents seeds from sinking too deep while still allowing roots to penetrate easily. After watering, let the tray sit for 5 minutes before planting to ensure even moisture distribution throughout each cell.
Planting Precision: For Step 2, I recommend using a toothpick or pencil to create planting holes—it gives you better control than your finger, especially for tiny seeds. When planting 1-2 seeds per cell, place them side by side rather than one on top of the other to prevent tangling later. This small adjustment makes transplanting much easier when roots start to develop.
Germination Environment: During Step 3, if you don't have a humidity dome, wrap the tray tightly with plastic wrap instead. Poke a few small holes in the plastic to allow air circulation while maintaining moisture. The 70-75°F temperature range is crucial—if your home runs cooler, place the tray on top of your fridge (not inside) for gentle warmth. This mimics ideal greenhouse conditions without special equipment.
Light Management: In Step 4, when using a south-facing window, rotate the tray 180 degrees daily to prevent seedlings from leaning toward the light. For grow lights, adjust the height every 5-7 days as seedlings grow—this prevents stretching. If you notice seedlings growing toward the light source, they're telling you they need more even exposure.
Pro Tips for Use Seed Starter
- These simple strategies will help you avoid common pitfalls and grow strong, healthy seedlings every time.
- Soil Preparation Secret: In Step 1, when pressing down the seed-starting mix, aim for a texture similar to a damp sponge—not too loose, not too compacted.
- Planting Precision: For Step 2, I recommend using a toothpick or pencil to create planting holes—it gives you better control than your finger, especially for tiny seeds.
Frequently asked questions
Got questions about seed starters? You’re not alone! Here are answers to the most common ones to help you grow with confidence.
What’s the best soil mix for seed starters?
A lightweight, well-draining mix works best—think 50% peat or coco coir, 30% perlite or vermiculite, and 20% compost. Avoid garden soil (it’s too dense and can harbor pests). Sterilize your mix by baking it at 200°F for 30 minutes to kill weeds and pathogens.
How long does it take for seeds to germinate in a starter?
Germination time varies by plant: fast growers (like radishes or lettuce) sprout in 3–7 days, while slow starters (tomatoes, peppers) take 7–21 days. Check your seed packet for specifics! Keep soil consistently moist (not soggy) and warm (70–85°F) for best results.
Why are my seeds not sprouting in the starter?
Common culprits: too much water (causes rot), too little (seeds dry out), or incorrect temps. Double-check your seed packet for depth—some need light (sprinkle on top), others darkness (cover lightly). Try pressing seeds gently into moist soil for better contact.
Can I reuse seed starter trays or soil?
Yes! Clean trays with soapy water and disinfect with a 10% bleach solution (rinse well). For soil, bake it at 200°F for 30 minutes to kill pathogens. Pro tip: Label trays to track plant types and avoid cross-contamination.
What’s a cheap alternative to store-bought seed starters?
DIY options abound! Use egg cartons (poke drainage holes), toilet paper rolls (cut and fill with soil), or muffin tins with paper cups. Just ensure they’re clean, moist, and have drainage. Repurpose containers to save money and reduce waste!
Wrapping up and next steps
Using a seed starter is your secret weapon for fast, healthy germination—no more weak sprouts or wasted seeds! 🌱 By following these steps, you’ll transform tiny seeds into sturdy seedlings in just three weeks, setting your lawn up for success.
The key? Patience, proper moisture, and a little TLC.
Ready to watch your garden thrive? Grab those seedlings and transplant them into your lawn or garden beds—your future green oasis starts now! 🌿 Next up: Learn how to harden off seedlings for outdoor planting.