
Lawn
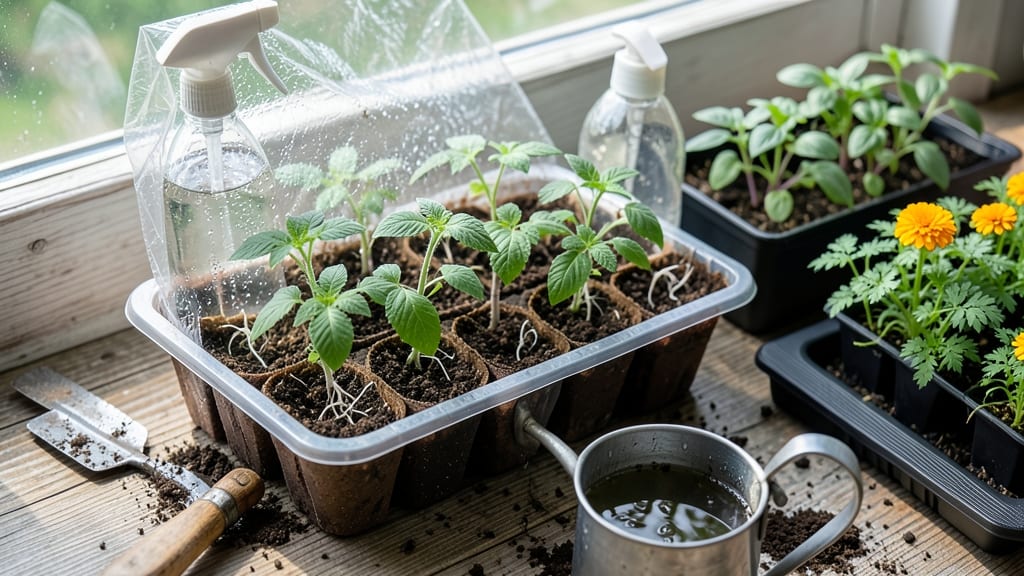
How to use seed starter trays turns your kitchen counter into a mini greenhouse where tiny seeds become strong seedlings. 🌱 I’ve struggled with uneven germination and leggy starts until I mastered these trays—they’re the secret weapon for consistent, healthy seedlings that transplant like pros. The beauty of starter trays is their simplicity: you need just the tray, quality seed-starting mix, and your chosen seeds. No fancy equipment required! Fill the cells with moistened mix, plant seeds at the right depth (usually twice their size), and keep them warm and bright. Most seedlings will emerge within 7-14 days, depending on the plant. What you’ll love is how these trays give you control over moisture, light, and spacing—no more crowded seedlings fighting for space. They also protect tender sprouts from pests and harsh weather until they’re ready for the garden. Plus, the modular design makes it easy to move them to different light sources as your seedlings grow. Common mistakes? Overwatering (drainage holes are your friend) and skipping the hardening-off process before transplanting. But once you get the hang of it, you’ll be growing everything from tomatoes to petunias with confidence. Ready to give it a try?
📚 In This Guide
- What you need
- Instructions
- Tips and common mistakes
- Wrapping up and next steps
What you need
- ● Seed starter trays: 1-2 trays (choose biodegradable or plastic with drainage holes; 72-cell or 200-cell sizes are ideal for small seeds like lettuce or herbs).
- ● Seed starting mix: 1 bag (lightweight, sterile potting mix—avoid garden soil! Look for labels like "seed starting" or "organic potting mix.")
- ● Seeds: Your chosen variety (check seed packets for spacing recommendations).
- ● Watering can or spray bottle: 1 (with a fine mist nozzle to avoid displacing seeds).
- ● Plastic wrap or humidity dome: 1 sheet or lid (to retain moisture during germination).
- ● Grow lights or sunny windowsill: 1 (a full-spectrum LED grow light is ideal; place 2–4 inches above trays).
- ● Labels & markers: Small sticks or tags + waterproof marker (to track seed types and planting dates).
- ● Trowel or small shovel: 1 (for filling trays with mix).
- ● Flat or tray base: 1 (to stabilize trays and catch excess water).
- ● Heating mat: 1 (for cold climates; keeps soil 65–75°F to speed up germination).
- ● Fertilizer: A balanced, water-soluble option (like 5-5-5) for post-germination feeding).
- ● Seedling heaters or fans: 1-2 (to prevent damping-off disease by improving airflow).
- ● Reusable pellets: 1 pack (compostable peat or coir pellets for easy transplanting).
- ● Glove & apron: 1 set (to keep hands clean while handling soil and seeds).
Step-by-Step guide to using seed starter trays effectively
Here’s how I’ve perfected seed starting—no more weak seedlings or wasted trays.
🌱 Step 1: Prepare the Tray and Soil for Optimal Germination
Start by filling each cell of your seed starter tray with moistened, sterile seed-starting mix. I press it down lightly with my fingers to eliminate air pockets—this ensures even moisture distribution. The mix should feel like a damp sponge, not dripping or clumpy. If you’re using a reusable tray, make sure it has drainage holes to prevent root rot.
I always add a tiny layer of perlite or vermiculite to the bottom of each cell before filling with soil. This improves drainage and prevents the roots from sitting in soggy conditions. A quick tap on the tray’s side helps settle the mix evenly without compacting it too much. Remember, the goal is to mimic the natural conditions seeds need to sprout—consistent moisture without waterlogging.
💧 Step 2: Sow Seeds at the Correct Depth and Space
Check the seed packet for recommended planting depth—most seeds should go in about ¼ to ½ inch deep. I use a toothpick to poke small holes in the soil, then place one seed per cell. If the packet suggests sowing two seeds, I plant them diagonally in the same cell to avoid overcrowding later. Cover them lightly with additional mix, just enough to hide the seeds but not bury them too deep.
Gently pat the soil surface to ensure good seed-to-soil contact. This step is critical because seeds need consistent moisture to germinate, and proper contact prevents them from drying out. I label each tray with the seed type and date—trust me, you’ll forget what’s what after a few weeks of identical green sprouts.
☀️ Step 3: Maintain Ideal Moisture and Light Conditions
Place the tray in a warm, bright location—70-75°F is ideal for most seeds. I cover the tray with a clear plastic dome or wrap to retain humidity, but I remove it as soon as 50% of seeds sprout. Over-moisture after germination invites damping-off, a fungal disease that kills seedlings overnight. Water from the bottom by placing the tray in a shallow tray of water for 10-15 minutes—this keeps the soil evenly moist without disturbing the seeds.
Once seedlings emerge, move them to a spot with 12-16 hours of light daily. A grow light positioned 2-4 inches above the tray works best—natural light alone often isn’t strong enough. You’ll notice leggy seedlings if the light is too far away, so adjust the height as they grow. Strong seedlings have thick stems and dark green leaves, while weak ones stretch and pale.
🌿 Step 4: Thin and Harden Off Seedlings Before Transplanting
When seedlings develop their first true leaves, thin them to the strongest one per cell. Use scissors to snip the weaker seedlings at soil level—this prevents disturbing the roots of the ones you’re keeping. I transplant the thinned seedlings into larger pots or directly into the garden once they’ve developed 2-3 sets of true leaves. This ensures they’re sturdy enough to handle the shock of moving.
Before transplanting outdoors, harden off the seedlings by gradually exposing them to outdoor conditions over 7-10 days. Start with 1-2 hours of shade** the first day, then increase exposure by 1 hour daily. This process toughens the seedlings and prepares them for the elements. Watch for wilting or yellowing leaves—these are signs they’re not ready yet.
Tips & tricks for perfect seed starter trays
Here's what nobody tells you about getting the most out of your seed starter trays—these tricks make all the difference between thriving seedlings and wasted effort.
Soil Preparation Secret: The key to Step 1 lies in the soil's texture—it should crumble easily between your fingers when lightly squeezed, like a damp sponge. If it feels too dry, mist it with water and let it sit for 5 minutes before filling the trays. Too wet? Mix in a handful of perlite or vermiculite to improve aeration. I've learned the hard way that soggy soil leads to root rot, while overly dry soil prevents germination entirely.
Planting Precision: When sowing seeds in Step 2, use a toothpick to create perfectly sized holes—this prevents overcrowding and ensures each seed gets the right depth. For seeds that need light to germinate (like lettuce or petunias), sprinkle them on top rather than burying them. I mark the seed packet depth on the toothpick with a marker so I never guess wrong.
Lighting Strategy: The 12-16 hours of light in Step 3 is non-negotiable for strong seedlings. If you notice leggy growth, your light source is too far away—move it closer until the seedlings grow compact and sturdy. A simple timer on your grow light ensures consistent light cycles without you having to remember to turn it on/off daily. I've had to replace weak seedlings grown under inconsistent light, and it's a waste of time.
Harden Off Gradually: During the 7-10 day hardening process in Step 4, watch for subtle signs of stress like curled leaves or yellowing. If you see these, move the seedlings back to their protected spot and extend their acclimation time by another day. I've ruined perfectly good seedlings by rushing this step—patience here means stronger plants that survive transplanting.
Pro Tips for Use Seed Starter Trays
- Here's what nobody tells you about getting the most out of your seed starter trays—these tricks make all the differen...
- Soil Preparation Secret: The key to Step 1 lies in the soil's texture—it should crumble easily between your fingers w...
- Planting Precision: When sowing seeds in Step 2, use a toothpick to create perfectly sized holes—this prevents overcr...
Frequently asked questions
Got questions about seed starter trays?
You’re not alone! Here are some of the most common concerns—and simple solutions—to help you grow with confidence.
What’s the best time to start seeds in trays?
Timing depends on your climate and plant type. For most veggies and flowers, start indoors 6–8 weeks before the last frost date. Cool-season crops (like lettuce) can go in earlier, while warm-season plants (tomatoes, peppers) need warmth—wait until after frost or use a heat mat. Check seed packets for specifics!
Can I reuse seed starter trays?
Clean them thoroughly with a 10% bleach solution (1 part bleach to 9 parts water) to kill bacteria and fungi. Rinse well, dry completely, and you’re ready for round two. Pro tip: Disinfect between batches to prevent mold or disease.
What if my seeds aren’t germinating?
First, check moisture—soil should feel like a damp sponge. If seeds aren’t sprouting within 2–3 weeks (or the time listed on the packet), try these fixes:
- Ensure warmth (70–85°F is ideal for most seeds).
- Test seed viability by soaking a few in water—if they sink, they’re likely good.
- Consider using a seedling heat mat for stubborn varieties.
Do I need to fertilize seedlings in trays?
Hold off on fertilizer until seedlings have 2–3 true leaves (not the initial seed leaves). Over-fertilizing can burn tender roots. Instead, use a balanced, water-soluble fertilizer (like 10-10-10) at half-strength. For organic options, try diluted fish emulsion or compost tea.
How do I transplant seedlings from trays without damaging roots?
Start by watering the trays well 1–2 hours before transplanting to reduce stress. Gently squeeze the tray to loosen roots, then slide seedlings out with their soil intact. Plant at the same depth they were in trays—burying stems too deep can cause rot. Harden off seedlings (acclimate to outdoor conditions) for 5–7 days first!
Wrapping up and next steps
Using seed starter trays is your secret weapon for stronger, healthier plants—whether you're growing veggies, flowers, or lawn grass! 🌱 With the right setup, moisture control, and a little patience, you’ll boost germination rates and give your seedlings the best possible start.
Now that you’re equipped with pro tips, it’s time to roll up your sleeves and get planting!
Your next step? Pick your seeds, prep your trays, and watch your green thumb shine! Happy growing! 🌿