
Lawn
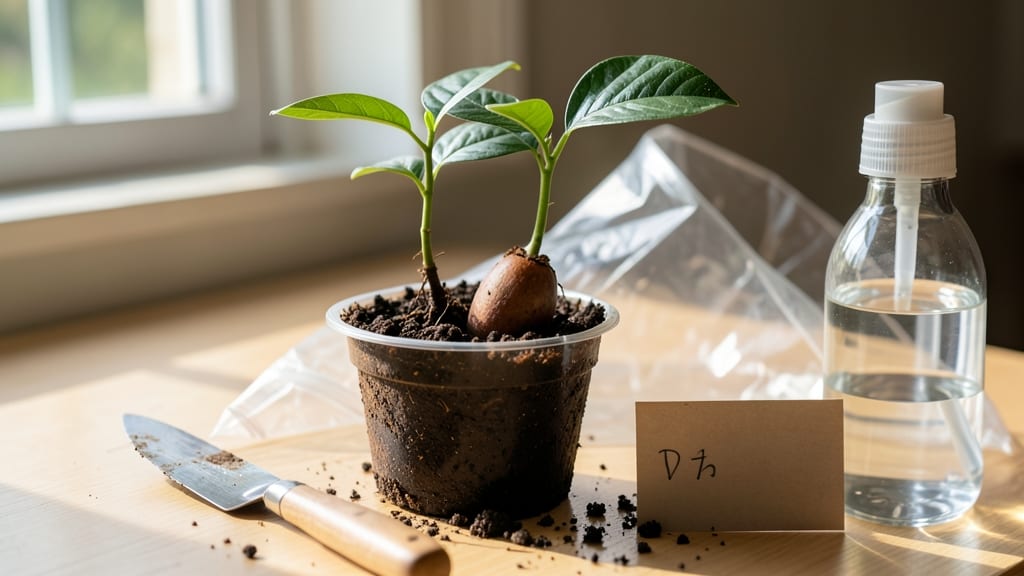
Preparing a mango seed for planting starts with the right twist-free extraction—one wrong move and you’ll crack the seed instead of planting it. 🌱 I’ve learned the hard way that patience and precision pay off when you’re working with these tropical treasures, especially since germination can take 4-8 weeks (or longer).
The key is removing the seed without damaging the delicate inner layers, then soaking it properly to kickstart growth.
You’ll need just three things: a ripe mango, a clean knife, and a small container for soaking. First, slice the mango open and carefully pry out the seed without twisting—think of it like peeling an avocado, but gentler.
The seed’s outer shell is tough, so avoid any cracks, as they’ll invite rot. Once free, rinse off any fruit residue and let it dry for a day before soaking in water for 24 hours to soften the shell.
After soaking, plant the seed about an inch deep in well-draining soil, keeping it consistently moist but not soggy. Place the pot in a warm, sunny spot, and within weeks, you might see a tiny sprout pushing through.
The hardest part is waiting—mango seeds germinate slowly, but once they do, you’ll have a living reminder of that perfect summer fruit.
If the seed doesn’t sprout after two months, don’t give up—some take longer. The real reward comes when you see those first broad leaves, signaling a healthy start. With the right care, your mango seedling could one day grow into a tree with real fruit, though it’ll take years.
Every step, from extraction to planting, is worth it for that first glimpse of green.
📚 In This Guide
- What you need
- Instructions
- Tips and common mistakes
- Wrapping up and next steps
What you need
- ● Mature, ripe mango (preferably from a healthy, disease-free tree) – 1
- ● Sharp kitchen knife (serrated or chef’s knife works best) – 1
- ● Cutting board (to protect surfaces and hands) – 1
- ● Paper towels or clean cloth (for drying and cleaning) – 2-3 sheets
- ● Small bowl or container (for rinsing or soaking) – 1
- ● Water (room temperature or slightly warm) – as needed
- ● Plastic wrap or ziplock bag (for seed storage) – 1 small bag
- ● Small pot or seed tray (4-6 inches in diameter) – 1
- ● Well-draining potting mix (lightweight, sandy, or coconut coir-based) – 1 small bag
- ○ Spray bottle (for gentle watering) – optional but helpful
- ● Hydrogen peroxide (3%) (for sterilizing seeds) – a few drops
- ● Seedling heat mat (to speed up germination) – 1
- ● Fertilizer (balanced, low-nitrogen) (for early growth) – small amount
- ● Gloves (if you prefer not to touch the seed directly) – 1 pair
- ● Notebook & pen (to track planting dates and progress) – 1
Step-by-step instructions for preparing a mango seed for planting
Here's the simple method I use to extract clean, damage-free seeds every time—no twisting or breaking required.
🪴 Step 1: Select and Prepare Your Mango
Start with a ripe mango that's slightly soft to the touch but not mushy. The riper the fruit, the easier the seed will separate from the flesh. I like to choose varieties like Tommy Atkins or Kent because their seeds are larger and less prone to cracking during extraction.
Wash the mango thoroughly under cool water to remove any wax coating or residue. Pat it dry with a clean towel. You'll want to work with a dry surface to prevent slipping and make the seed easier to handle. Cut the mango in half lengthwise using a sharp knife—this gives you direct access to the seed without damaging it.
✂️ Step 2: Extract the Seed Without Cracking
Here's the trick: instead of twisting, which often cracks the seed, gently pry the seed loose by inserting the knife between the seed and the mango flesh. Angle the blade at about 30 degrees and work slowly around the seed's perimeter. You'll feel resistance as you cut through the fibrous connection.
Once you've made a complete circle around the seed, lift it straight out. The seed should come free with just the flesh attached. If it resists, you're pressing too hard—ease up and continue cutting. Never use force, as this can split the seed or damage the germination layers.
💧 Step 3: Clean and Dry the Seed
Rinse the seed under warm water to remove all remaining mango pulp. Use your fingers to gently scrape off any stubborn bits of flesh clinging to the seed's surface. A clean seed germinates faster because moisture and potential mold don't get trapped between the layers.
Place the seed on a paper towel and let it air dry for 24-48 hours in a warm, shaded spot. The seed is ready when it feels light in your hand and the outer skin no longer sticks to your fingers. This drying step prevents rot during the germination process.
🌱 Step 4: Optional Scarification for Faster Germination
For seeds that seem particularly tough, I like to give them a light scarification to help water penetrate the hard outer shell. Wrap the seed in a damp paper towel and place it between two sheets of sandpaper. Rub gently in a circular motion for about 30 seconds—just enough to rough up the surface slightly.
This step isn't necessary for all seeds, but it can cut germination time from 4-6 weeks to just 2-3 weeks. If you skip scarification, the seed will still germinate—it might just take a little longer. The key is patience; mango seeds are slow starters but worth the wait for that tropical tree.
⏰ Step 5: Store Until Planting
Once completely dry, store your cleaned seed in a cool, dry place like a paper envelope or breathable bag. Keep it away from direct sunlight and moisture. Mango seeds can remain viable for up to 6 months if stored properly, though I've found they germinate best when planted within 3 months of extraction.
When ready to plant, soak the seed in warm water for 12-24 hours before sowing. This hydration jumpstarts the germination process. You'll know it's ready when the seed begins to swell slightly—this means the internal layers are absorbing moisture and preparing to sprout.
Tips & tricks for perfect mango seed preparation
Between us, extracting a mango seed without cracking it is one of those skills that takes practice—but these tricks will save you from the frustration I went through with my first three attempts.
Seed Selection Matters: The ripeness of your mango makes all the difference. Look for fruit that yields slightly when pressed but doesn't feel mushy—this is your sweet spot. I've found that varieties like Tommy Atkins and Kent have larger seeds that resist cracking better during extraction. The firmer the seed, the easier it is to handle without damage.
The Angle Game: That 30-degree angle when inserting your knife in Step 2 is critical. I learned this the hard way after splitting two seeds trying to force the blade straight in. Start shallow, then gradually increase the angle as you cut around the seed's perimeter. You'll feel the resistance change when you're on the right track—this is your cue to go slower, not harder.
Drying is Non-Negotiable: Skipping the 24-48 hour drying period in Step 3 is a common mistake that leads to moldy seeds. Place your seed in a warm, shaded spot where airflow circulates—like on a kitchen counter away from direct sunlight. The seed is ready when it feels light and the outer skin no longer sticks to your fingers. Trust me on this: a properly dried seed germinates reliably, while a damp one will rot.
Scarification Shortcut: For seeds that seem particularly tough, the 30-second sandpaper rub in Step 4 works wonders. I wrap the seed in a damp paper towel first—this prevents the sandpaper from damaging the seed's surface too aggressively. The goal is just to rough up the surface slightly, not to sand it down completely. This small step can cut your waiting time nearly in half, from 4-6 weeks to just 2-3 weeks.
Pro Tips for Prepare A Mango Seed For Planting
- Between us, extracting a mango seed without cracking it is one of those skills that takes practice—but these tricks w...
- Seed Selection Matters: The ripeness of your mango makes all the difference. Look for fruit that yields slightly when...
- The Angle Game: That 30-degree angle when inserting your knife in Step 2 is critical. I learned this the hard way aft...
Frequently asked questions
Got questions about growing mangoes from seed? You’re not alone! Here are some of the most common queries—and straightforward answers—to help you get started without the guesswork.
How long does it take for a mango seed to sprout?
A mango seed typically sprouts within 2 to 4 weeks if kept in warm, moist conditions (around 70–85°F). Patience is key—some seeds may take up to 6–8 weeks, especially if stored improperly. Keep the soil consistently damp (not soggy) and place the pot in bright, indirect light to encourage germination.
Can I plant a mango seed directly in the ground?
While possible, direct planting isn’t recommended for seeds, especially in cooler climates. Young seedlings are delicate and need protection from frost, pests, and uneven soil temperatures. Start indoors in a pot for 3–6 months, then transplant outdoors after the last frost when the soil is warm. This boosts survival rates!
Will a mango tree grown from seed produce fruit like the parent?
Probably not! Seed-grown mangoes are unpredictable—they may take 5–15 years to fruit (if ever) and won’t match the parent tree’s flavor, size, or quality. For reliable fruit, graft a known variety onto your seedling later. Think of it as a fun experiment with a long-term payoff!
What’s the best temperature for germinating mango seeds?
Mango seeds thrive in warmth. Ideal germination temps are 75–85°F. If your home is cooler, place the pot near a sunny window, under a grow light, or on top of a refrigerator. Avoid drafts or cold spots—consistent warmth speeds up sprouting and prevents rot.
My seed won’t sprout—what should I do?
Don’t give up! Try these fixes:
- Check moisture: The seed and soil should feel damp like a wrung-out sponge. Overwatering can suffocate it.
- Test viability: Soak the seed in warm water for 24 hours. If it sinks and feels firm, it’s alive. If moldy or mushy, it’s done.
- Adjust conditions: Move it to a warmer spot (like a seedling heat mat) or try the paper towel method to bypass soil issues.
Wrapping up and next steps
Preparing a mango seed for planting is simpler than you think—just follow the right steps to avoid frustration and ensure a healthy start! With the right tools and a little patience, you’ll be ready to nurture your very own mango tree. 🌱
Now that you’re armed with the knowledge, it’s time to take action. Grab that seed, follow the foolproof method, and watch your garden grow! Next up: Choose the perfect spot, plant with care, and keep an eye on your seedling’s progress—you’ve got this!