
Planting
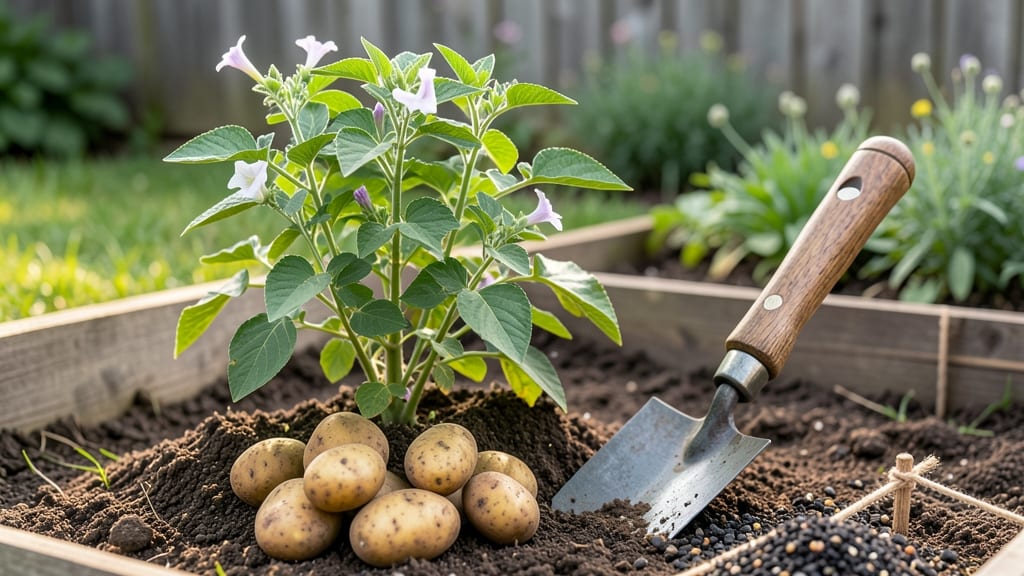
Planting seed potatoes in the ground starts with cutting your chits to size—each one should have at least two strong eyes. 🌱 I’ve learned the hard way that proper depth and spacing make all the difference between a meager harvest and a mountain of spuds.
The secret isn’t complicated: aim for 3-4 inches deep, with 12-15 inches between plants in rows spaced 3 feet apart. This gives roots room to spread and prevents disease by improving airflow.
First, prep the soil by loosening it to 12 inches deep and mixing in compost for nutrients. Seed potatoes thrive in well-draining soil with a pH between 5.0 and 6.5, so test yours if you’re unsure.
Plant the cut pieces eyes-up (the little dimples where sprouts emerge) so they don’t rot. After planting, water lightly to settle the soil—no need to drown them, just keep it moist until green shoots appear in 2-3 weeks.
Once the shoots reach 6 inches tall, mound soil around the stems to encourage more tuber formation. Repeat this earthen up every few weeks until the plants flower, then let them grow freely until the foliage yellows and dies back.
That’s when you know it’s time to dig—about 2-3 weeks after flowering—before frost hits. The reward? A high-yield harvest of crisp, flavorful potatoes that’ll last all winter.
Pro tip: If you’re in a short-season climate, opt for early-maturing varieties like ‘Yukon Gold’ or ‘Red Pontiac.’ And if slugs are a problem, scatter diatomaceous earth around the plants—it’s organic, effective, and won’t harm your potatoes. Now grab those chits and let’s get growing!
📚 In This Guide
- What you need
- Instructions
- Tips and common mistakes
- Wrapping up and next steps
What you need
- ● Seed potatoes: 1–2 lbs (or ~5–10 certified disease-free tubers, depending on variety and yield goals). Pro tip: Choose organic or untreated seed potatoes for best results!
- ● Garden soil: Well-draining, loose soil with a pH of 5.0–6.5. Amend with compost if your soil is heavy or clay-like.
- ● Garden fork or tiller: For loosening soil to a depth of 12 inches (30 cm).
- ● Garden gloves: A sturdy pair to protect your hands from dirt and sharp rocks.
- ● Rake: For leveling the soil after tilling.
- ● Watering can or hose: With a gentle spray nozzle for even moisture.
- ● Mulch (straw, grass clippings, or leaves): 2–3 inches (5–7 cm) to retain moisture and suppress weeds.
- ○ Fertilizer (optional but recommended): Balanced 10-10-10 or 5-10-10 fertilizer (follow package rates).
- ● OR compost or well-rotted manure (work 2–3 inches into the topsoil).
- ● Potato planter or dibber: For creating precise planting holes (depth: 4–6 inches or 10–15 cm).
- ● Row covers or frost cloth: To protect early plantings from late frosts.
- ● Potato clipper or pruners: For harvesting (if you’re going the digging-by-hand route!).
- ● Soil thermometer: To ensure soil temps are above 45°F (7°C) before planting.
- ● Plant labels: To track varieties (especially useful if growing multiple types!).
- ● Potato grow bags or containers: If you’re planting in raised beds or small spaces.
Step-by-Step guide to planting seed potatoes in the ground
Here's my battle-tested method for planting seed potatoes that yield strong, disease-resistant tubers every time.
🌱 Step 1: Chit Your Seed Potatoes Before Planting
Place your seed potatoes in a bright, cool spot—like a sunny windowsill—about 6-8 weeks before your last frost date. The eyes (those little dimples) will sprout tiny white shoots called chits. These pre-sprouted potatoes establish roots faster and produce more uniform growth.
I like to position them with the eyes facing upward—this ensures the sprouts grow toward the light. Keep them in a single layer on a tray or egg carton, never stacked. If you notice any soft, mushy spots, toss those potatoes—they’ve started to rot and won’t grow well.
🪴 Step 2: Prepare the Soil and Planting Site
Choose a location with loose, well-draining soil that gets full sun (at least 6-8 hours daily). Avoid planting where potatoes grew last year to prevent disease buildup. Work in 2-3 inches of compost or aged manure to enrich the soil—potatoes are heavy feeders.
Use a garden fork to loosen the soil to a depth of 12 inches, breaking up any compacted layers. If your soil drains poorly, mix in sand or perlite to improve aeration. The ideal planting soil should feel crumbly when squeezed—like a damp sponge, not a brick.
☀️ Step 3: Plant Chitted Potatoes at the Right Depth
Dig trenches 12 inches deep and 3 feet apart for rows (or 18 inches apart if planting in hills). Place each chitted potato 4-6 inches deep, with the sprouts facing upward. Space individual potatoes 12 inches apart in the row—crowding leads to small, misshapen tubers.
Cover with 2-3 inches of soil, leaving the chits exposed. As the stems grow, hill up soil around the base (more on this in Step 4). If you’re planting in containers, use a 5-gallon bucket or larger—one potato per container, buried halfway.
💧 Step 4: Hill Soil and Maintain Moisture
When the stems reach 6 inches tall, mound soil around the base to cover the lower half. Repeat this process every 2-3 weeks until the plants flower. Hilling prevents sunlight from turning tubers green (toxic) and encourages more tuber formation underground.
Water deeply once a week, aiming for 1 inch of water total. Let the soil dry slightly between waterings—consistent moisture is key, but soggy soil causes rot. You’ll know you’re doing it right when the soil feels damp 2 inches down but not waterlogged.
✂️ Step 5: Harvest at Peak Maturity
Wait until the flowers fade and the foliage yellows before harvesting—this usually happens 2-3 weeks after flowering. Use a garden fork to gently loosen the soil around the plants, then dig carefully to avoid piercing the tubers. Wear gloves—some varieties have prickly skins.
Cure harvested potatoes by laying them in a shady, well-ventilated spot for 1-2 weeks at 50-60°F. This toughens the skin and improves storage life. Store in a cool, dark place (like a root cellar) where they’ll keep for months.
Tips & tricks for perfect seed potato planting
These battle-tested tricks will help you grow abundant, healthy potatoes with fewer headaches—and more harvests. Real talk: I've planted enough potatoes to know what separates a decent yield from a bumper crop.
The Chitting Timeline: That 6-8 week window before your last frost isn't arbitrary—it's when your seed potatoes develop strong root systems before transplanting. If you're in doubt about your frost date, check your local cooperative extension service or use a planting calendar that accounts for your specific microclimate. I've seen gardeners in cooler regions extend this to 10 weeks when needed, but never rush it. Rushed chitting means weak sprouts that struggle in the ground.
Soil Test First: Before amending your soil with compost, grab a soil test kit (they're cheap and available at garden centers). Potatoes thrive in soil with a pH between 5.0 and 6.5. If your test shows different numbers, you'll need to adjust with lime (to raise pH) or sulfur (to lower it) before planting. I once planted in untested soil that turned out alkaline—my potatoes grew, but they were bitter and stored poorly. Don't make my mistake.
Container Planting Hacks: When planting in containers like those 5-gallon buckets, add a drainage layer of broken pottery or pebbles at the bottom before adding soil. This prevents waterlogging, which is the #1 killer of container-grown potatoes. Also, use lightweight potting mix instead of garden soil—it drains better and won't compact as your tubers grow. I've had amazing success with containers on patios and balconies using this method, even in urban settings.
Hilling Visual Cue: When your stems reach 6 inches and it's time to hill, here's my trick: run your hand along the stem from base to top. Where your hand naturally stops is where the soil should come up to—about halfway up the stem. This creates the perfect environment for tuber formation without burying the plant too deeply. Over-hilling can stress the plant, while under-hilling leaves tubers exposed to sunlight (which turns them green and toxic).
Pro Tips for Plant Seed Potatoes In The Ground
- These battle-tested tricks will help you grow abundant, healthy potatoes with fewer headaches—and more harvests.
- The Chitting Timeline: That 6-8 week window before your last frost isn't arbitrary—it's when your seed potatoes develop strong root systems before transplanting.
- Soil Test First: Before amending your soil with compost, grab a soil test kit (they're cheap and available at garden centers).
Frequently asked questions
Got questions about planting seed potatoes? You’re not alone! Here are answers to the most common concerns—so you can grow a bountiful harvest with confidence.
How deep should I plant seed potatoes?
Plant them 4–6 inches deep, with the largest "rose" end (where sprouts emerge) facing up. If the soil is loose, go shallower (3–4 inches). Deeper planting prevents greening (toxic solanine) but risks rot if drainage is poor. Adjust based on your climate—warmer regions may need slightly deeper planting.
When is the best time to plant seed potatoes?
The ideal window is 2–4 weeks before your last frost date (spring) when soil reaches 45°F (7°C). In warm climates, plant in fall for a winter harvest. Avoid planting too early—cold soil can stunt sprouts. Use a soil thermometer to check if unsure!
How far apart should I space seed potatoes?
Space them 12–15 inches apart in rows (2–3 feet between rows) for small varieties like Yukon Gold. Larger types (e.g., Russet) need 18–24 inches apart. Crowding reduces yields and increases disease risk. If space is tight, opt for container growing with 1–2 potatoes per 5-gallon pot.
What if my seed potatoes sprout before planting?
No problem! Sprouted potatoes are ready to plant—just trim long sprouts to 1–2 inches to avoid stress. If they’re green or shriveling, they may be too old; choose firm, plump ones. Store them in a cool, dark place (like a cardboard box) until planting day to encourage even sprouting.
Can I plant seed potatoes in wet or clay soil?
Wet or heavy clay soil can lead to rot or poor drainage, but you can fix it! Amend with compost or coarse sand to improve texture. If drainage is terrible, plant on a mound or raised bed. Avoid planting until the soil is workable—stick your finger in; if it feels like a sponge, wait a few days.
What if my potatoes don’t sprout after planting?
Don’t panic! Wait 2–3 weeks—sprouts may emerge later. If nothing happens, check for rot (soft, mushy potatoes) or pests (cutworms). Ensure the soil is moist but not soggy and the area gets full sun (6+ hours/day). Try planting a few extra as backup!
Wrapping up and next steps
Planting seed potatoes is a rewarding way to grow your own bountiful harvest—just follow the right depth and spacing for success! By choosing healthy seed potatoes, preparing the soil, and planting them at the perfect 3-4 inches deep, you’re setting your garden up for plump, delicious potatoes.
Don’t forget to mulch and water as they grow—your future meals will thank you! 🌱
Now that you’re ready to dig in, grab your gloves and get planting! For extra tips, check out our guide on caring for potato plants to keep your crop thriving all season.