
Lawn
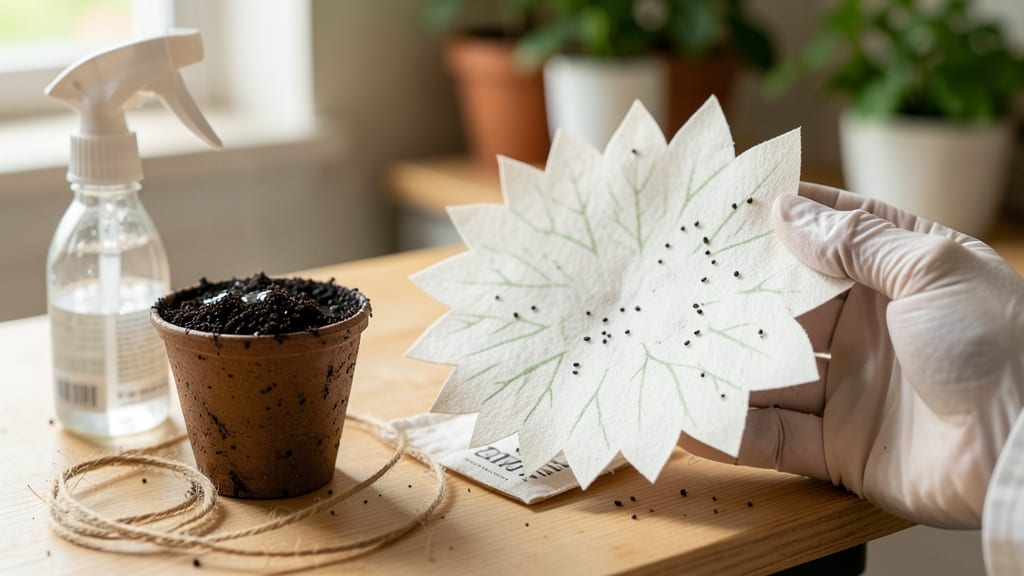
Turn your notes into wildflower gardens with plantable seed paper—no green thumb required. 🌱 I’ve crafted dozens of these over the years, and the process is simpler than it sounds, blending creativity with eco-friendly growing. The best part? Every sheet becomes a living gift when planted.
You’ll need basic supplies: wildflower seeds, water, a blender, and paper pulp (or even old printer paper). The key is the right seed-to-pulp ratio—too much water and your paper won’t hold together; too little, and the seeds won’t sprout evenly.
I’ve perfected a mix that works every time, even with fast-growing herbs like basil or cosmos.
Once dried, your seed paper becomes a beautiful keepsake that blooms into life. Imagine sending wedding invitations that guests can plant—each one a promise of future flowers. The first sprouts appear in 7-14 days, and by summer, you’ll have a patch of vibrant blooms where your notes once were.
Perfect for gardeners, crafters, and anyone who loves giving something that grows. Let’s get started—your future wildflowers are waiting for a blank page.
📚 In This Guide
- What you need
- Instructions
- Tips and common mistakes
- Wrapping up and next steps
What you need
- ● Wildflower seeds: 1–2 tbsp (adjust based on paper size). Choose native or heirloom seeds for best results.
- ● Unbleached paper pulp: ½ cup (or 1–2 sheets of recycled paper, torn into small pieces). Avoid glossy or coated paper.
- ● Water: 1–2 cups (enough to blend pulp into a thick slurry).
- ● Mold & deckle (or DIY screen): A simple wooden frame (like a picture frame) with fine mesh or window screen stapled to it.
- ● Blender or food processor: To break down paper into pulp.
- ● Rolling pin or smooth surface: For pressing out excess water.
- ● Baking sheet or tray: Lined with parchment paper or a cloth towel.
- ● Natural dyes (e.g., turmeric, beet juice) for colored paper.
- ● Essential oils (like lavender or citrus) for scent and pest resistance.
- ● Decorative elements (dried flowers, glitter, or pressed leaves) for embellishments.
- ● Spray bottle with water to keep pulp moist during drying.
Step-by-Step instructions for crafting plantable seed paper
Here's how to transform your old notes into blooming wildflower gardens with just a few simple materials.
🌱 Step 1: Prepare Your Wildflower Seeds and Water Mixture
Start by selecting 4 wildflower seed varieties—I like a mix of cosmos, bachelor's buttons, and marigolds for vibrant color. Combine 1 tablespoon of seeds with 1 cup of water in a bowl and let it soak for 10 minutes. This ensures even seed distribution later. While the seeds soak, tear 4 sheets of recycled paper into 2-inch strips—the thinner, the better for even moisture absorption.
Real talk: don't use glossy or coated paper. The ink and coatings can inhibit germination, and you'll end up with blank paper instead of blooms. Save your plain printer paper or notebook scraps for this project. Once your paper strips are ready, lay them flat on a clean, dry surface—this prevents curling when you add the wet mixture.
💧 Step 2: Create the Seed Paper Mixture
In a separate bowl, blend 1 cup of water with 1 tablespoon of psyllium husk powder—this is the secret binder that holds everything together. Stir vigorously until the mixture thickens into a gel-like consistency, similar to pudding. The psyllium will create a strong, flexible sheet when dry. Add your soaked seeds to this mixture and stir gently to distribute them evenly.
Here's the thing—psyllium reacts quickly, so work fast once you mix it. If the mixture becomes too thick, add a splash more water. You want it to coat a spoon like thick syrup but still flow smoothly. Spread one of your paper strips onto a flat surface and pour half the seed mixture over it, using a spoon to spread it evenly into a thin layer. Repeat with the remaining strips and mixture.
☀️ Step 3: Dry and Cure the Seed Paper
Let the seed-coated strips dry completely in a warm, shaded area for 24-48 hours. I like to prop them up slightly with chopsticks or clothespins to prevent curling. The drying process is crucial—if it dries too quickly, the paper may crack. If it takes too long, mold can develop. You'll know it's ready when the paper feels stiff and the edges no longer bend easily.
Once dry, carefully peel the seed paper off the surface. If any pieces stick stubbornly, gently lift with your fingers rather than tearing. Store your finished seed papers in a cool, dry place until ready to plant. I keep mine in a sealed envelope until spring planting season. The seeds remain viable for up to 1 year when stored properly—just don't let them get damp again before planting.
🌿 Step 4: Plant and Watch Your Wildflowers Bloom
When you're ready to plant, simply place your seed paper directly onto prepared soil in your garden bed or container. Press it gently into the earth and water thoroughly. The paper will biodegrade naturally, releasing the seeds as it breaks down. For best results, plant in full sun with well-draining soil—wildflowers thrive where native plants grow.
Keep the soil consistently moist for the first 2-3 weeks until you see green sprouts pushing through. You'll notice tiny shoots within 7-14 days depending on your climate. Once established, your wildflowers will bloom beautifully throughout the growing season, attracting pollinators to your garden. The best part? You've given new life to something that would have otherwise been waste.
Tips & tricks for perfect plantable seed paper
Common pitfalls—and how to sidestep every one when creating your eco-friendly garden art.
Seed Selection Matters: The 10-minute soak in Step 1 ensures your seeds stay evenly distributed, but not all wildflower mixes work equally well. For best germination, choose seeds labeled "wildflower blend" or specific varieties like cosmos and bachelor's buttons—these are proven performers. Avoid seeds with additives or coatings, as these can inhibit sprouting. If you're using heirloom seeds, test a small batch first to confirm viability before committing to your full project.
Psyllium's Secret: In Step 2, the psyllium husk powder transforms your mixture into a cohesive sheet, but timing is everything. Work quickly once you add the psyllium to water—it thickens within minutes. If your mixture becomes too stiff, add just a splash of water to restore that pudding-like consistency. Spread the mixture thinly but evenly; thicker layers may crack during drying. I've found that using a silicone spatula helps distribute the mixture without tearing the paper strips.
Drying Wisdom: The 24-48 hour drying period in Step 3 is where many projects fail. To prevent cracking, create airflow by propping your seed papers with chopsticks or clothespins, but avoid direct sunlight which can cause uneven drying. A warm, shaded spot like a covered porch works perfectly. If humidity is high, consider using a small fan on low to speed up the process. Test for readiness by gently flexing the edge—it should bend slightly but not feel floppy.
Planting Precision: When it's time to plant in Step 4, place your seed paper directly on prepared soil and press gently. For containers, use a small amount of soil to weigh down the edges and prevent wind from blowing it away. Water thoroughly but avoid oversaturating—wildflowers prefer well-draining soil. If planting in a garden bed, consider creating small trenches to nestle the seed paper, which helps maintain consistent soil contact as it degrades.
Pro Tips for Make Plantable Seed Paper
- Common pitfalls—and how to sidestep every one when creating your eco-friendly garden art.
- Seed Selection Matters: The 10-minute soak in Step 1 ensures your seeds stay evenly distributed, but not all wildflower mixes work equally well.
- Psyllium's Secret: In Step 2, the psyllium husk powder transforms your mixture into a cohesive sheet, but timing is everything.
Frequently asked questions
Got questions about crafting your own plantable seed paper? You’re not alone—this eco-friendly project sparks curiosity! Here are answers to the most common queries to help you grow wildflowers from your notes with confidence.
How long does it take for seeds embedded in paper to sprout?
Seed paper typically sprouts within 7–21 days, depending on seed type, moisture, and sunlight. Wildflower seeds often germinate faster (1–2 weeks) if kept damp and warm. Test a small batch first to track your specific mix’s timeline!
Can I use any type of paper to make seed paper?
No—only uncoated, acid-free paper works best (like recycled printer paper or cardstock). Avoid glossy or wax-coated papers, as they can inhibit germination. For extra durability, blend paper pulp with a bit of flour or cornstarch as a binder.
What’s the best way to store seed paper before planting?
Keep your seed paper in a cool, dry place (like a sealed envelope) until ready to plant. Avoid humidity or direct sunlight, which can cause mold or premature sprouting. Plant within 3–6 months for best results—seeds lose viability over time!
Will the paper decompose completely after planting?
Yes! Seed paper is designed to biodegrade naturally as roots grow. Within a few weeks, the paper will break down, leaving seeds to thrive. For faster decomposition, bury it slightly (½ inch deep) or place it in moist soil.
What if my seed paper doesn’t hold together?
If your mixture feels too crumbly, add 1–2 tablespoons of flour or cornstarch per cup of pulp. For extra strength, let the paper dry flat under a heavy book for 24 hours. If it still tears, try a thinner layer or a different paper blend.
Wrapping up and next steps
Creating your own plantable seed paper is a rewarding way to blend creativity with eco-friendly gardening! 🌱 With just a few simple materials—like wildflower seeds, water, and paper—you can turn everyday notes into living decorations that bloom into beauty.
Whether you’re crafting gifts, reducing waste, or adding a touch of nature to your space, this project is both fun and meaningful.
Now that you’re armed with the know-how, why not try it today? Grab some seeds, get creative, and watch your handmade paper grow into vibrant wildflowers. Share your blooming masterpieces with friends or plant them in your garden—every seed makes a difference! 🌸