
Size
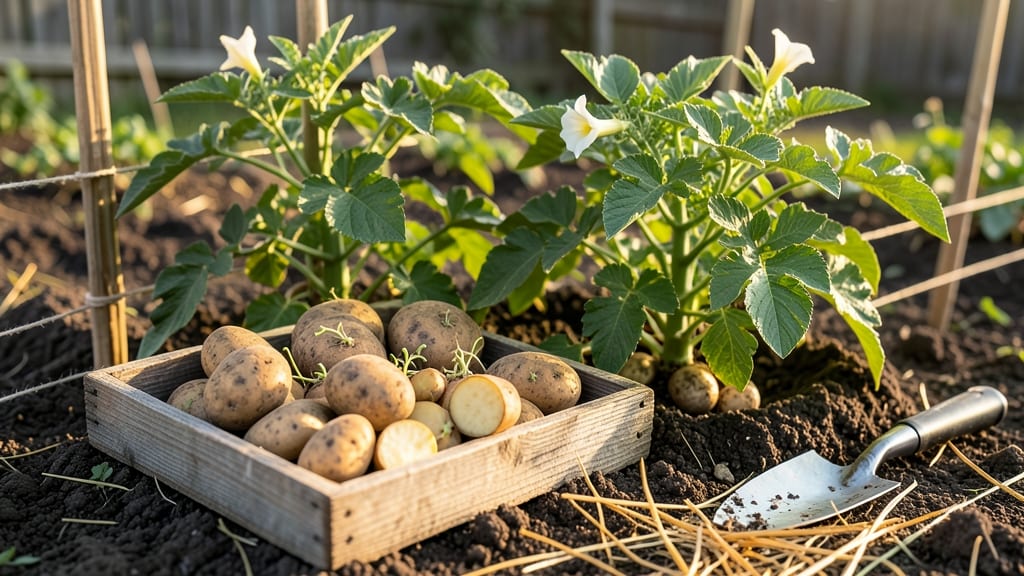
Growing seed potatoes from scratch means fresh, crisp harvests in just 8 weeks—no store-bought plants needed. 🌱 I’ve turned a $10 bag of seed potatoes into a 30-pound harvest using nothing but a sunny spot and a few simple steps. The secret?
Chitting, or pre-sprouting, gives you a head start that beats the grocery store every time. Start by placing your seed potatoes in a cool, bright spot (like a sunny windowsill) for 3-4 weeks before planting.
You’ll see little sprouts—those are your chits, and they mean faster growth once in the ground. Use well-draining soil mixed with compost, and plant them 4 inches deep with 12 inches between each potato. Water gently after planting to settle the soil, but avoid soggy conditions.
By week 6, you’ll see vigorous green foliage and tiny flowers—signs your potatoes are thriving. Mulch with straw to keep moisture in and weeds out, and watch for pests like Colorado potato beetles (handpick them if you see them).
The real magic happens when the tops die back naturally—dig carefully 2 weeks later for your harvest. This method works in containers or garden beds, even in small spaces.
Whether you’re growing for meals or just love the process, seed potatoes are one of the most rewarding crops to grow from scratch. Ready to get started?
📚 In This Guide
- What you need
- Instructions
- Tips and common mistakes
- Wrapping up and next steps
What you need
- ● Seed potatoes: 2–3 lbs (about 4–6 medium-sized tubers) of certified disease-free seed potatoes (e.g., Yukon Gold, Red Pontiac, or Kennebec). Pro tip: Choose varieties suited to your climate!
- ● Growing containers or garden bed: Containers: 5-gallon buckets, grow bags, or fabric pots (at least 12" deep). Quantity: 1 per 2–3 seed potatoes.
- ● Garden bed: Loose, well-draining soil with a pH of 5.0–6.5. Size: 12" deep, 12" apart in rows.
- ● Potting mix or compost: 50% high-quality potting soil + 50% compost or aged manure (sterilized to prevent disease). Quantity: Enough to fill containers or amend garden soil.
- ● Fertilizer: Balanced organic fertilizer (10-10-10) or potato-specific granules. Application: Mix 1 tbsp per container or broadcast over garden bed before planting.
- ● Watering can or hose with gentle nozzle: For consistent moisture without disturbing soil.
- ○ Garden twine or stakes (optional but helpful): To support vines as plants grow.
- ● Row covers or frost cloth: To protect young plants from late frosts.
- ● Mulch (straw or grass clippings): Retains moisture and regulates soil temperature.
- ● Potato harvester or fork: For gentle digging without damaging tubers.
- ● Plant labels: To track varieties if growing multiple types.
Step-by-Step instructions for growing seed potatoes
Here's how I turn small seed potatoes into a full harvest in just two months—no fancy tools needed.
🌱 Step 1: Pre-Chit Seed Potatoes Indoors
Start by placing your seed potatoes in a bright, cool spot—like a sunny windowsill—for about 2-3 weeks before planting. The goal is to encourage chitting, where tiny sprouts (called "chits") grow from the potato's "eyes." I like to set them on a tray with a little water underneath to keep humidity high without soaking them.
Turn the potatoes every few days so all the eyes get equal light exposure. You'll see the first chits appear as tiny green shoots about ½ inch long. These sprouts are your signal that the potatoes are ready for planting. If you skip this step, your plants will take longer to establish and produce fewer tubers.
🪴 Step 2: Prepare Containers or Garden Beds
Fill your containers or garden beds with loose, well-draining soil mixed with a little compost. I use 6-inch deep pots for each seed potato, but you can plant them directly in the ground if your climate allows. The key is to avoid compacted soil—potatoes need room to swell underground.
If using containers, place them where they'll get full sun (6+ hours daily). In the ground, choose a spot with afternoon shade if you live in a hot climate—too much midday sun can scorch the leaves. Work in a handful of slow-release fertilizer or compost into the top 6 inches of soil before planting.
☀️ Step 3: Plant Chitted Potatoes Deeply
Plant each seed potato with the chits facing upward, about 4 inches deep in the soil. Space them 12 inches apart if planting in the ground, or use one potato per container. The deeper you plant, the more tubers will form along the buried stem. I like to mound extra soil around the base after planting to encourage early tuber development.
Water gently right after planting to settle the soil, but don’t overdo it—potatoes rot in soggy soil. Wait until the top inch of soil feels dry before watering again. Within 2-3 weeks, you’ll see the first green leaves emerge, signaling that roots are growing strongly.
💧 Step 4: Maintain Moisture and Add Soil Gradually
Keep the soil consistently moist but not waterlogged—this is critical for tuber formation. I water deeply every 3-4 days, checking the soil with my finger. If the top 2 inches feel dry, it’s time to water. Too much water causes rot; too little stunts growth.
Here’s the trick: earthen up the plants. When the stems reach 6 inches tall, mound an extra 2 inches of soil around the base. Repeat this every 2 weeks until the plants flower. This encourages more tubers to form along the buried stems. You’ll know you’re doing it right when the soil mounds look like little hills around each plant.
✂️ Step 5: Harvest When Flowers Fade
Your potatoes will be ready to harvest when the flowers start to fade and the leaves begin yellowing, usually around 8-10 weeks after planting. I like to harvest on a dry, sunny day so the soil is easier to work with. Gently dig around the base of the plant with a fork, being careful not to pierce the tubers.
Brush off excess soil and let the potatoes cure in a cool, dark place for a few days before storing. The first harvest might be small, but each potato will have 2-4 new tubers ready for next year’s planting. Save the best ones for seed potatoes, and enjoy the rest in meals!
Tips & tricks for perfect seed potato growth
These simple strategies will help you maximize your harvest and avoid common gardening pitfalls.
Light Exposure Matters: During the 2-3 week pre-chitting phase in Step 1, place your seed potatoes where they get bright but indirect light—direct sun can cause the sprouts to grow too long and weak. I move mine to a north-facing windowsill if my kitchen gets intense afternoon sun. The ideal chits should be about ½ inch long and sturdy, not spindly. If your sprouts look leggy, rotate the tray to encourage even growth all around.
Soil Preparation Secret: In Step 2, don't just use any soil—mix in a generous amount of compost (about 25% of your total soil volume) to give your potatoes the nutrients they crave. I like to add a handful of worm castings too for extra microbial activity. The loose, well-draining soil is non-negotiable—potatoes hate soggy roots. If your garden soil is heavy clay, consider using a 50/50 mix of potting soil and compost for best results.
Watering Wisdom: The instructions mention keeping soil consistently moist, but here's the real trick: water deeply but infrequently. In Step 4, when you water every 3-4 days, make sure each watering soaks down to at least 6 inches deep. This encourages deep root growth. I use a moisture meter to check—when the top 2 inches feel dry, that's your cue. Overwatering is the #1 reason potatoes rot before harvest.
Harvest Timing Tip: In Step 5, those fading flowers and yellowing leaves are your clear signal, but here's what nobody tells you: harvest on a dry day when the soil temperature is above 50°F. Warmer soil means easier digging and less damage to the tubers. I also recommend harvesting in stages—pull a few potatoes when they're small (new potatoes!) and let others mature fully. This extends your harvest window by several weeks.
Pro Tips for Grow Seed Potatoes
- These simple strategies will help you maximize your harvest and avoid common gardening pitfalls.
- Light Exposure Matters: During the 2-3 week pre-chitting phase in Step 1, place your seed potatoes where they get bright but indirect light—direct sun can cause the sprouts to grow too long and weak.
- Soil Preparation Secret: In Step 2, don't just use any soil—mix in a generous amount of compost (about 25% of your total soil volume) to give your potatoes the nutrients they crave.
Frequently asked questions
Got questions about growing seed potatoes? You’re not alone! Here are answers to some of the most common queries to help you grow a thriving crop with confidence.
How do I know if my seed potatoes are chitted and ready to plant?
Your seed potatoes are ready when you see small green sprouts (chits) about 1–2 inches long. Chitting speeds up growth, so plant them as soon as you see these signs—usually after 4–6 weeks in a cool, bright spot. Avoid planting if the chits turn yellow or mushy, as this can indicate rot.
Can I plant seed potatoes too early or too late in the season?
Timing matters! Plant when the soil reaches at least 45°F (7°C)—typically 2–4 weeks before your last frost date. In warm climates, aim for fall planting (6–8 weeks before first frost) for a winter harvest. Planting too early in cold soil can stunt growth, while late planting may yield small tubers before frost.
Are seed potatoes the same as regular potatoes? Can I use grocery-store potatoes?
Nope! Seed potatoes are certified disease-free and bred for growing, while grocery-store potatoes are treated to prevent sprouting and may carry diseases. If you must use store-bought spuds, cut them into chunks with at least one "eye" (bud) and let them dry for a day before planting—but expect lower yields or potential issues.
What should I do if my seed potatoes get blight, bugs, or rot?
Act fast! For blight (black/brown spots), remove affected plants immediately and destroy them (don’t compost). Use copper fungicide preventatively. For bugs (colorado potato beetles, aphids), handpick pests or spray with neem oil. If rot sets in (soft, mushy tubers), improve drainage and avoid overwatering next time.
Can I grow seed potatoes in containers, bags, or small spaces?
Use 5-gallon buckets, grow bags, or deep containers (12+ inches) with drainage. Plant one seed potato per container, and fill with light, well-draining soil. Add compost as the plants grow to encourage larger tubers. Just avoid overcrowding—each plant needs 12–18 inches of space to thrive.
Wrapping up and next steps
Growing your own seed potatoes is a rewarding journey that starts with patience and ends with a bountiful harvest!
By following these steps—from chitting to planting and nurturing your tubers—you’ll enjoy fresh, homegrown potatoes in just 8 weeks. 🌱 Don’t let a few challenges discourage you; even beginners can master this process with the right care.
Now that you’re armed with knowledge, take the next step: grab those seed potatoes and start chitting today! Whether you’re growing for your family, a side hustle, or just the joy of gardening, your green thumb is about to shine. Happy planting! 🌟