
Propagation
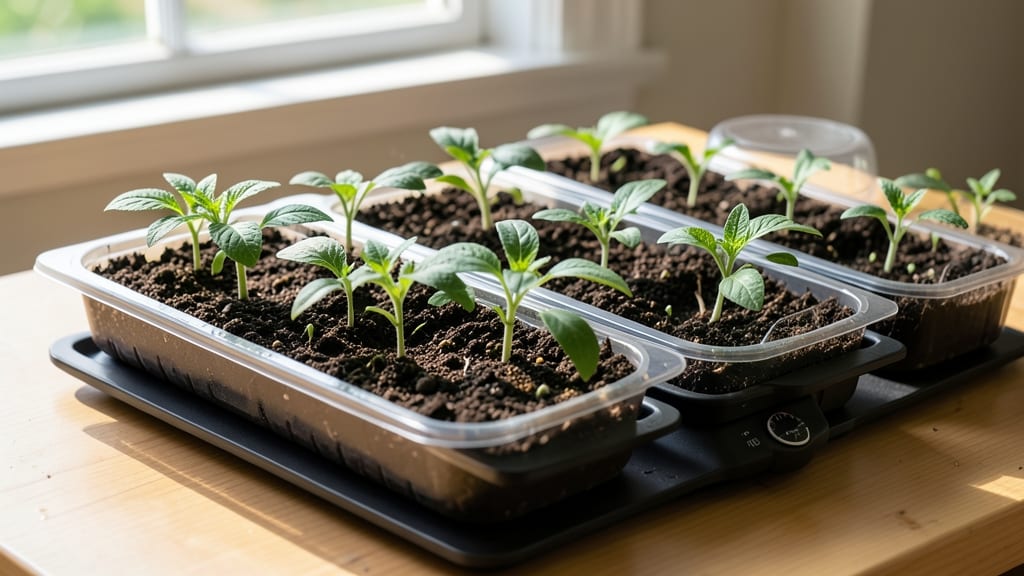
My seed-starting game changed when I discovered heating pads—heat-loving plants like peppers and tomatoes now pop up in half the time instead of waiting weeks. 🌱 The secret isn’t just warmth; it’s mimicking the cozy soil conditions these tropical varieties crave, especially in cool basements or early spring.
You’ll need a basic seed-starting mat (plug into any outlet), a tray or container, and your favorite slow-to-germinate seeds. Set the pad to 75-85°F—too hot, and you’ll fry those seeds; too cool, and you’re back to square one.
I learned this the hard way with my first batch of jalapeños! Within 5-7 days, you’ll see tiny sprouts breaking through soil that’s still cold to the touch outside the pad’s zone. The difference is night-and-day compared to my old method of waiting for spring warmth.
Just don’t let the pad run dry—condensation on the bottom is normal, but soggy seeds aren’t. Perfect for cold climates, early starts, or stubborn seeds like okra and eggplant. Here’s how to set it up without burning your seedlings—or your electricity bill.
📚 In This Guide
- What you need
- Instructions
- Tips and common mistakes
- Wrapping up and next steps
What you need
- ● Heating pad or mat: 1 x Seedling heat mat (10"–12" x 20"–24" for standard trays; 100–150W recommended for consistent warmth).
- ● OR a reusable heat pad (like those for muscle relief—check wattage; 80W+ works for small setups).
- ● Seed-starting trays: 1–2 x 10²⁰ trays (or equivalent) with bottom heat compatibility (avoid plastic without drainage).
- ● Growing medium: 2–4 cups of seed-starting mix (sterilized, lightweight, and peat/coir-based for drainage).
- ● Seeds: Heat-loving varieties (e.g., peppers, tomatoes, basil—check seed packets for specific heat needs!).
- ● Humidity dome or plastic wrap: 1 x clear plastic lid (or DIY with plastic wrap) to retain moisture.
- ● Thermometer: 1 x digital soil thermometer (to monitor 70–90°F range; essential for accuracy!).
- ● Power source: Access to a wall outlet or USB-powered pad (if battery-operated).
- ● 1 x Heat-resistant tray (to elevate the mat for airflow).
- ● 1 x Grow light (12–16 hrs/day once seeds sprout).
- ● 1 x Fertilizer spray (balanced 5-5-5 or fish emulsion for post-germination boosts).
- ● DIY alternative: A laptop or phone (with a low heat setting) wrapped in a towel—not ideal but works in a pinch!
Step-by-step guide to using heating pads for faster seed germination
Here's how I boost germination speed for heat-loving plants using a simple heating pad setup.
🌱 Step 1: Select the Right Heating Pad and Set Up Your Seed Trays
Choose a seedling heat mat designed for germination—these maintain consistent 75-85°F soil temperatures. I prefer mats with adjustable thermostats so I can fine-tune for specific seeds. Place your seed trays directly on the mat, ensuring the entire seed area makes contact with the warm surface. For larger setups, I stack trays in rows with 1-inch spacing between them to allow airflow while still maintaining even heat distribution.
Here's the thing—most heat mats are only 12-18 inches wide, so if you're starting multiple varieties, you'll need to stagger your trays or use multiple mats. I always position the trays with the longest side parallel to the mat's length to maximize coverage. Never place anything metal on the mat (like aluminum trays), as it can create hot spots that damage delicate seedlings.
💧 Step 2: Prepare Your Seed Starting Mix and Moisten Evenly
Fill your trays with sterile seed starting mix (never garden soil—it's too dense and may harbor pathogens). Moisten the mix until it's evenly damp but not soggy—think of a wrung-out sponge. I use a spray bottle for precision, avoiding heavy watering that can displace seeds. The key is consistent moisture without waterlogging, which creates anaerobic conditions that prevent germination.
Gently press the soil down so it's firm but not compacted. You want roots to have good contact with the warm mat. Here's where it gets fun—watch the condensation form on the underside of your humidity dome or plastic wrap. That's your visual cue that moisture is perfectly balanced for germination. If you see water beading on the soil surface, you've overdone it—let it dry slightly before proceeding.
☀️ Step 3: Sow Seeds and Cover for Optimal Germination Conditions
Sow your seeds at the proper depth—typically twice the seed diameter—using the quantities from your packet. I like to tap the seed packet gently to release one seed at a time, planting 1-2 seeds per cell (you'll thin later). Cover lightly with additional mix, then mist the surface again until evenly moist. The warmth from the mat will accelerate the germination process, but you still need humidity to prevent the soil from drying out.
Cover the trays with a clear plastic dome or humidity tent to trap warmth and moisture. This creates a mini greenhouse effect that works perfectly with the heat mat. Most seeds will germinate within 5-10 days when using this method—peppers and tomatoes, in particular, respond dramatically to the warmth. I set a reminder to check daily for sprouts, especially with slower germinators like parsley.
⏰ Step 4: Monitor Temperature and Adjust as Needed
Use a soil thermometer to verify your mat is maintaining 75-85°F—this is critical for heat-loving plants. Some seeds (like peppers) need the upper end of this range, while others (like lettuce) prefer the lower end. If your mat runs too hot, reduce the setting or place a thin layer of paper towel between the mat and trays to act as insulation. You'll see condensation form on the underside of the dome as a visual cue that the environment is properly humid.
Once 50% of seeds have sprouted, remove the humidity dome immediately. Trapped moisture around new seedlings invites damping-off disease, which will collapse stems overnight. At this stage, I switch to bottom-watering—placing the trays in a shallow tray of water for 10-15 minutes—to keep roots moist without wetting the leaves. The heat mat can stay on until seedlings develop their first true leaves, then you can reduce the temperature slightly to prevent overgrowth.
✂️ Step 5: Transition to Light and Maintain Even Growth
The instant seedlings break through the soil, move them to bright, indirect light (a grow light positioned 2-4 inches above is ideal). Without sufficient light, seedlings will stretch toward the source (called "legginess"), and the heat mat alone won't compensate. You'll know your light is right when seedlings grow compact and dark green, with leaves spaced 1 inch apart. If stems look thin and pale with leaves spaced far apart, your light is too far away.
Keep the heat mat on for 7-10 more days after germination to support early root development. Then, gradually reduce the temperature to room level over 3-5 days to harden off the seedlings. I like to place a thermometer near the trays to monitor ambient temperatures—most seedlings do well at 65-75°F once they've established their first true leaves. Real talk: this is where many gardeners make the mistake of keeping the heat on too long, resulting in weak, spindly plants that struggle when transplanted.
Tips & tricks for perfect seed germination with heating pads
Here's how to maximize your heat mat's potential without common pitfalls that slow down germination.
Heat Mat Coverage: Position your trays so the entire seed area touches the mat—uneven contact creates cold spots that delay sprouting. For wide trays, I cut cardboard inserts to elevate edges, ensuring consistent 75-85°F across all seeds. This is especially critical for pepper seeds, which need that upper-range warmth to break dormancy.
Visual Moisture Check: The condensation test in Step 2 is your secret weapon. When the humidity dome forms droplets on the underside, you've hit the perfect balance. Too much water beading on the soil surface? Let it dry slightly—overwatering creates anaerobic pockets that suffocate seeds. I've lost entire trays of basil seeds this way before learning to trust the dome's condensation as my guide.
Temperature Fine-Tuning: Use your soil thermometer to adjust for specific seeds. Tomatoes thrive at 80-85°F, while lettuce prefers 70-75°F. If your mat runs hotter than 85°F, place a paper towel barrier between the mat and trays—it acts as insulation without blocking heat completely. I keep a small notebook to track which seeds prefer which temps for future reference.
Light Transition Strategy: The moment seedlings emerge, move them to bright indirect light immediately. I use a grow light on a timer (14-16 hours/day) to prevent legginess. Place the light 2-4 inches above—any higher and seedlings stretch; any lower and they burn. This is where most gardeners go wrong after the germination phase, thinking the heat mat alone will compensate.
Pro Tips for Heating Pads For Seed Starting
- Here's how to maximize your heat mat's potential without common pitfalls that slow down germination.
- Heat Mat Coverage: Position your trays so the entire seed area touches the mat—uneven contact creates cold spots that delay sprouting.
- Visual Moisture Check: The condensation test in Step 2 is your secret weapon.
Frequently asked questions
Got questions about using heating pads for seed starting?
Here are some of the most common ones—plus quick, actionable answers to get your seeds sprouting faster!
What temperature should I set my heating pad for seed starting?
Most heat-loving plants (like peppers, tomatoes, and herbs) thrive between 70–85°F (21–29°C). Check the seed packet for specifics—some tropical varieties may need the higher end of the range. Use a thermometer to monitor soil temp (not air temp) for accuracy!
How long should I keep seeds on a heating pad?
Once seeds sprout, remove them immediately—most seedlings prefer cooler temps (65–75°F) to prevent legginess. For pre-germination (if needed), use heat for 5–10 days max. Overheating can stress seeds or cause mold. Pro tip: Set a timer to avoid forgetting!
Can I use a heating pad without a seedling mat?
Yes! If you don’t have a mat, place the heating pad under a tray or container with a thin layer of soil (or a damp paper towel) to diffuse heat evenly. Avoid direct contact with seeds—use a seedling tray or egg cartons as a buffer. Just monitor closely to prevent hot spots.
What if my seeds aren’t germinating even with heat?
Check these first:
- Moisture: Soil should stay damp (not soggy). Mist lightly if dry.
- Depth: Most seeds need 2x their width of coverage—don’t bury too deep!
- Freshness: Old seeds (over 1 year) may need extra warmth or a soak in warm water for 24 hours.
- Light: Some seeds (like lettuce) need light to germinate—cover trays with plastic wrap until sprouts appear.
Are heating pads worth it for small-scale seed starting?
For heat-loving plants or slow germinators, they’re a game-changer! If you’re starting just a few seeds, a DIY alternative (like a heated cable under a tray) can work. But for serious gardeners or tropical plants, the $20–$40 investment pays off with faster, stronger seedlings. Pro tip: Reuse pads for multiple growing seasons!
Wrapping up and next steps
Ready to unlock the secret to faster, healthier starts for your heat-loving plants? 🌱✨ Heating pads for seed starting are a game-changer—boosting germination rates, ensuring consistent warmth, and giving delicate seedlings the perfect head start.
With the right setup and a little patience, you’ll be well on your way to a thriving garden in no time.
Now that you’re armed with the knowledge, take the next step—pick your favorite heat-loving varieties, gather your supplies, and start experimenting! Whether you’re a seasoned gardener or just beginning, every seed you plant is a step toward a greener, more vibrant future. Happy growing! 🌿💚