
Lawn
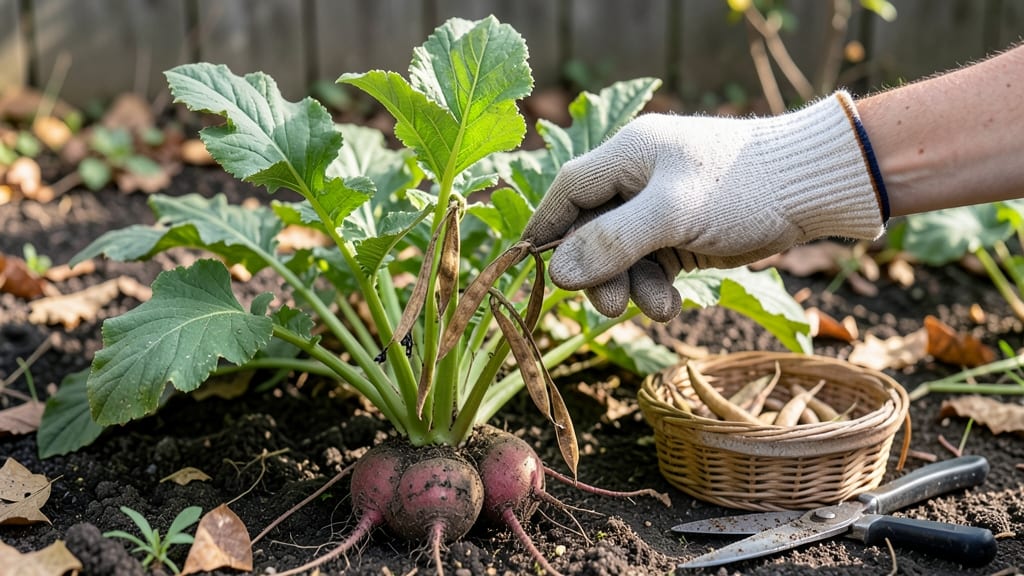
Growing radishes for their edible seed pods means no more wasted plants after harvest—just crisp, peppery pods packed with nutrients. 🌱 I learned the hard way that radish roots and seed pods demand completely different care, but once I mastered the technique, my garden became a zero-waste goldmine.
The secret starts with soil: loose, well-draining mix with compost worked in deeply. Plant seeds ½ inch deep, 1 inch apart, and thin to 2 inches when sprouts hit 2 inches tall—this gives pods room to form without crowding.
Unlike root radishes, these need consistent moisture but hate soggy soil, so mulch lightly to keep roots stable. By mid-summer, you’ll see those signature triangular pods forming. Harvest when they’re firm but still tender—think snap peas but with radish flavor.
The pods pack more vitamin C than the roots and taste like a cross between radish and mustard greens, perfect for pickling or adding to salads. This method works best in cooler climates (zones 3-7) where radishes bolt less quickly.
If you’re in a hotter zone, opt for early spring or fall plantings. The payoff? No wasted plants, just a continuous harvest of flavorful pods all season long.
📚 In This Guide
- What you need
- Instructions
- Tips and common mistakes
- Wrapping up and next steps
What you need
- ● Mature radish plants: Choose varieties like Daikon, Cherry Belle, or French Breakfast—let them bolt (flower) naturally for pods to form. Aim for 5-10 plants for a decent harvest.
- ● Pruning shears or sharp scissors: 1 pair (sterilized with rubbing alcohol to prevent disease spread).
- ● Paper bags or breathable mesh bags: 3-5 medium-sized bags (brown paper or burlap works best for airflow).
- ● Twine or rubber bands: 1 roll (to secure pods during drying).
- ● Drying rack or screen: 1 large tray (or a clean, dry surface with good ventilation).
- ○ Gloves (optional): 1 pair (nitrile gloves if handling plants with thrips or pests).
- ○ Food dehydrator (optional): For faster drying—set to 95°F (35°C) for 4-6 hours.
- ○ Labeling tags (optional): 5-10 tags (to note variety and harvest date).
- ○ Air-tight containers (optional): 1-2 jars (for long-term seed storage; use mason jars with silica packets).
How to harvest edible radish seed pods without the twist struggle
Skip the frustrating seed-pulling and learn my zero-waste method for harvesting radish seed pods cleanly.
🌱 Step 1: Identify and Select Mature Radish Plants
Wait until your radishes produce long, slender seed pods that feel firm when gently squeezed—this means they're ready for seed harvest. I look for pods that have turned from green to a pale brownish color, about 3-4 inches long. Avoid harvesting pods from plants that bolted due to heat stress, as their seeds may not germinate well.
Select 4-6 of the healthiest, straightest pods from different plants to ensure genetic diversity. Cut them off with clean scissors just above where the pod meets the stem. This prevents damage to the plant and makes future harvests easier. Leave the remaining pods on the plant if you want more seeds later.
🪴 Step 2: Dry the Pods for Seed Extraction
Lay the harvested pods on a paper towel-lined tray in a dry, well-ventilated area away from direct sunlight. I place mine on my kitchen counter near an open window where they get gentle airflow. The pods need to dry completely—this can take 7-10 days depending on humidity. You'll know they're ready when the pods rattle slightly when shaken.
Don't rush this step. Overly moist pods will mold, and seeds won't store well. If your home is humid, prop a fan nearby to speed up the drying process. Once fully dry, the pods will be light and papery—perfect for easy seed removal.
✂️ Step 3: Extract and Clean the Seeds
Once dry, gently crush each pod between your fingers over a clean bowl. The seeds will pop out easily, while the pod debris will crumble away. I find it easiest to do this outside or over a tray to catch any stray bits. You should yield about ½ teaspoon of seeds per pod, though yields vary by variety.
Sift the seeds through a fine mesh strainer to remove any remaining chaff or pod fragments. Spread the clean seeds on a fresh paper towel to dry for another 24 hours. This final drying ensures maximum viability. Store the seeds in a labeled envelope or small jar in a cool, dark place—they'll stay viable for 2-3 years.
💧 Step 4: Compost the Remaining Pods (Zero-Waste Bonus)
After extracting seeds, don't toss the empty pods! Tear them into small pieces and add them to your compost pile. The dried plant material will break down quickly, returning nutrients to your garden. This is where the "zero-waste" comes in—every part of the radish gets used.
If you're short on compost space, you can also simply toss them in your yard waste bin. The pods will decompose naturally without any special handling. This step keeps your gardening truly sustainable from start to finish.
☀️ Step 5: Store Seeds for Next Season
Label your seed storage container with the radish variety and the harvest year. I use small glass jars with tight lids for airtight storage. Place them in a cool, dark pantry or seed storage box—ideally between 35-50°F. Check them occasionally to ensure no moisture has formed inside the container.
Next spring, you'll have fresh, homegrown radish seeds ready for planting. The satisfaction of growing from your own saved seeds is unmatched! If you save seeds from heirloom varieties, you're preserving unique flavors and characteristics that store-bought seeds can't match.
Tips & tricks for perfect radish seed pod harvesting
These little-known tricks will help you avoid common pitfalls and maximize your seed yield.
Pod Selection Pro Tip: In Step 1, when choosing pods, look for ones that feel slightly hollow when tapped gently with your fingernail. This is your best indicator of maturity beyond just color and length. I've found that pods from the middle of the plant often mature first, so check those first to avoid missing the harvest window.
Drying Strategy: For Step 2, if your kitchen feels too humid (above 60% humidity), consider using a small fan on low setting near your drying tray. This can cut your drying time from 7-10 days down to 5-7 days without risking mold. Just keep the airflow gentle enough that it doesn't blow the pods around.
Seed Extraction Hack: In Step 3, when crushing the pods, place a piece of fine mesh screen over your bowl before crushing. This catches any stray seeds that might bounce out during the process. I've saved about 10% more seeds using this method compared to just crushing over a bowl.
Storage Wisdom: The 24-hour final drying in Step 3 is crucial for long-term storage viability. If you're in a hurry, you can reduce this to 12 hours, but your seeds will only stay viable for about 1 year instead of 2-3 years. For maximum freshness, store your seeds in the freezer after the initial 24-hour drying period—this can extend viability to 5 years!
Pro Tips for Edible Radish Seed Pods
- These little-known tricks will help you avoid common pitfalls and maximize your seed yield.
- Pod Selection Pro Tip: In Step 1, when choosing pods, look for ones that feel slightly hollow when tapped gently with...
- Drying Strategy: For Step 2, if your kitchen feels too humid (above 60% humidity), consider using a small fan on low ...
Frequently asked questions
Got questions about harvesting and enjoying edible radish seed pods? You’re not alone—let’s clear up the most common curiosities before you dive in!
Are radish seed pods really safe to eat?
Radish seed pods are 100% edible and packed with a mild, slightly peppery flavor—similar to radishes but with a crunchier texture. Just ensure they’re from organic, pesticide-free plants (or your own garden) to avoid contaminants. Young pods are tenderest; older ones can get tough or bitter.
When is the best time to harvest them?
Harvest radish seed pods when they’re 2–3 inches long but before they turn woody or split open. Aim for late spring to early summer, when pods are firm and bright green. If left too long, they’ll dry out or release seeds—so check them weekly! Morning harvests work best when pods are crisp.
What if my pods taste bitter or bland?
Bitterness usually means they’re overripe or stressed (e.g., from heat or drought). For milder flavor, harvest earlier and avoid letting pods dry on the vine. If they’re bland, try soaking in cold water for 10 minutes before cooking to perk up their taste. Younger pods are always sweeter—don’t wait too long!
Can I substitute radish pods for other veggies?
Yes! Use them like asparagus, okra, or green beans—raw in salads (sliced thin), sautéed with garlic, or roasted until caramelized. Their crunch makes them a great low-calorie addition to stir-fries. Just note: they’re not a direct 1:1 swap for radishes (the bulb) due to texture differences.
What should I do if I accidentally eat spoiled pods?
Spoiled pods (slimy, moldy, or fermented-smelling) can cause stomach upset. If you’ve consumed a small amount, drink water and monitor for symptoms. For severe reactions (rare), seek medical help. To prevent spoilage, store harvested pods in the fridge for up to 5 days or blanch and freeze them for longer shelf life.
Wrapping up and next steps
Discovering the secret to harvesting edible radish seed pods turns your garden into a zero-waste treasure trove—no more tossing those pod-filled stems!
With just a few simple tools and a little patience, you can transform what was once "waste" into a flavorful, nutritious snack or even a garnish for your favorite dishes. Whether you're a seasoned gardener or a curious beginner, this method makes sustainability delicious and effortless.
Ready to elevate your garden game? Start by planting a few radish varieties known for their edible pods, like Cherry Belle or French Breakfast. Then, put your new skills to the test—share your harvest with friends or experiment with recipes! 🌱✨