
Lawn
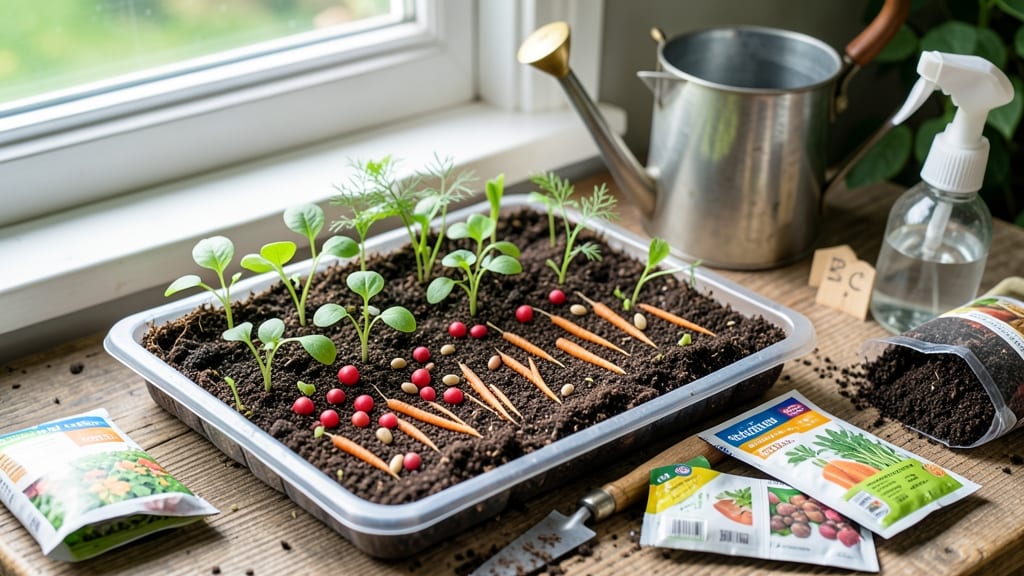
Direct seed planting transforms bare patches into lush lawns without the hassle of sod. 🌱 I’ve used this no-dig method for years—skipping tilling saves time, preserves soil health, and produces grass that outlasts store-bought rolls. The secret lies in soil prep, seed choice, and consistent moisture, not brute force. Most people overlook soil temperature and moisture balance, which is why seeds fail to sprout. A simple 10-minute test—press your finger into the soil—tells you if it’s ready. Too dry? Water deeply before seeding. Too wet? Wait a week. The right conditions mean germination within 7-14 days, not weeks of guesswork. You’ll end up with a thicker, more resilient lawn that resists weeds and drought better than sod. No more patchy repairs or dead spots—just even, vibrant grass that stays green through summer heat. The method works for cool-season grasses like Kentucky bluegrass and fine fescue, as well as warm-season options like Bermuda. For best results, seed in early fall or spring when weeds are dormant and temperatures are mild. Avoid seeding in peak summer heat or freezing conditions. With this approach, even beginners achieve professional-quality lawns without the backbreaking work.
📚 In This Guide
- What you need
- Instructions
- Tips and common mistakes
- Wrapping up and next steps
What you need
- ● High-quality grass seed: Choose a blend suited to your climate (e.g., tall fescue for cool seasons, bermudagrass for warm). 10–20 lbs per 500 sq ft (check seed bag for exact coverage rates).
- ● Lawn fertilizer: A starter fertilizer (10-10-10 or 12-12-12 NPK ratio) to kickstart root growth. Apply ~1 lb per 100 sq ft.
- ● Topsoil or compost: ¼–½ inch layer to improve seed-to-soil contact. Opt for organic matter-rich soil for best results.
- ● Rake: A bow rake with flexible tines (for leveling soil) or a stiff-bristle rake (for breaking up clumps).
- ● Water source: A hose with a sprinkler head or garden sprayer (fine mist setting).
- ● Mulch or straw: Lightweight, seed-safe mulch (e.g., straw or peat moss) to retain moisture. ¼ inch layer max.
- ○ Broadcast spreader: For even seed distribution (optional but highly recommended for large areas).
- ● Soil tester kit: To check pH (ideal: 6.0–7.0) before planting.
- ○ Lawn roller (lightweight): 50–100 lbs to press seed into soil (optional but helps germination).
- ● Weed barrier fabric: If your lawn has persistent weeds, lay down biodegradable fabric before seeding.
- ● Garden kneeler/pad: For comfort during prep work!
Direct seed planting: Step-by-Step no-dig Technique
This method skips tilling entirely—here’s how to plant seeds directly into undisturbed soil for healthier roots and less work.
🌱 Step 1: Test and Prepare the Soil Surface
Begin by testing your soil’s readiness. Press your finger 1-2 inches deep—if the soil feels dry and crumbles easily, it’s ready. If it’s compacted or overly wet, wait until it drains better. I like to rake the surface lightly with a stiff-bristled leaf rake to create ¼-inch furrows in a grid pattern, about 6-12 inches apart depending on your seed spacing needs.
This step is critical because no-dig planting relies on undisturbed soil structure. Avoid digging or turning the soil—you’re working with what’s already there. If you notice weeds sprouting, pull them now before seeding. The goal is a smooth, level surface with just enough texture to catch seeds.
💧 Step 2: Spread Seeds Evenly in the Furrows
Scatter seeds sparingly—most packets recommend ⅓ to ½ the usual rate for direct seeding. I use a small hand-held spreader or simply shake seeds from the packet while walking slowly. For larger seeds like beans, I plant them 1 inch deep and 2-3 inches apart. For tiny seeds like grass or carrots, I press them just below the soil surface—no deeper than ¼ inch—so they get enough light to germinate.
Here’s the thing—overplanting leads to weak, crowded seedlings that compete for nutrients. Instead, aim for even spacing and thin later. After seeding, lightly cover with a thin layer of soil or compost using the back of a rake. This keeps seeds in place while protecting them from birds and wind.
☀️ Step 3: Water Gently and Maintain Moisture
Water immediately after planting with a fine-mist spray nozzle or gentle rain setting on your hose. The soil should feel moist but not soggy—like a damp sponge. I avoid soaking the area because heavy water can wash seeds deeper than intended. For the first 7-10 days, keep the soil consistently moist by watering early in the morning to reduce evaporation.
Watch for first true leaves (not the initial seed leaves) as your signal that germination is working. If the soil surface dries out, seeds may not sprout. Mulch lightly with straw or shredded leaves (¼ inch thick) to retain moisture without smothering seedlings. This step is where most beginners fail—consistent moisture is non-negotiable.
✂️ Step 4: Thin Seedlings for Stronger Growth
Once seedlings reach 2-3 inches tall and have 2-3 sets of true leaves, it’s time to thin. Use sharp scissors or your fingers to snip or pull seedlings at the base, leaving only the strongest, most vigorous plants spaced according to the seed packet. For example, carrots should be 2-3 inches apart, while lettuce can handle 6-12 inches between plants.
Don’t skip thinning—crowded seedlings fight for sunlight and nutrients, leading to weak stems and poor yield. I like to harvest the thinned seedlings as microgreens for salads. After thinning, water deeply to help remaining plants establish roots. This is also the perfect time to add a light layer of compost around the base of each plant to boost growth.
🪴 Step 5: Monitor and Protect New Growth
Keep an eye out for pests like slugs or cutworms, especially in damp conditions. I place diatomaceous earth or row covers around vulnerable seedlings if needed. Weeds can also compete with young plants, so pull them by hand as they appear. For larger plants like tomatoes or peppers, consider staking or trellising early to support their growth without disturbing roots.
Adjust watering as plants mature—most need 1 inch of water per week, but check the soil 1 inch deep before watering. If it’s dry, water deeply; if it’s still moist, wait. This method builds soil health over time, so resist the urge to fertilize heavily. Instead, let the natural soil ecosystem do the work—you’ll see stronger, more resilient plants with minimal effort.
Tips & tricks for perfect no-dig seed planting
These simple but game-changing techniques will help you achieve lush, healthy growth without the backbreaking work of traditional tilling.
Soil Testing Trick: The finger test in Step 1 is your best friend—press firmly, but don't force it. If the soil resists or sticks to your finger, it's not ready. Pro tip: Test at the same time each day for consistency, as soil moisture fluctuates dramatically between morning and afternoon. I've ruined multiple plantings by rushing this step when the ground felt dry in the morning but was actually still too damp from overnight dew.
Seed Spacing Secret: When creating your ¼-inch furrows in Step 1, use a straight piece of wood or a level to ensure they're perfectly straight. This makes seed distribution in Step 2 much easier and prevents uneven germination. For tiny seeds like clover or fescue, I mix them with a little sand first—it helps them spread more evenly and prevents clumping. Remember, those ⅓ to ½ rates on seed packets are non-negotiable for direct seeding success.
Watering Wisdom: That first 7-10 days of consistent moisture in Step 3 is where most gardeners fail. Here's what I do: Set up a simple drip irrigation system or place a shallow tray of water nearby to check moisture levels daily. The soil should feel like a wrung-out sponge—if it crumbles when you squeeze it, you need more water. Morning watering is crucial because it reduces evaporation and gives plants a head start before the heat of the day.
Thinning Technique: When thinning in Step 4, I always work on a cloudy day or in the early morning when plants are most hydrated. This makes the process gentler on the remaining seedlings. Use clean, sharp scissors to cut seedlings at the base rather than pulling—this reduces root disturbance. And here's a bonus: Save those thinned seedlings! They make excellent microgreens for salads or garnishes, giving you free edible harvests while improving your main crop's growth.
Pro Tips for Direct Seed Planting
- These simple but game-changing techniques will help you achieve lush, healthy growth without the backbreaking work of...
- Soil Testing Trick: The finger test in Step 1 is your best friend—press firmly, but don't force it. If the soil resis...
- Seed Spacing Secret: When creating your ¼-inch furrows in Step 1, use a straight piece of wood or a level to ensure t...
Frequently asked questions
Got questions about direct seed planting? You’re not alone—this method can feel a little tricky at first! Here are some of the most common concerns and answers to help you get started with confidence.
What’s the best time of year to direct seed my lawn?
The ideal window is early spring (when soil temps hit 50–60°F) or late summer/early fall (when temps drop to 60–75°F). Avoid seeding during extreme heat or cold—seeds need consistent moisture and warmth to germinate. Check your local frost dates for a heads-up!
How do I keep seeds from washing away or drying out?
Mulch is your BFF here! Lightly cover seeds with straw or peat moss (¼ inch thick) to retain moisture without smothering them. Water gently but frequently (2–3 times daily for 10–15 minutes) until germination. A sprinkler with a fine mist setting works best—avoid heavy streams!
How long does it take for grass seeds to sprout?
Germination time varies by seed type:
- Cool-season grasses (like Kentucky bluegrass): 7–21 days
- Warm-season grasses (like Bermuda grass): 5–14 days
Can I direct seed over existing grass, or do I need to remove it first?
For best results, thin or kill existing grass first—direct seeding over thick turf often leads to competition and poor germination. Use a non-selective herbicide (like glyphosate) 2–3 weeks before seeding, or mow low and overseed in high-traffic areas where grass is sparse. Patchy spots? Spot-treat with herbicide first!
What should I do if birds or pests eat my seeds?
Cover seeds with wire mesh or netting until germination (remove it once sprouts appear!). For squirrels or raccoons, try scattering seeds in smaller, random patches instead of one big area. A light layer of mulch can also deter some critters. If you spot damage, re-seed those spots immediately!
Wrapping up and next steps
Direct seed planting is your gateway to a lush, resilient lawn—without the hassle of traditional methods! By skipping tilling and embracing no-dig techniques, you save time, reduce soil disruption, and create the perfect conditions for seeds to thrive.
Whether you're a seasoned gardener or a beginner, this foolproof approach delivers visible results with minimal effort.
Ready to transform your lawn? Start small—pick a sunny patch, gather your supplies, and dive in! Track your progress, adjust as needed, and soon, you’ll be reaping the rewards of a greener, healthier yard. Happy planting! 🌱✨