
Planting
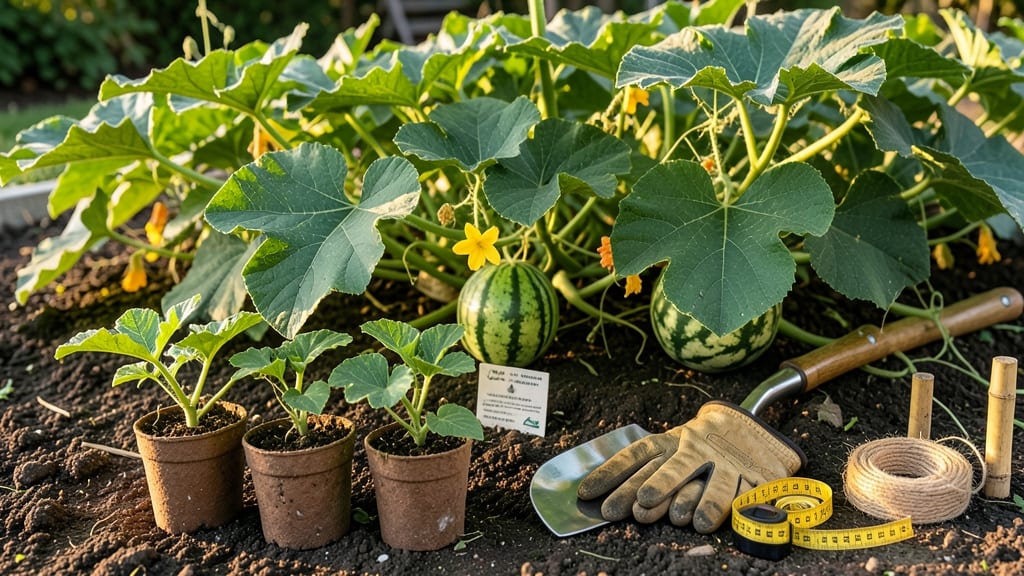
Proper watermelon seed spacing determines whether you end up with a handful of giant melons or a crowded mess of stunted plants. 🌱 After years of trial and error, I’ve found that 6-foot spacing between vines is the sweet spot for standard varieties—any closer and your harvest will suffer.
The key is matching your spacing to the watermelon type: dwarf varieties need 3-4 feet, while giant heirlooms can stretch to 8 feet if you’ve got the room.
Start with well-drained soil and work in compost—watermelons are heavy feeders, and they’ll reward you with 20-pound melons if you give them the right foundation. Overcrowding is the silent killer—plants compete for nutrients, leading to weak vines and small fruit.
I’ve seen gardens where every plant looked healthy, but only half produced anything worth eating. Give them space, and you’ll avoid that heartbreak. This method works for both backyard plots and larger farms. Once you’ve got the spacing right, focus on consistent watering and trellising for those sprawling vines.
The payoff? A harvest that makes your neighbors jealous.
📚 In This Guide
- What you need
- Instructions
- Tips and common mistakes
- Wrapping up and next steps
What you need
- ● Watermelon seeds: Choose high-quality, disease-resistant varieties suited to your climate. Aim for 2-3 seeds per hill (or 1 seed per spot if direct-sowing).
- ● Seed-starting soil or potting mix: 1-2 gallons per seedling if starting indoors, or sterile garden soil for direct planting.
- ● Garden soil (if direct-sowing): Well-draining, loamy soil enriched with compost or aged manure.
- ● Fertilizer: Balanced fertilizer (e.g., 10-10-10) for planting: 1-2 tbsp per hill.
- ○ High-nitrogen fertilizer (e.g., 16-4-8) for early growth (optional but helpful).
- ● Mulch: Straw or black plastic mulch (3-4 feet wide per row) to retain moisture and suppress weeds.
- ● Watering can or hose with a gentle spray nozzle: For consistent moisture without disturbing seeds.
- ● Trowel or hand shovel: For digging planting holes (1 inch deep).
- ● Garden rake: To loosen soil and create a smooth planting bed.
- ● Measuring tape or ruler: To ensure proper spacing (12-24 inches apart in hills, 5-6 feet between hills).
- ● Stakes or markers: Popsicle sticks or bamboo stakes to label rows and track spacing.
- ○ Gloves (optional): For comfort while handling soil or seeds.
- ● Sunlight: Full sun (6-8 hours daily)—watermelons are sun-worshippers! 🌞
- ● Warm soil: Wait until soil temps reach 70°F+ (21°C+) before planting (use a soil thermometer if unsure).
- ● Last frost date: Plant 2-3 weeks after your area’s last frost date.
- ● Well-drained location: Avoid low spots where water pools (watermelons hate “wet feet”).
- ● Seedling trays: If starting indoors, use biodegradable pots to reduce transplant shock.
- ● Row cover or shade cloth: To protect young seedlings from pests or extreme heat.
- ● Drip irrigation system: For precise watering without over-saturating the soil.
- ● Organic pest control: Neem oil or diatomaceous earth to deter pests like cucumber beetles.
Precision planting: how to space watermelon seeds for maximum yield
Here’s the method I’ve used for years to turn a handful of seeds into a vine-covered harvest—no guesswork, just science-backed spacing.
🌱 Step 1: Prepare the Soil and Planting Bed
Watermelons thrive in loose, fertile soil with excellent drainage. Work in 2-3 inches of compost or well-rotted manure into the top 6-8 inches of soil to improve structure and fertility. I like to raise beds 6-12 inches high if my soil drains poorly—this prevents waterlogged roots that stunt growth.
Test soil moisture before planting: stick your finger 2 inches deep. If it feels dry, water the bed deeply 24 hours ahead so moisture penetrates evenly. Avoid planting in soggy ground—watermelon roots need air, not mud. A soil thermometer confirms ideal planting temps: 70-90°F at least 1 inch deep.
🌱 Step 2: Sow Seeds at the Correct Depth and Spacing
Plant 4-5 seeds per hill, spaced 1-2 inches apart and ½ inch deep. I use a small dibble or my finger to make holes—this ensures consistent depth. Watermelons are sensitive to cold soil, so I cover seeds with mulch (like straw) after planting to retain warmth until germination.
Space hills 5-6 feet apart in rows 6-8 feet apart. This gives vines room to sprawl without competing for nutrients. If you’re short on space, use trellises for bush varieties—they’ll still need 3-4 feet of vertical space to climb. Mark hills with sticks or flags so you don’t accidentally disturb seedlings later.
🌿 Step 3: Thin Seedlings to the Strongest Plants
Once seedlings show 2 true leaves (about 10-14 days after sowing), thin to 2-3 plants per hill. Use sharp scissors to snip weak stems at soil level—this prevents disease spread from broken stems. Keep the strongest, most vigorous seedling; discard the rest or transplant to another area if you’re desperate.
Watch for crowded growth—leaves touching create humid pockets that invite fungal diseases. If you see yellowing or wilting, thin immediately. Pro tip: I harvest the thinned seedlings as microgreens for a quick, sweet snack. No waste in my garden!
☀️ Step 4: Train Vines and Maintain Spacing as They Grow
Watermelon vines grow aggressively—6-20 feet long—so guide them outward from the hill using straw or black plastic mulch to create a barrier. This keeps vines from wandering into neighboring plants and stealing nutrients. If using trellises, tie vines loosely with soft fabric strips every 2-3 feet to avoid damaging stems.
Prune side shoots (those growing from the main vine) to 3-4 leaves to direct energy into fruit production. I always leave 1-2 strong vines per plant—more than that spreads resources too thin. Space remaining vines 2-3 feet apart along the trellis or mulch barrier to maintain airflow.
💧 Step 5: Monitor Water and Nutrient Needs
Watermelons need 1-2 inches of water weekly, delivered at the base of the plant (never overhead). I water deeply 2-3 times per week in hot climates, adjusting for rain. Overhead watering spreads disease, so I use a soaker hose or drip irrigation to keep foliage dry.
When vines start flowering, switch to low-stress irrigation—let the top 1-2 inches of soil dry slightly between waterings. This encourages deeper root growth. Side-dress with compost tea or balanced fertilizer (10-10-10) at half-strength when flowers appear. Too much nitrogen = leafy vines, no fruit.
Tips & tricks for perfect watermelon spacing
Here's what nobody tells you about turning seed spacing into a harvest game-changer.
Soil Temperature is Non-Negotiable: That 70-90°F soil temperature range isn't just a suggestion—it's the difference between germination and wasted seeds. I've planted dozens of times, and anything below 70°F makes watermelons sluggish. If your soil runs cooler, use black plastic mulch 2-3 days before planting to warm it up naturally. This works especially well in early spring or northern climates where soil stays cold longer.
The Mulch Advantage: Don't just use mulch—use the right mulch. Straw or black plastic mulch does double duty: it retains soil warmth (critical for those first 10-14 days until seedlings emerge) AND suppresses weeds that compete with young plants. I've seen gardens where weeds choked out watermelon seedlings because they skipped this step. Pro tip: Lay mulch 2 inches thick around hills, but keep it 2 inches away from seed hills to prevent rot.
Thinning Strategy: When you're thinning to 2-3 plants per hill at the 2 true leaves stage, don't just grab and pull. Use sharp scissors to cut stems at soil level—this prevents disease from spreading through broken stems. I've learned this the hard way after seeing powdery mildew spread through a garden from improper thinning. Also, save those thinned seedlings! They make excellent microgreens—just rinse and eat raw for a sweet, peppery snack.
Vine Training Hacks: For trellised varieties, use soft fabric strips (like old T-shirts) instead of wire to tie vines. Wire cuts into stems and creates entry points for pests. When pruning side shoots to 3-4 leaves, make your cuts at a 45-degree angle just above a leaf node. This encourages faster healing and prevents water from pooling on the cut, which can lead to rot. I've trained hundreds of vines this way and never lost a plant to poor pruning technique.
Pro Tips for Watermelon Seed Spacing
- Here's what nobody tells you about turning seed spacing into a harvest game-changer.
- Soil Temperature is Non-Negotiable: That 70-90°F soil temperature range isn't just a suggestion—it's the difference b...
- The Mulch Advantage: Don't just use mulch—use the right mulch. Straw or black plastic mulch does double duty: it reta...
Frequently asked questions
Got questions about spacing watermelon seeds like a pro? Here are some of the most common queries—and answers—to help you grow a thriving patch!
What’s the ideal distance between watermelon seeds when planting?
For hill planting, space seeds 6–12 inches apart within each hill, with hills 4–6 feet apart. For flat planting, use 2–3 feet between seeds in rows spaced 5–6 feet apart. Tighter spacing risks overcrowding, while wider gaps may reduce yields.
Can I plant watermelon seeds too close together?
Yes, but it’s a recipe for poor air circulation, disease, and smaller fruits. Overcrowded plants compete for nutrients, leading to stunted growth. If you’ve already planted too close, thin seedlings to the recommended spacing once they’re 2–3 inches tall.
What if I don’t have enough space for proper spacing?
Try vertical trellising! Watermelons like ‘Sugar Baby’ or ‘Black Diamond’ grow well on trellises, saving space. Space vines 12–18 inches apart horizontally and train them upward. Just ensure strong support—watermelons can get heavy!
Does seed spacing change for cold climates?
In cooler areas, start seeds indoors 3–4 weeks before last frost, then transplant with wider spacing (6+ feet between hills) to offset slower growth. Use black plastic mulch to warm the soil and extend the season.
Why are my watermelon seedlings dying after thinning?
Check for root damage (pull gently, don’t yank) or transplant shock. Water deeply before and after thinning, and avoid working soil when wet. If seedlings wilt, they may need shade for a day or two while they recover.
Wrapping up and next steps
Mastering watermelon seed spacing is your secret weapon for a thriving garden and a harvest that’ll make your neighbors jealous! 🌱 Whether you’re planting in rows, hills, or containers, precision ensures strong vines, fewer pests, and juicy melons that’ll last all summer.
Now that you’re armed with the right techniques and tips, it’s time to roll up your sleeves and get growing—your future watermelon feast starts with a single seed!
Ready to take the next step? Mark your calendar for planting season, prep your soil, and watch your garden transform into a sweet, sun-drenched paradise. Happy planting! 🌞