
Propagation
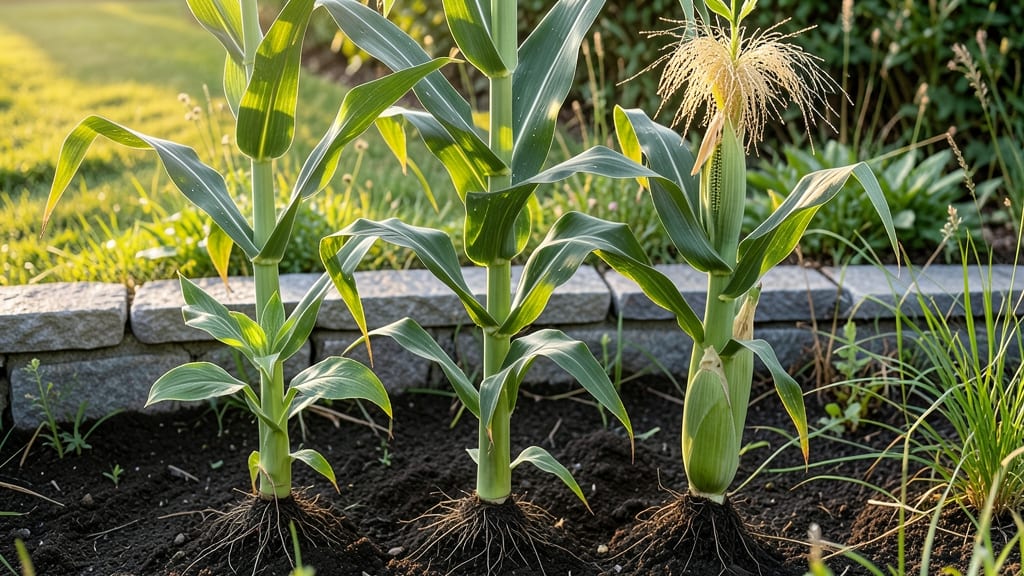
Growing corn from seed to harvest is one of those gardening triumphs that feels like magic—turning tiny kernels into towering stalks with ears heavy enough to bend the stems. 🌽 I’ve grown corn for years, and the secret isn’t just patience; it’s knowing the exact timing, spacing, and care that turns good plants into plump, sweet ears by summer’s end.
The process starts with rich, well-drained soil and seeds planted 1-1.5 inches deep, spaced 12 inches apart in rows 30 inches apart. Watering is critical—corn needs 1-2 inches per week, especially when tassels appear.
Most beginners overlook this, leading to dry ears or stunted growth, but with the right routine, you’ll see silks emerge within 60-70 days, signaling the plant is ready for pollination.
By harvest time—around 90 days—you’ll be snapping ears from stalks, testing for milk-stage sweetness (that creamy liquid inside the kernels). The first few ears might be small, but with proper care, you’ll end up with bushels of corn that outshine anything from the store.
The smell of fresh corn on the cob in August? That’s the real reward.
Works for home gardens, small farms, or even container growing with dwarf varieties. Here’s how to avoid common pitfalls and get the most from your corn patch—no green thumb required, just attention to detail.
📚 In This Guide
- What you need
- Instructions
- Tips and common mistakes
- Wrapping up and next steps
What you need
- ● Corn seeds: Choose a variety suited to your climate (e.g., Sweet corn like 'Silver Queen' or 'Ambrosia'). Plant 1–2 seeds per hill, spaced 12–18 inches apart in rows 2–4 feet apart.
- ● Garden soil: Well-draining, fertile soil with a pH of 6.0–7.0. Amend with compost if needed.
- ● Fertilizer: A balanced 10-10-10 or 5-10-10 fertilizer (apply at planting and mid-season). Organic options like fish emulsion or bone meal work too!
- ● Watering supplies: Hose or drip irrigation system (corn needs 1–1.5 inches of water per week).
- ● Garden tools: Trowel or transplanting spade
- ● Garden hoe (for weeding)
- ● Pruners (for removing tassels if pollination is an issue)
- ○ Support (optional): Stakes or trellises for tall varieties (e.g., 10+ feet for 'Mammoth').
- ● Row covers: Protect young plants from pests like corn earworms or frost.
- ● Soil tester kit: Ensure optimal nutrient levels before planting.
- ● Plant markers: Label rows to track varieties and planting dates.
- ● Harvest knife or shears: For cleanly cutting stalks at maturity.
Step-by-step instructions for growing corn from seed to harvest
Here’s how to transform tiny kernels into sweet, plump ears—just follow these proven steps.
🌱 Step 1: Start Seeds Indoors (4-6 Weeks Before Last Frost)
Corn doesn’t transplant well, so sow seeds directly in the garden—but if your growing season is short, you can get a head start indoors. Fill 2-inch deep biodegradable pots with moistened seed-starting mix and plant 2-3 seeds per pot at a depth of 1 inch. Press them gently into the soil to ensure good soil-to-seed contact.
Place pots in a warm spot (70-80°F) with bright light. You’ll see sprouts in 7-14 days, depending on variety. Once seedlings have 2-3 true leaves and are 4-6 inches tall, they’re ready to harden off. Acclimate them outdoors for 1 week before transplanting, gradually increasing exposure from 1 hour to full sun.
Real talk: If you’re in a short-season zone, skip indoor starting—corn grows fast and performs better when planted directly outside. Just wait until soil is at least 60°F and all frost risk has passed.
🪴 Step 2: Plant Seeds Directly in the Garden (After Last Frost)
Corn thrives in blocks, not rows, so plant seeds in groups of 4-6 plants per hill, spaced 12-18 inches apart in rows 30-36 inches apart. Dig holes 1-2 inches deep—deeper planting risks rot, while shallow planting can leave seeds exposed to drying. Drop 2-3 seeds per hole and cover lightly with soil.
Press the soil firmly around the seeds to eliminate air pockets. Water gently but thoroughly to settle the soil without displacing seeds. You’ll see sprouts in 7-10 days if conditions are ideal (65-85°F soil temps). Thin seedlings to the strongest plant per hill once they’re 6 inches tall—gently snap weaker stems at soil level.
Here’s the thing—corn is wind-pollinated, so planting in blocks ensures better pollination and fuller ears. If your garden is small, consider growing just one variety in a single block rather than scattering seeds across multiple rows.
☀️ Step 3: Maintain Soil Moisture and Fertility (Critical for Ear Development)
Corn loves water but hates soggy roots. Keep soil consistently moist—1-1.5 inches of water per week, more during tasseling and ear formation. Water deeply at the base in the morning to reduce fungal risks. You’ll know moisture is right when the top 2 inches of soil feel damp but not waterlogged.
Side-dress with high-nitrogen fertilizer when plants are 6-8 inches tall to boost leaf growth, then switch to high-phosphorus fertilizer when tassels emerge to support ear development. Watch for silking (the long, thread-like strands that emerge from ear husks)—this is when corn needs the most water and nutrients.
Don’t overlook weeds. They compete aggressively with corn for nutrients and water. Cultivate shallowly around plants weekly to keep the area clean without disturbing roots.
⏰ Step 4: Monitor Growth Stages for Harvest Timing
Corn reaches maturity in 90-120 days, depending on variety. Start checking for readiness when tassels turn brown and dry. Look for silks that have turned brown and crispy—this signals the ear is nearly done growing. Gently peel back the husks to inspect the kernels.
For sweet corn, harvest when kernels are plump, milky, and slightly soft when pierced with a fingernail. If they’re hard and starchy, the corn has passed its prime. Use a sharp knife to cut the stalk 6-8 inches below the ear to avoid damaging the plant. If you’re saving seeds, wait until kernels are dry and hard before harvesting.
Here’s where it gets fun—try a few ears early to test sweetness. Some varieties (like bicolor or super sweet) are ready sooner than others. Once you pull one ear, check the rest every 1-2 days to catch them at peak flavor.
🌿 Step 5: Extend the Harvest and Save Seeds (Optional)
If you planted multiple varieties with staggered maturity dates, you can enjoy corn for 2-4 weeks. Succession planting—sowing new seeds every 2 weeks—keeps a steady supply. Just be sure to space varieties by at least 100 feet to prevent cross-pollination if saving seeds.
To save seeds, leave the best ears on the stalk until kernels are completely dry and hard (usually 30-45 days after harvest). Shell the dried ears, remove any shriveled or damaged kernels, and store seeds in a cool, dry place. Label them clearly—corn seed viability drops after 2 years.
Don’t skip this step if you loved your harvest. Saved seeds are free, and next year’s crop will be even heartier.
Tips & tricks for perfect corn growing
Growing corn from seed to harvest is all about timing, patience, and knowing what to watch for—here’s how to make every step count.
Soil Temperature Matters: Soil must reach at least 60°F before planting seeds directly in the garden, as corn seeds won’t germinate properly in cooler soil. I’ve seen seeds sit for weeks in 50°F soil—don’t make that mistake! Use a soil thermometer to confirm before planting. If your spring is slow to warm, consider using black plastic mulch to raise soil temperatures faster.
Planting Layout for Pollination: Corn is wind-pollinated, so planting in blocks (not rows) is critical for full ears. In Step 2, when you plant 4-6 seeds per hill, space hills 12-18 inches apart in rows 30-36 inches apart. This creates a dense enough cluster for effective cross-pollination. If your garden is small, plant just one variety in a single block rather than scattering seeds across multiple rows—this ensures better ear development.
Watering Wisdom: During the silking stage (when those long, thread-like silks emerge), corn needs 1-1.5 inches of water per week. This is when ears are forming, so consistent moisture is crucial. Water deeply at the base in the morning to prevent fungal diseases. A good test: check the top 2 inches of soil—it should feel damp, not soggy. Too much water can lead to ear rot, while too little causes poor kernel development.
Harvest Timing Secret: For sweet corn, harvest when kernels are plump, milky, and slightly soft when pierced with a fingernail. I like to test a few ears early to gauge sweetness—some varieties (like bicolor or super sweet) mature faster than others. Once you pull one ear, check the rest every 1-2 days to catch them at peak flavor. If kernels are hard and starchy, the corn has passed its prime and will be tough and dry.
Pro Tips for Corn From Seed To Harvest
- Growing corn from seed to harvest is all about timing, patience, and knowing what to watch for—here’s how to make eve...
- Soil Temperature Matters: Soil must reach at least 60°F before planting seeds directly in the garden, as corn seeds w...
- Planting Layout for Pollination: Corn is wind-pollinated, so planting in blocks (not rows) is critical for full ears....
Frequently asked questions
Got questions about growing corn from seed to harvest? You’re not alone—this process has a few quirks! Here are answers to the most common queries to help you grow plump, golden ears with confidence.
How long does it take for corn to grow from seed to harvest?
Most sweet corn varieties mature in 70–90 days from planting, depending on the type (early, mid-season, or late). Check the seed packet for days-to-maturity (DTM) and adjust planting time to avoid frost. Pro tip: Count backward from your first expected frost date to ensure a full growing season!
Can I plant corn seeds too early or too late?
Yes! Corn thrives in warm soil (60°F+) and needs consistent heat. Plant too early, and seeds may rot; too late, and ears won’t fill out. Aim for 2–3 weeks after your last frost when soil is workable. If your season is short, opt for early-maturing varieties (60–70 days) like ‘Silver Queen’ or ‘Ambrosia.’
Do I need to thin corn seedlings, and how?
Thinning is key! Crowded seedlings compete for nutrients and light, leading to weak stalks. Once seedlings have 2–3 true leaves, thin to 10–12 inches apart in rows spaced 2–3 feet apart. Snip with scissors or pull gently—don’t yank to avoid disturbing roots. Save thinned seedlings for stir-fries!
What should I do if my corn plants look chewed or wilted?
Pests like corn earworms, cutworms, or deer can wreak havoc, while wilting often signals drought, disease (e.g., fusarium), or poor drainage. Try these fixes:
- Pests: Use row covers early, handpick worms, or spray neem oil.
- Wilting: Water deeply at the base (1–2 inches per week), improve soil drainage, or rotate crops next year.
- Disease: Remove infected plants and avoid overhead watering.
Can I save corn seeds from my harvest for next year?
Technically yes, but freshness and genetics matter. For best results, save seeds from open-pollinated varieties (not hybrids) and dry them thoroughly in a cool, dark place for 2–3 weeks. Store in an airtight container—viability drops after 2–3 years. For hybrids, buy new seeds annually for consistent quality.
What’s the best alternative if I don’t have space for full corn rows?
Try container growing or short-season varieties! Dwarf corn like ‘Bodacious’ or ‘Golden Bantam’ (mature in 60–75 days) thrive in 5-gallon buckets or raised beds. For urban gardens, plant in blocks (not rows) to improve pollination—just space plants 12 inches apart in a 3x3 grid.
Wrapping up and next steps
From planting tiny kernels to harvesting golden ears, growing corn is a rewarding journey that connects you to nature’s cycle. 🌱 Whether you’re a beginner or a seasoned gardener, understanding each step—from soil prep to pollination—ensures a bountiful harvest.
Your hard work pays off with fresh, homegrown corn, perfect for grilling, freezing, or sharing with neighbors.
Ready to take the next step? Start small—even a 4’x4’ patch can yield delicious ears—and experiment with varieties that thrive in your climate. Happy growing! 🌽