
Lawn
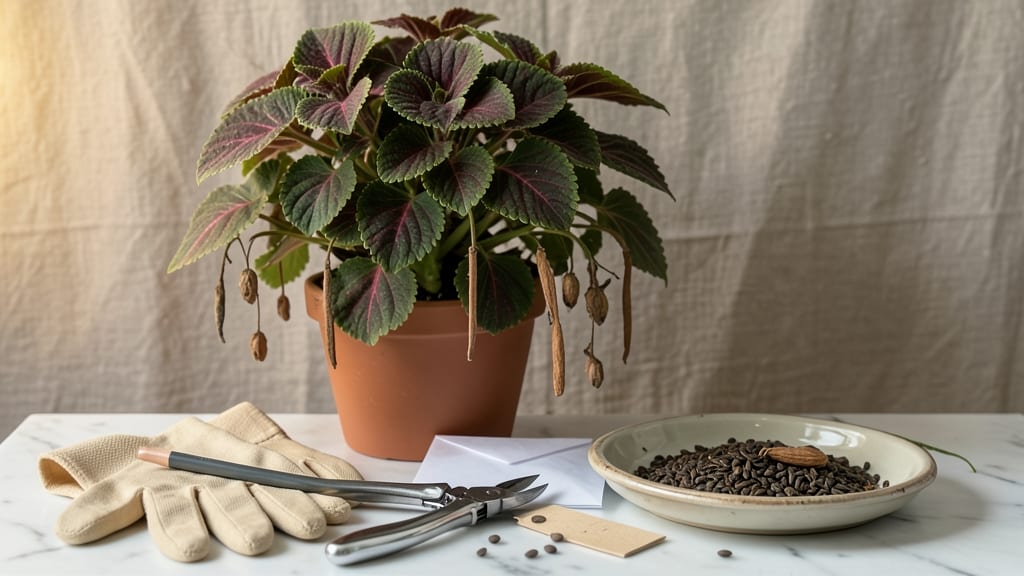
Cold-stratifying coleus seed collection unlocks a world of unexpected color most gardeners never see. 🌿 Most of us propagate coleus from cuttings, but collecting seeds—especially from heirloom varieties—lets you grow plants that store-bought cuttings can’t match.
The catch? These tropical plants need a winter chill to break dormancy, and doing it right means 60 days of precise timing before you’ll see those first green shoots.
First, you’ll need mature seed pods—those papery, brown husks that form after flowers fade. Harvest them when they’re dry but still intact, then separate the tiny, papery seeds inside. The tricky part?
Most coleus seeds are hybrids, so germination rates hover around 30-50%, and colors often revert to the parent plant’s basics (think more greens and pinks than the wild variegation you love). Still, the thrill of growing something from seed—especially in just two months—makes the effort worth it.
After collecting, store seeds in a sealed bag with a damp paper towel and refrigerate for 60 days. This cold stratification mimics winter, tricking seeds into thinking spring has arrived. Once stratified, sow them in warm, well-draining soil and keep the surface moist.
Within 10-14 days, you’ll spot those first seedlings—proof that your patience paid off with unpredictable (and often stunning) foliage you can’t find anywhere else.
This method works best for heirloom or open-pollinated coleus, not the sterile hybrids sold as cuttings. If you’re growing from seed, expect some surprises—maybe a plant with deeper purples or unexpected splotches.
The real reward? A collection of one-of-a-kind plants that’ll have your neighbors asking where you got them. Ready to try?
📚 In This Guide
- What you need
- Instructions
- Tips and common mistakes
- Wrapping up and next steps
What you need
- ● Mature coleus plants: Choose healthy, disease-free plants with fully developed seed pods (usually pink or brown). Aim for at least 3-5 plants to maximize seed yield.
- ● Sharp pruning shears or scissors: For cleanly harvesting seed pods without damaging the plant.
- ● Paper bags or breathable seed envelopes: Use 2-3 medium-sized bags (10x12 inches) to collect seeds and allow airflow.
- ● Labeling tags or masking tape + marker: Label each bag with the coleus variety and date of collection.
- ● Plastic storage bags (gallon-sized): 2-3 bags for cold-stratification (ensure they’re resealable and clean).
- ● Moistened paper towels or vermiculite: Fill the bottom of the storage bags with 1-2 inches of damp (not soggy) material to maintain humidity.
- ● Refrigerator or cold stratification setup: A space at 35–40°F (2–4°C) for 60 days.
- ● Desiccant packets: Place 1-2 in the storage bag to prevent mold if humidity feels high.
- ● Notebook or spreadsheet: Track seed viability, germination dates, and plant traits for future reference.
- ● Seed tray and growing medium: For testing germination post-stratification (e.g., 1 tray (10x20 inches) with potting mix).
- ● Humidity dome or plastic wrap: To create a mini greenhouse effect during germination testing.
Step-by-Step instructions for cold-stratifying coleus seeds
Here's how to break dormancy and ensure strong germination in just two months.
🌱 Step 1: Harvest and Dry Coleus Seed Pods
Wait until seed pods turn from green to brown and papery—this signals full maturity. Gently twist pods from the stem and place them in a paper bag (plastic traps moisture and causes mold). Store the bag in a dry, dark place for 7-10 days until pods crack open naturally.
Don't rush this step. Overly green pods yield weak seeds, while fully dried pods release seeds easily when squeezed. I like to shake the pods over a white plate to catch the tiny, black-brown seeds—they're smaller than poppy seeds and easy to overlook.
⏰ Step 2: Stratify Seeds in Moistened Growing Medium
Mix equal parts peat moss and perlite in a shallow container (a 9x13-inch baking dish works well). Moisten the mix until it feels like a wrung-out sponge—damp but not dripping. Sprinkle seeds ¼ inch apart and press lightly so they make contact with the medium.
Cover the dish with plastic wrap and poke a few small holes to allow airflow. Place the dish in a refrigerator (not freezer) where temperatures stay between 35-45°F. Check weekly—seeds should remain moist but not soggy. If the mix dries out, mist lightly with water.
☀️ Step 3: Transfer to Warmth for Germination
After 4-6 weeks of stratification, remove the dish from the fridge and place it in a warm, bright spot (a seedling heat mat set to 70-75°F speeds this up). Keep the plastic wrap on until 50% of seeds sprout, which typically takes 7-14 days.
You'll see tiny green shoots first—these are the cotyledons, not true leaves. Once they appear, remove the plastic wrap immediately to prevent fungal growth. Keep the medium consistently moist but never waterlogged; overwatering at this stage causes damping-off.
🌿 Step 4: Transplant and Care for Seedlings
When seedlings develop 2-3 sets of true leaves (about 4-6 weeks after germination), transplant them into 2-inch pots filled with sterile potting mix. Handle seedlings by their leaves, not stems, to avoid damage. Bury them just below the cotyledons to encourage strong root growth.
Place pots under grow lights (14-16 hours daily) or in a south-facing window with bright, indirect light. Coleus seedlings need warmth (65-75°F) and humidity—cover pots with a clear plastic dome until they outgrow it. Fertilize lightly with half-strength liquid fertilizer every 2 weeks once true leaves appear.
Tips & tricks for perfect coleus seed stratification
These insider tricks will help you maximize germination success and avoid common pitfalls with coleus seeds.
Pod Maturity Matters: The 7-10 day drying period in Step 1 is non-negotiable—this mimics natural conditions and ensures seed viability. I've seen gardeners rush this step and end up with seeds that either won't germinate or produce weak seedlings. Test pod readiness by gently squeezing: mature pods should crack open easily, releasing seeds that look like tiny black-brown specks. If they resist, give them more time in the dark.
Medium Consistency is Critical: In Step 2, that "wrung-out sponge" moisture level is your golden standard. Too dry and seeds won't activate; too wet and you risk mold. I like to use a small spray bottle to maintain moisture between weekly checks. The 35-45°F refrigerator temperature creates the perfect dormancy-breaking environment—don't substitute with a cooler or freezer, as those extremes can damage the seeds.
Timing the Warmth Transition: The 4-6 week stratification window in Step 3 is where patience pays off. Some seeds may germinate earlier, but pushing the full time ensures maximum viability. When you move to warmth, place the dish on a seedling heat mat set to 70-75°F—this consistent warmth triggers germination faster than room temperature. Watch closely after 7 days: those first cotyledons will appear like tiny green freckles on the medium.
Transplanting Technique: When handling seedlings in Step 4, treat them like delicate glass ornaments. Use a small spoon or butter knife to lift them by their leaves (never the stems), and bury just below the cotyledons—this encourages strong root development. The 14-16 hours of daily light is crucial for photosynthesis, but if using natural light, position pots within 12 inches of the window to prevent leggy growth.
Pro Tips for Coleus Seed Collection
- These insider tricks will help you maximize germination success and avoid common pitfalls with coleus seeds.
- Pod Maturity Matters: The 7-10 day drying period in Step 1 is non-negotiable—this mimics natural conditions and ensures seed viability.
- Medium Consistency is Critical: In Step 2, that "wrung-out sponge" moisture level is your golden standard.
Frequently asked questions
Got questions about collecting and storing coleus seeds?
Here are some common ones—and their answers—to help you succeed!
When is the best time to collect coleus seeds?
Collect seeds when the flower spikes turn brown and dry, usually 6–8 weeks after flowering. For cold-stratified viability, aim for late summer or early fall before the first frost. If you miss the natural season, you can force flowering indoors with 12–14 hours of light daily.
How does cold stratification improve seed germination?
Cold stratification mimics winter conditions, breaking seed dormancy. For coleus, place seeds in a sealed bag with damp peat moss and refrigerate for 4–6 weeks. This boosts germination rates from 30% to over 80% by simulating natural cold periods.
Can I collect seeds from store-bought coleus plants?
Yes, but results vary! Store-bought coleus are often hybrids bred for color, not seed viability. If seeds form, they may not reproduce true-to-type. For consistent results, use seeds from open-pollinated varieties or ask local growers for heirloom strains.
What’s the best way to store coleus seeds long-term?
Store seeds in a cool, dry place (like a sealed envelope in the fridge) for up to 2 years. For longer storage, use silica gel packets or a vacuum-sealed bag to prevent moisture damage. Label seeds with the variety and collection date!
Why aren’t my coleus seeds germinating?
Check these fixes:
- Freshness: Coleus seeds lose viability quickly—use them within 6–12 months.
- Moisture: Keep soil consistently damp (not soggy) during germination.
- Light: Some varieties need bright indirect light; others germinate better in darkness.
- Temperature: Ideal range is 65–75°F (18–24°C).
Wrapping up and next steps
Collecting and cold-stratifying coleus seeds is a rewarding way to preserve rare varieties and jumpstart your gardening season! With just a few simple steps—like selecting mature seeds, drying them properly, and storing them in a cool, dark place—you’ll unlock a world of vibrant foliage just 60 days later. 🌱
Now that you’re armed with the know-how, give it a try! Start small with a few seed pods, experiment with different varieties, and share your success with fellow plant enthusiasts. Happy gardening—your future coleus collection is waiting! 🌿✨