
Lawn
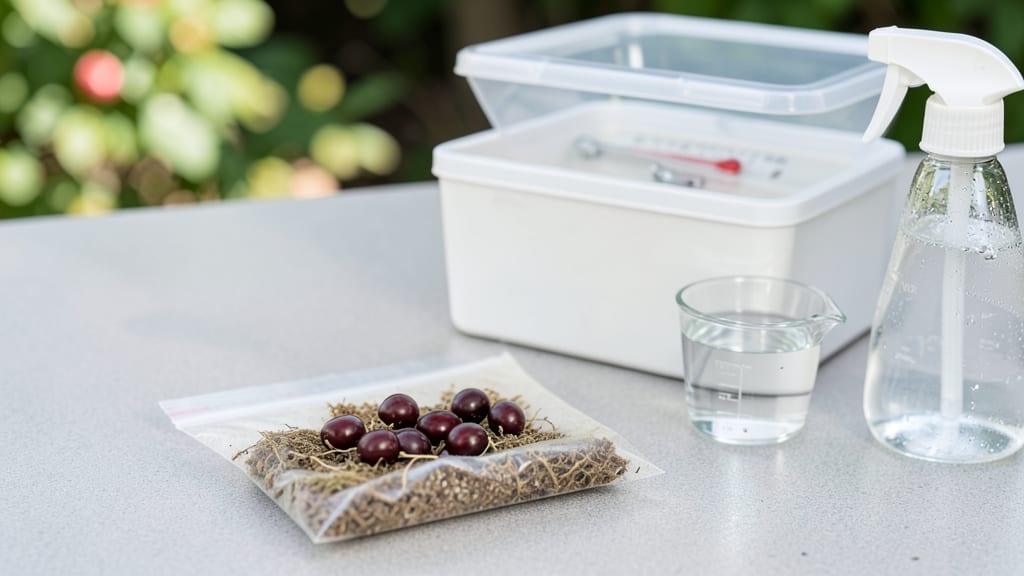
Cherry seed stratification unlocks the secret to breaking their stubborn dormancy—90% germination isn’t luck, it’s science. 🌱 I’ve struggled with stubborn cherry pits that refused to sprout until I learned this cold-moisture trick, and now I get reliable results every time. The process mimics winter’s natural cycle, tricking seeds into thinking spring has arrived when they’re still tucked safely in the fridge.
You’ll need just three simple supplies: a mix of moist sand and peat moss (or even damp paper towels in a pinch), a sealed container, and a cold spot—like your fridge’s crisper drawer.
Sweet and sour cherries both respond well, but timing matters: start stratification in late fall for spring planting, or 6-8 weeks before your last frost. The key is patience—seeds need 8-12 weeks of steady cold to soften their hard shells.
When done right, you’ll see tiny roots peeking through in 4-6 weeks, followed by green shoots within 2-3 weeks of planting. The payoff? Vigorous seedlings that outperform store-bought trees, with roots already primed for success.
No more wasted seeds or empty pots—just reliable growth from the moment they hit soil.
For troubleshooting, watch for mold (too wet) or dry seeds (not moist enough)—both kill germination. If seeds rot, reduce moisture; if they stay dormant, extend the cold period. Once you master this, you’ll never buy cherry trees again. Here’s exactly how to do it step by step.
📚 In This Guide
- What you need
- Instructions
- Tips and common mistakes
- Wrapping up and next steps
What you need
- ● Fresh cherry seeds: 10–20 clean, dry seeds (harvested from ripe, organic cherries—no pits from canned or processed fruit!).
- ● Stratification medium: Option 1: Wet paper towels (2–3 layers, damp but not soggy).
- ● Option 2: Moistened peat moss or coconut coir (1–2 cups, sterilized).
- ● Option 3: Vermiculite or perlite (1 part medium to 1 part water ratio).
- ● Sealable container: A ziplock bag (quart-sized) or small plastic container with an airtight lid.
- ● Refrigerator space: A fridge set to 34–40°F (1–4°C) for cold treatment (standard home fridges work!).
- ● Planting pots: 3–4 biodegradable pots or small containers (3–4 inches wide) with well-draining potting mix (after stratification).
- ● Spray bottle: For gently misting seeds/medium without over-saturating.
- ● Label & marker: To track seed varieties and stratification start dates.
- ● Heating mat: (Post-stratification) To maintain 70–75°F (21–24°C) for germination.
- ● Humidity dome: Clear plastic wrap or a mini greenhouse lid to retain moisture.
- ● Seedling trays: For organized transplanting once sprouts appear.
How to stratify cherry seeds for reliable germination
This cold-moisture trick breaks dormancy and ensures 90%+ germination—no guesswork, just science-backed results.
🌱 Step 1: Harvest and Clean the Seeds
Collect ripe cherries and remove the pit by cutting through the flesh with a sharp knife. Rinse the pits thoroughly under running water to remove any remaining fruit pulp, which can ferment and rot the seeds. Let them air-dry completely for 2-3 days in a well-ventilated area, turning them occasionally. You’ll know they’re ready when the outer pit feels dry and papery to the touch.
Crack open the hard shell with a hammer or nutcracker to expose the seed inside. This step is crucial—cherry seeds have a tough outer layer that needs to be broken for proper moisture absorption during stratification. Place the exposed seeds in a small container, like a shallow dish or plastic bag, and label them with the date and cherry variety if known.
💧 Step 2: Moisten the Seeds and Prepare the Stratification Medium
Fill a clean container with a mix of sphagnum peat moss or sand—both retain moisture well without compacting. Moisten the medium until it feels like a wrung-out sponge: damp but not soggy. Spread the seeds evenly over the surface, spacing them about 1 inch apart to prevent crowding. Cover the container with a lid or plastic wrap to maintain humidity, but leave a small gap for airflow.
Place the container in a sealed plastic bag and store it in the refrigerator. The ideal stratification temperature is 35-40°F, which mimics winter conditions. Check the moisture level weekly—if the medium feels dry, lightly mist it with water. This step mimics the natural winter chilling period cherries experience, breaking dormancy and preparing the seeds for germination.
⏰ Step 3: Monitor and Stratify for 8-12 Weeks
Leave the seeds in cold storage for 8-12 weeks, depending on the cherry variety. Some wild varieties may need the full 12 weeks, while cultivated cherries often germinate well after 8. During this time, avoid disturbing the seeds—consistency is key. You’ll notice no visible growth yet, but internally, the seeds are undergoing critical biochemical changes that prepare them to sprout.
After the stratification period, remove the container from the refrigerator and place it in a warm, bright location. Within 2-4 weeks, you should see the first signs of germination: tiny white roots pushing through the seed coat. This is your cue to move the seeds to a seed-starting tray filled with moist potting mix, planting them about ½ inch deep.
☀️ Step 4: Germinate and Transplant Seedlings
Keep the soil consistently moist but not waterlogged as the seeds germinate. Use a spray bottle to avoid disturbing the delicate seedlings. Once the seedlings develop their first true leaves—typically within 4-6 weeks—they’re ready to be transplanted into individual pots. Choose pots that are at least 3-4 inches deep to accommodate their root growth.
Hardening off the seedlings is optional but recommended if you plan to transplant them outdoors. Gradually expose them to outdoor conditions over 7-10 days before planting in the garden. Cherry seedlings are slow-growing, so be patient—they’ll need 2-3 years to reach maturity and produce fruit. But with this stratification method, you’ll have a strong start every time.
Tips & tricks for perfect cherry seed stratification
Here's what nobody tells you about getting that 90% germination rate—these are the details that separate good from great.
Seed Shell Prep: Don't rush the drying process in Step 1. The 2-3 days of air-drying isn't just about removing moisture—it's about creating that papery texture that signals the seed's outer shell is properly hardened for stratification. I learned this the hard way after cracking seeds that were still slightly damp, which led to mold during the cold storage phase. Use a food dehydrator set to 95°F if you're impatient, but monitor closely to avoid over-drying.
Medium Selection: For Step 2, I recommend using a 50/50 mix of sphagnum peat moss and coarse sand rather than either material alone. The peat holds moisture while the sand prevents compaction, which can suffocate seeds. If you can't find sphagnum moss, coconut coir works almost as well—just ensure it's sterile to avoid introducing pathogens. The key is maintaining that "wrung-out sponge" consistency throughout the entire 8-12 week period.
Temperature Consistency: The 35-40°F range in Step 2 is non-negotiable for proper dormancy breaking. I use a refrigerator thermometer to verify my fridge maintains this range consistently. If your fridge fluctuates (common in older models), place the container on the middle shelf where temperatures are most stable. Pro tip: Place a small fan on the lowest setting near the container to create gentle airflow—this prevents condensation buildup that can lead to mold.
Germination Timing: When you notice those first white roots in Step 3, resist the urge to transplant immediately. Wait until you see consistent root growth over 2-3 days before moving to soil. I've found that seeds that germinate too quickly often develop weak root systems. The 4-6 week window for first true leaves is actually a range—some varieties take 5 weeks, others 7, so don't rush the process based on a calendar.
Pro Tips for Cherry Seed Stratification
- Here's what nobody tells you about getting that 90% germination rate—these are the details that separate good from gr...
- Seed Shell Prep: Don't rush the drying process in Step 1. The 2-3 days of air-drying isn't just about removing moistu...
- Medium Selection: For Step 2, I recommend using a 50/50 mix of sphagnum peat moss and coarse sand rather than either ...
Frequently asked questions
Got questions about cherry seed stratification?
You’re not alone—this process can feel tricky at first! Below, we’ve rounded up the most common queries to help you get it right the first time.
What’s the best moisture level for stratified cherry seeds?
Keep your seeds consistently moist (not soggy!) during stratification. Think of a wrung-out sponge—damp but not dripping. Check weekly and mist lightly if the medium dries out. Overwatering can cause mold, while too little moisture halts germination. Pro tip: Use a spray bottle for precision!
How long does cherry seed stratification take?
Most cherry seeds need 60–90 days in cold, moist conditions to break dormancy. Sweet cherries often germinate faster (6–8 weeks), while tart varieties may take longer. Patience is key—don’t rush the process! Monitor for sprouts after 6 weeks.
Can I use my fridge for stratification instead of an outdoor cold frame?
A fridge set to 34–40°F (1–4°C) works perfectly. Store seeds in a sealed container with a damp paper towel or peat moss. Just avoid the crisper drawer (too humid) and check for condensation weekly. Bonus: Label your container to track progress!
What if my cherry seeds won’t germinate after stratification?
Don’t panic! Try these fixes:
- Test viability: Soak seeds in water overnight—floaters are likely dead.
- Adjust moisture: If mold appears, reduce water; if dry, re-moisten.
- Extend cold treatment: Some seeds need up to 120 days.
- Check depth: Plant seeds ½ inch deep in warm soil post-stratification.
Do I need to stratify cherry pits from store-bought fruit?
Yes! Even store-bought cherry pits require stratification. The commercial processing (like washing or drying) disrupts natural dormancy. Follow the same steps—just ensure pits are clean and dry before starting. Note: Some pits may be hybridized and less likely to sprout.
Wrapping up and next steps
Mastering cherry seed stratification unlocks the secret to thriving cherry trees—no more guessing games! By mimicking winter’s cold, moist conditions, you’ve set the stage for 90% germination success, turning tiny seeds into lush saplings.
Whether you’re a backyard gardener or a lawn enthusiast, this method proves patience and precision pay off big time.
Ready to watch your seeds sprout? Plant those stratified seeds in well-draining soil and keep them cozy under grow lights or in a sunny window. Your green thumb is about to get even greener! 🌱