
Lawn
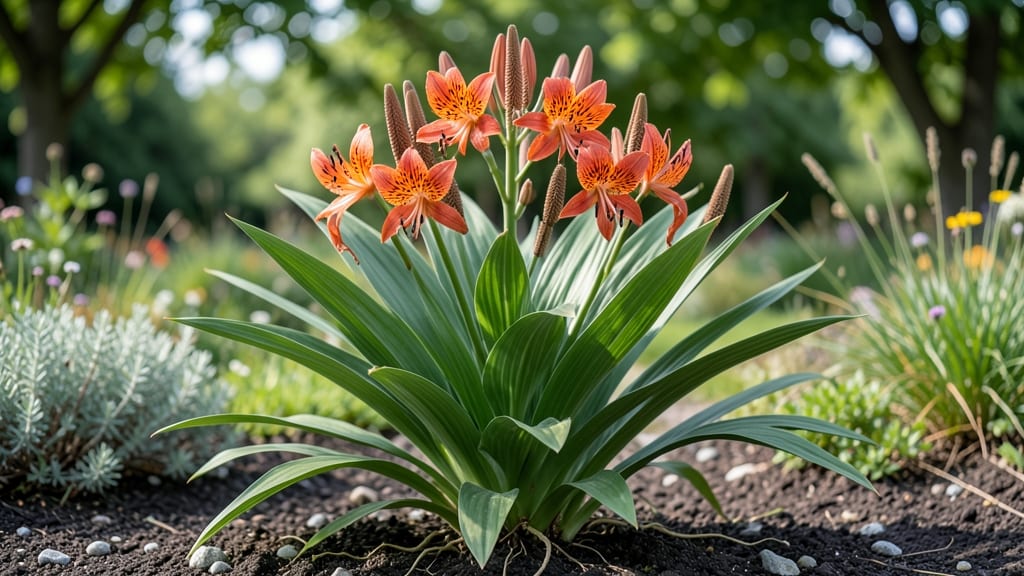
Extracting blackberry lily seeds without twisting the pods is the secret to higher germination rates—and I’ve cracked it after years of trial and error with these striking perennials. 🌱 The key lies in patience: letting the pods dry completely on the plant before handling them prevents the fibrous mess that frustrates most gardeners.
Once you master this, you’ll have seeds ready for planting within weeks, not months.
Start by harvesting mature pods when they turn deep brown and papery—usually late summer to early fall. Store them in a paper bag (not plastic) for 2-4 weeks to finish drying, then gently squeeze to release seeds.
The twist-free method means no lost seeds or damaged pods, and you’ll end up with clean, viable seeds ready for sowing. This approach works even for beginners, though timing is everything.
Germination thrives in warmth and moisture—think of it like waking a dormant plant. Plant seeds just below the soil surface in a light, well-draining mix, keep them consistently moist (not soggy), and place the container in a warm spot (70-75°F).
Within 2-4 weeks, you’ll see those first delicate sprouts pushing through, signaling success. The real magic happens when you transplant them outdoors after frost.
Blackberry lilies reward persistence: seedlings grow quickly into bold, ornamental perennials that multiply underground. Expect first blooms in 2 years, but the foliage alone adds striking texture to gardens.
For faster results, divide established plants in spring—though saving seeds is far more satisfying (and free!). Here’s how to keep them thriving year after year.
📚 In This Guide
- What you need
- Instructions
- Tips and common mistakes
- Wrapping up and next steps
What you need
- ● Mature blackberry lily seed pods: 5–10 fully dried pods (brown, papery texture, and slightly cracked open).
- ● Sharp pruning shears or scissors: Clean, sterilized tools to snip pods from the plant.
- ● Paper towels or newspaper: 2–3 sheets to line your workspace and catch debris.
- ● Small bowl or container: A shallow dish (6–8 inches wide) to hold seeds during extraction.
- ● Fine-mesh strainer or sieve: 1–2 mm mesh size to separate seeds from chaff.
- ● Plastic baggies or airtight containers: 2–3 small bags (quart-size) for seed storage.
- ● Labeling markers or tags: To mark seed varieties and harvest dates.
- ● Magnifying glass: For inspecting seed quality up close.
- ● Soft paintbrush: To gently dislodge stubborn seeds from pods.
- ● Desiccant packets: 1–2 for long-term seed storage to prevent moisture.
- ● Seed catalog or notebook: To track germination rates and plant traits.
- ● Dry, overcast day: Ideal for harvesting to avoid humidity or rain.
- ○ Gloves (optional): If you’re sensitive to plant sap or debris.
- ● Patience: Seed pods take weeks to fully dry—don’t rush!
Step-by-Step guide to extracting blackberry lily seeds without twisting the pods
Here’s how I carefully harvest seeds from blackberry lily pods without damaging the delicate capsules or losing viability.
🌱 Step 1: Identify and Select Mature Seed Pods
Blackberry lily pods turn a deep brownish-red when fully mature—wait until they’re completely dry and crisp to the touch. I avoid harvesting too early; immature pods won’t release seeds easily and may still contain undeveloped embryos. Gently twist the pod between your fingers to confirm it separates cleanly from the stem.
If the pod resists, it’s not ready. Mature pods should split open with minimal force, revealing the glossy black seeds inside. Collect pods on a dry day to prevent moisture from sticking to the seeds and reducing germination potential. Place them in a paper bag for airflow while you work.
💧 Step 2: Prepare a Clean Work Surface and Tools
Lay out a white paper towel or clean cloth on a flat surface—this makes the dark seeds easier to spot against a light background. I use a pair of small scissors or sharp pruners to carefully slice open the pods instead of crushing them. A fine-tip paintbrush helps later to separate seeds from any remaining pod fibers.
Avoid using your hands to pry open pods—blackberry lily seeds are tiny and can stick to fingers, making them difficult to recover. Work in a well-lit area to avoid missing seeds that might fall into shadows. If you’re processing multiple pods, label each with the collection date to track freshness.
✂️ Step 3: Open Pods and Extract Seeds Without Damage
Hold the pod firmly with one hand and make a single vertical cut along the seam with scissors, stopping just before the base to avoid slicing through seeds. Gently squeeze the two halves apart—they should separate cleanly, revealing the seeds nestled inside. Tap the pod lightly against the paper towel to dislodge any seeds clinging to the inner walls.
Use the paintbrush to sweep seeds onto the paper towel, then inspect the pod remnants under bright light. Some seeds may still adhere to the fibrous material; I carefully tease them free with the brush tip. Never shake pods directly over the towel—seeds can scatter and become lost in folds.
☀️ Step 4: Dry and Store Seeds for Optimal Viability
Spread the extracted seeds in a single layer on the paper towel and let them air-dry for 24-48 hours in a warm, dry place away from direct sunlight. This prevents mold growth and ensures seeds are completely dry before storage. I place a small fan nearby to speed up drying without disturbing the seeds.
Once dry, transfer seeds to a paper envelope or small glass jar with a desiccant packet to absorb any residual moisture. Label with the collection date—blackberry lily seeds remain viable for 1-2 years if stored properly. Keep them in a cool, dark place until ready to plant in spring.
⏰ Step 5: Verify Seed Quality Before Planting
Before sowing, I test a few seeds by placing them between damp paper towels in a sealed plastic bag. Store the bag in a warm spot (70-75°F) and check daily for germination. Healthy seeds should sprout within 10-14 days, though some varieties may take longer. Discard any seeds that remain dormant after 3 weeks—they’re likely nonviable.
If germination rates are low, consider stratification: place seeds in a sealed container with slightly damp sand and refrigerate for 4-6 weeks to mimic winter conditions. This often breaks dormancy for stubborn seeds. Once you confirm viability, plant in well-draining soil with partial shade to mimic their woodland habitat.
Tips & tricks for perfect blackberry lily seed extraction
Here's what nobody tells you about handling these delicate pods—and how to avoid losing seeds in the process.
Pod Maturity Matters: The deep brownish-red color and crisp texture are your cues for readiness in Step 1. I've learned the hard way that harvesting too early means struggling to extract seeds that won't release cleanly. If pods resist when you twist them, they're not ready yet—wait another week. The seeds inside immature pods are often undeveloped, so patience here pays off with higher germination rates later.
Tool Selection is Critical: For Step 2, small scissors or sharp pruners are essential—they give you precise control that fingers can't match. I've tried using my nails or blunt tools, and you'll end up crushing seeds or losing them in the process. A fine-tip paintbrush isn't just helpful—it's necessary for those stubborn seeds clinging to fibrous material. Keep one handy during Step 3 when you're carefully teasing seeds free from pod remnants.
Drying Strategy: The 24-48 hour drying period in Step 4 is non-negotiable for viability. I place a small fan nearby to create gentle airflow without disturbing the seeds—this cuts drying time to the lower end of the range. Direct sunlight will overheat the seeds, while too much humidity can cause mold. Store your seeds in a cool, dark place immediately after drying to preserve that 1-2 year viability window mentioned in Step 4.
Germination Test: The 10-14 day germination test in Step 5 reveals more than just viability—it shows you which seeds will establish fastest. I've found that seeds that sprout within 7 days tend to be the most vigorous plants. If you're dealing with stubborn seeds that don't germinate within 3 weeks, the 4-6 week stratification period often works wonders by mimicking natural winter conditions.
Pro Tips for Blackberry Lily Seed Pods
- Here's what nobody tells you about handling these delicate pods—and how to avoid losing seeds in the process.
- Pod Maturity Matters: The deep brownish-red color and crisp texture are your cues for readiness in Step 1.
- Tool Selection is Critical: For Step 2, small scissors or sharp pruners are essential—they give you precise control that fingers can't match.
Frequently asked questions
Got questions about harvesting blackberry lily seed pods? You’re not alone! Here are some of the most common queries—and their straightforward answers—to help you get the best viable seeds with minimal fuss.
When is the best time to harvest blackberry lily seed pods?
The ideal time to harvest is when the seed pods turn brown and papery but haven’t split open naturally—usually late summer to early fall. If you wait too long, the pods may crack, scattering seeds everywhere. Harvest on a dry day to avoid mold.
Why do some seed pods refuse to open, even when dry?
Blackberry lily pods are stubborn! If they won’t crack naturally, place them in a paper bag and store them in a warm, dry spot for 1–2 weeks. The movement from handling or temperature changes often triggers them to burst open. Avoid forcing them—patience pays off!
Can I use seed pods from store-bought blackberry lilies?
Unfortunately, no. Most nursery-bought blackberry lilies are hybrids or sterile cultivars, meaning their seed pods won’t produce viable seeds. Stick to pods from wild-type or heirloom plants grown from fresh seeds for the best results.
What should I do if my seed pods develop mold or rot?
If you spot fuzzy green/black mold or a musty smell, discard the pods immediately. To prevent this, harvest only when fully dry, store them in a well-ventilated container (like a mesh bag), and avoid damp conditions. A 5-minute rinse in 10% hydrogen peroxide can also sterilize clean pods.
How do I store harvested seed pods until planting?
Keep pods in a cool, dry place (like a sealed jar or envelope) for up to 6 months. For long-term storage, dry them further in the sun for a day, then freeze them in a sealed bag. Label with the harvest date—freshness = higher germination rates!
Wrapping up and next steps
Extracting viable seeds from blackberry lily seed pods is a rewarding process that connects you to nature’s cycle—without the frustration of stubborn twists! 🌱 Whether you’re a gardener, a DIY enthusiast, or simply curious about propagation, these pods offer a simple yet effective way to grow new plants.
Now that you’re equipped with the right tools and techniques, why not give it a try?
Start small: gather a few pods, follow the steps, and watch your green thumb grow! Share your success—or even your challenges—with fellow plant lovers online, and don’t forget to tag us. Happy growing! 🌿✨
- Next step: Plant your extracted seeds in well-draining soil and keep them moist until sprouts appear!