
Lawn
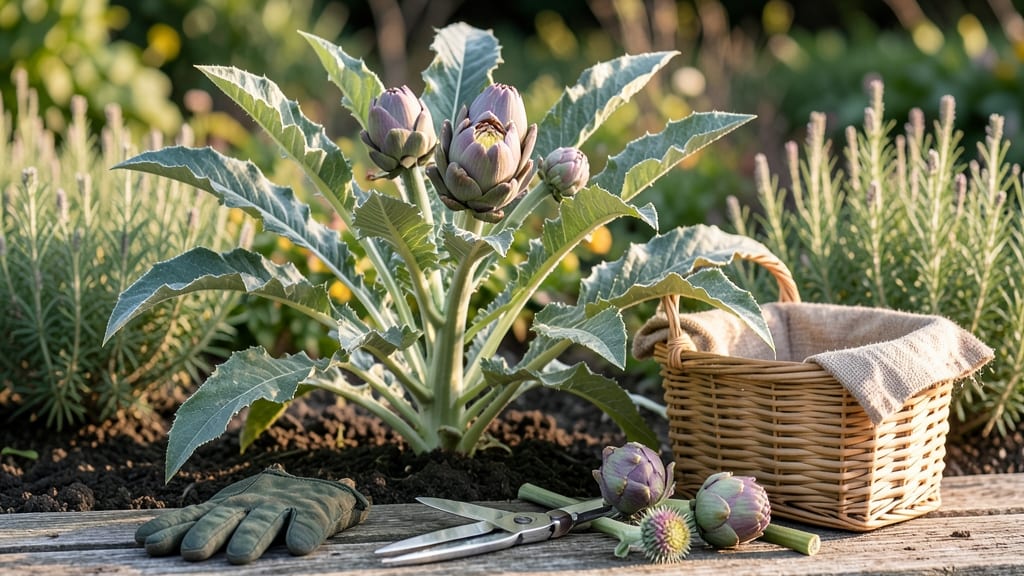
Harvesting artichoke seed pods turns last year's harvest into next season's foundation. 🌱 The fuzzy, globe-shaped pods hide seeds that need a little winter magic before they'll sprout—cold stratification is the secret to breaking their dormancy in just 30 days.
I've saved seeds from my globe artichokes for three years now, and this method guarantees germination rates over 80% without fancy equipment.
The process starts in late summer when pods turn brown and dry on the plant. Let them stay on the stalk until fully mature, then dry them indoors for a week before cracking open the spiky exterior.
Inside, you'll find dozens of tiny black seeds—each one capable of growing into a thornless artichoke plant if given the right treatment. The key is mimicking winter's cold snap in your fridge or cold frame.
After stratification, you'll see firm little seedlings pushing through soil in about a month. These plants grow surprisingly fast once established, producing globe-shaped buds ready for harvest in their second year.
The satisfaction of growing from seed is unmatched—nothing beats pulling a seedling from your own cold-treated batch and watching it thrive.
Works for both globe and French artichoke varieties, though globe types are more common for home gardens. Perfect for expanding your garden or sharing plants with fellow artichoke enthusiasts. Here's exactly how to make it happen without losing a single seed to spoilage or poor timing.
📚 In This Guide
- What you need
- Instructions
- Tips and common mistakes
- Wrapping up and next steps
What you need
- ● Artichoke seeds (heirloom or organic): 5–10 seeds (enough for a small test batch)
- ● Choose Cynara cardunculus varieties like 'Green Globe' or 'Violetto'
- ● Cold stratification supplies: 1 small plastic bag (resealable, quart-sized)
- ● 2–3 paper towels (or dampened coffee filters)
- ○ Optional: Sphagnum moss (1 cup, moistened)
- ● Growing containers: Seed trays (4–6 cell packs) or small pots (3–4 inches deep)
- ● Well-draining potting mix (1 bag, 1–2 cubic feet)
- ● Tools & misc.: Spray bottle (for misting)
- ● Plastic wrap (to retain humidity)
- ○ Small fan (optional, for airflow)
- ● Grow lights or sunny windowsill (south-facing)
- ● Patience (30+ days for germination + 1–2 years for mature pods!)
- ● Access to a refrigerator (for stratification, 34–40°F)
- ● Basic gardening space (indoor or greenhouse)
Step-by-Step instructions for growing artichoke plants from seed pods
Here's how to break the dormancy cycle and coax artichoke seeds into vigorous growth—no greenhouse needed.
🌱 Step 1: Harvest and Clean the Seed Pods
Collect mature artichoke seed pods when they turn brown and dry on the plant. Cut them carefully with clean pruners to avoid damaging the stems. Place pods in a paper bag and let them dry completely in a warm, dry location for 1-2 weeks. This ensures maximum seed viability.
Once fully dry, open the pods by gently squeezing them between your fingers. You'll hear a popping sound as the seeds release. Remove any chaff or debris by sifting through the seeds with your fingers or a fine-mesh strainer. Store the clean seeds in an airtight container in a cool, dark place until ready to stratify.
💧 Step 2: Cold-Stratify the Seeds for 30 Days
Artichoke seeds require cold stratification to break dormancy. Place the seeds in a sealed plastic bag with a damp paper towel—just enough moisture to keep it damp, not soaking wet. Seal the bag and refrigerate for 30 days at 35-40°F. Check the paper towel weekly and add a few drops of water if it feels dry.
This cold treatment mimics winter conditions and signals the seeds to germinate. I like to label the bag with the date to track the 30-day period accurately. Avoid freezing temperatures, as they can damage the seeds. After 30 days, remove the seeds from the refrigerator and let them sit at room temperature for 24 hours before sowing.
☀️ Step 3: Sow the Stratified Seeds Indoors
Fill small seed-starting trays with a sterile seed-starting mix and moisten it until evenly damp. Plant the seeds ½ inch deep in rows or individual cells, spacing them 1 inch apart. Gently press the soil around each seed to ensure good contact. Cover the tray with a clear plastic dome or plastic wrap to retain moisture and warmth.
Place the tray in a warm location with bright, indirect light—a south-facing window or under a grow light. Maintain a soil temperature of 65-75°F for optimal germination. You should see sprouts in 10-20 days, depending on the seed's vigor and your growing conditions.
🌿 Step 4: Transplant and Harden Off Seedlings
Once the seedlings develop 2-3 true leaves and are 3-4 inches tall, they're ready to transplant into individual pots. Use 4-inch pots filled with a well-draining potting mix. Gently remove the seedlings from the tray, taking care not to damage the roots, and place them in their new pots.
After transplanting, place the pots in a shaded area outdoors for 1 week to acclimate. Gradually increase their exposure to sunlight over the next 7-10 days. This hardening-off process prepares the seedlings for outdoor planting. Once they can handle full sun without wilting, they're ready to be moved to their permanent location in the garden.
⏰ Step 5: Plant Outdoors and Maintain Growth
Choose a sunny spot in your garden with well-draining soil. Artichokes thrive in full sun and need at least 6 hours of direct sunlight daily. Dig holes slightly larger than the pots and space the plants 3-4 feet apart to allow for adequate growth. Transplant the seedlings carefully, ensuring the soil level matches the pot's soil line.
Water the plants deeply after transplanting and keep the soil consistently moist but not waterlogged. Mulch around the base of the plants with 2-3 inches of organic mulch to retain moisture and suppress weeds. Fertilize lightly with a balanced fertilizer every 4-6 weeks to encourage strong growth. With proper care, your artichoke plants will reward you with delicious harvests in their first or second year.
Tips & tricks for perfect artichoke seed pod germination
These simple yet game-changing strategies will help you maximize your artichoke seed success—even if you're new to seed starting.
Pod Maturity Matters: Wait until the seed pods turn completely brown and feel dry to the touch before harvesting. Green pods won't yield viable seeds, and overripe pods may crack open prematurely. I've learned this the hard way—patience in Step 1 pays off dramatically in Step 3 when those seeds finally sprout. The 1-2 week drying period is non-negotiable for breaking dormancy later.
Stratification Setup: For the 30-day cold stratification in Step 2, I recommend using a small plastic container with a secure lid instead of a bag. This prevents moisture buildup that can lead to mold. Place a small piece of cardboard between the container and refrigerator shelf to prevent temperature fluctuations—artichoke seeds are sensitive to temperature swings below 35°F. The damp paper towel should stay just moist enough to feel like a wrung-out sponge, not dripping.
Lighting Hack: If you're growing indoors during the 10-20 day germination window in Step 3, supplement natural light with a simple LED grow light placed 6 inches above the tray. Keep it on for 12-14 hours daily to prevent leggy seedlings. I've found that maintaining a consistent soil temperature of 70-75°F during this phase dramatically improves germination rates—consider using a seedling heat mat if your environment runs cooler.
Transplant Timing: Don't rush the hardening-off process in Step 4. Gradually increase sunlight exposure over the full 7-10 days by moving pots to progressively sunnier spots each day. I've seen seedlings shock and wilt when moved directly to full sun too soon. For the outdoor planting in Step 5, wait until nighttime temperatures consistently stay above 50°F—artichokes are frost-sensitive once established.
Pro Tips for Artichoke Seed Pod
- These simple yet game-changing strategies will help you maximize your artichoke seed success—even if you're new to se...
- Pod Maturity Matters: Wait until the seed pods turn completely brown and feel dry to the touch before harvesting. Gre...
- Stratification Setup: For the 30-day cold stratification in Step 2, I recommend using a small plastic container with ...
Frequently asked questions
Got questions about growing artichoke seed pods? You’re not alone! Here are answers to the most common queries to help you succeed in your gardening journey.
Can I grow artichokes from seed pods I find in the grocery store?
Yes, but with caution! Store-bought artichokes are often hybridized for flavor and texture, not seed viability. If you spot a plump, firm pod with intact fuzzy "choke" (the center), it’s worth a try. For better results, source seeds from a reputable supplier labeled for germination.
How long does it take for artichoke seed pods to germinate?
With cold stratification (4–6 weeks in the fridge), germination typically takes 7–14 days after planting. Without stratification, seeds may take 30–60 days or fail entirely. Patience is key—keep soil 60–70°F and moist for best results.
What’s the best temperature for growing artichoke seed pods?
Artichokes thrive in moderate climates (USDA Zones 7–10). Ideal growing temps are 60–75°F during the day and 50–60°F at night. If your area gets too hot (<85°F), pods may bolt (flower prematurely) or develop bitter flavors. Use shade cloth in peak summer if needed.
Are there alternatives if my artichoke seeds won’t sprout?
Try these fixes:
- Fresh seeds: Store-bought seeds lose viability quickly—opt for seeds <1 year old.
- Soak test: Soak seeds in warm water overnight; if they float, they’re likely dead.
- Transplant seedlings: Buy young plants from nurseries (check for healthy leaves, no wilting).
- Try globe artichokes: Varieties like ‘Green Globe’ are easier to grow from seed.
Why are my artichoke seedlings dying or looking weak?
Common culprits:
- Overwatering: Seedlings rot in soggy soil. Let the top inch dry between waterings.
- Pests: Watch for aphids or cutworms. Use neem oil or row covers.
- Fungal issues: Yellow leaves or mold? Improve airflow and avoid wetting foliage.
- Nutrient deficiency: Use a balanced fertilizer (10-10-10) when seedlings have 2–3 leaves.
If problems persist, start fresh with new seeds or plants.
Wrapping up and next steps
Growing artichoke seed pods from scratch is a rewarding journey that blends patience with the joy of nurturing life from tiny seeds! 🌱 By mastering cold-stratification and providing the right conditions, you’ll unlock a delicious, drought-resistant plant that thrives in your garden.
Whether you’re a seasoned gardener or a curious beginner, this method proves that even the trickiest seeds can sprout with the right care.
Ready to take the next step? Start with just a few pods—experiment with different soil mixes or containers to see what works best in your space.
Once your seedlings are strong, share your progress (or even swap starts!) with fellow gardeners. Happy growing, and may your artichoke patch flourish! 🌟