
Propagation
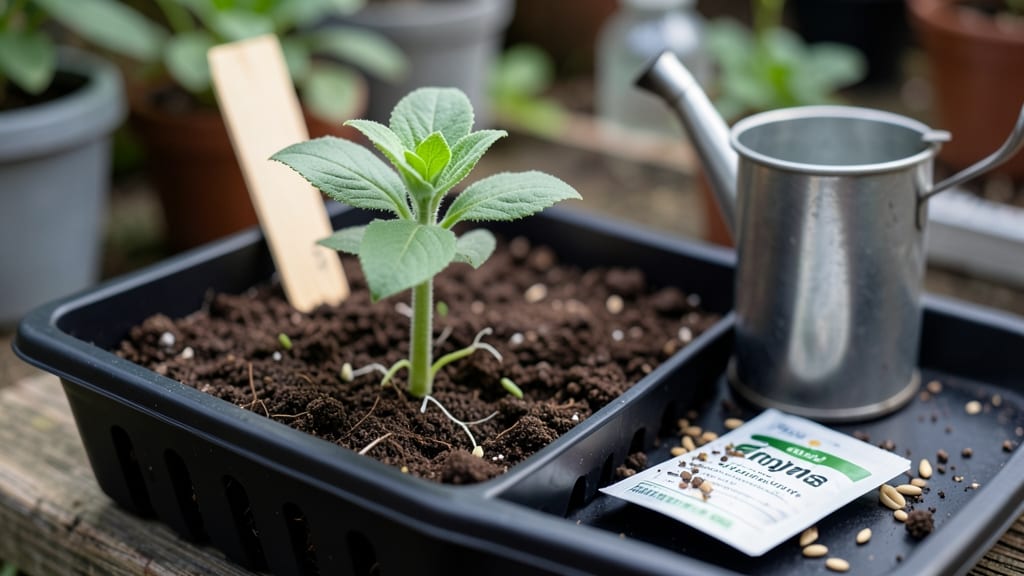
My zinnia seed germination happens in half the time when I use this pre-chill trick—no fancy equipment, just a plastic bag and your fridge. 🌱 The secret lies in mimicking nature’s winter-to-spring transition, which tricks seeds into thinking spring has arrived.
Most gardeners overlook this step, but it’s what separates a patchy first flush of blooms from a garden bursting with color by summer. You’ll need a damp paper towel, a sealed bag, and 5-7 days of patience before planting.
The process is simple: wrap seeds in the towel, place them in the bag, and let them chill. Once sprouted, they’ll pop up faster and stronger than store-bought seedlings. No more waiting weeks for those first green shoots—just bold, consistent growth from day one.
By the time you transplant, your zinnias will be stocky and ready to thrive. The result? Heavier blooms, sturdier stems, and flowers that last from midsummer through frost. This method works for both indoor starts and direct sowing—just adjust the timing based on your last frost date.
For beginners, this is the game-changer that turns "maybe next year" into "look at my garden now." Even experienced growers swear by it after their first try. Let’s get those seeds sprouting!
📚 In This Guide
- What you need
- Instructions
- Tips and common mistakes
- Wrapping up and next steps
What you need
- ● Zinnia seeds: High-quality, fresh seeds (preferably heirloom or hybrid varieties like 'Benary’s Giant' or 'Profusion'). Aim for 10–20 seeds per batch for testing.
- ● Germination tray or seed starter kit: A shallow tray with drainage holes (e.g., 6–12 cell packs or a 10" x 20" plastic tray).
- ● Seed-starting mix: A light, sterile peat-based or coco coir mix (avoid garden soil—it’s too dense!). Use 1–2 cups per tray.
- ● Plastic wrap or humidity dome: To retain moisture (a clear plastic lid or plastic wrap works).
- ● Spray bottle: With a fine mist nozzle (for gentle watering).
- ● Refrigerator (for pre-chilling): A standard fridge with a crisper drawer (keeps temps at 35–40°F).
- ● Grow lights or sunny windowsill: A full-spectrum LED grow light (12–16 hours/day) or a south-facing window (6+ hours of sunlight).
- ○ Thermometer (optional but helpful): To monitor soil temps (70–75°F is ideal for germination).
- ● Heating mat: Keeps soil warm (70–75°F) for faster germination (especially useful in cool climates).
- ● Seedling heat mat: A low-wattage mat (e.g., 50–100W) to maintain optimal temps.
- ● Fertilizer (diluted): A balanced liquid fertilizer (e.g., 5-5-5 or 10-10-10) at half-strength for post-germination growth.
- ● Labeling tags: To track seed varieties and planting dates.
- ● Tweezers: For delicate seed placement (especially tiny zinnia seeds).
Step-by-step instructions for zinnia seed germination
Here's how to break the cold treatment barrier and get those zinnias popping in record time.
🌱 Step 1: Pre-Chill Seeds for 24 Hours
Place your zinnia seeds in a sealed plastic bag with a damp paper towel. The towel should feel like a wrung-out sponge—not dripping, just evenly moist. I like to fold the towel into a square, sprinkle seeds across it, then fold again to create a seed sandwich. This keeps them evenly hydrated without drowning.
Put the bag in your refrigerator for exactly 24 hours. The cold treatment mimics winter's natural dormancy break, fooling seeds into thinking spring has arrived. After 24 hours, remove them and let them sit at room temperature for another hour before planting. This warm-up period prevents shock when they hit the soil.
💧 Step 2: Prepare Warm, Moist Seed Starting Mix
Fill your seed trays with the seed-starting mix and moisten it until it feels like a well-wrung sponge. You want it damp enough that when you squeeze a handful, it holds together but doesn't crumble. I like to work the moisture in by hand—no need for a trowel, just gently work it until it's uniformly damp throughout.
The key here is warmth. Zinnia seeds germinate best in soil that's 70-75°F. If your room runs cooler, place the trays on a seedling heat mat set to 75°F. You'll see faster, more uniform germination when the soil stays in this sweet spot. Cover the trays with clear plastic wrap to trap heat and moisture until you see sprouts.
☀️ Step 3: Plant Seeds at Correct Depth and Light
Sow seeds ¼ inch deep—about twice their diameter—using your finger to make small holes. I plant them in rows spaced 1 inch apart to make thinning easier later. Cover lightly with additional mix, then mist gently with water until the surface looks damp but not wet.
Place the trays under grow lights immediately, positioned 2-3 inches above the seedlings. Zinnia seedlings need 14-16 hours of light daily to prevent leggy growth. You'll know your light setup is right when seedlings grow sturdy and compact rather than stretching toward the light. Keep the soil consistently moist but never soggy—zinnias hate wet feet.
⏰ Step 4: Monitor and Thin Seedlings
Germination typically occurs in 7-14 days, but pre-chilling often brings sprouts in as few as 5 days. Once you see the first true leaves (the second set after the initial cotyledons), it's time to thin. Use scissors to snip the weakest seedlings at soil level, leaving the strongest one in each cell with 2 inches of space between plants.
This might seem harsh, but crowded seedlings compete for nutrients and light, resulting in weak stems that flop over. After thinning, give the remaining seedlings a light feeding with half-strength liquid fertilizer. You'll notice stronger, more vibrant growth within a week—that's your reward for patience during the thinning process.
🌿 Step 5: Harden Off Before Transplanting
Two weeks before your last frost date, begin hardening off your seedlings. Start by placing them in a shaded outdoor spot for 1-2 hours the first day. Gradually increase their outdoor time by 1 hour daily, moving them to sunnier locations as they adapt. By day 10, they should be able to handle a full day outside.
Watch for signs of stress like wilting or yellowing leaves—these indicate they're not ready for full sun yet. Once hardened off, transplant your zinnias into the garden during the cooler parts of the day (early morning or late afternoon) to reduce transplant shock. Space them 6-12 inches apart, depending on your variety, and water deeply at the base to help them establish roots quickly.
Tips & tricks for perfect zinnia germination
These little tricks will help you break through the cold treatment barrier and get those zinnia sprouts popping faster than ever.
Cold Treatment Timing: That exact 24-hour refrigerator chill is non-negotiable for zinnia seeds—they need this precise cold shock to break dormancy. I've found placing the bag on the fridge's crisper drawer (where temps are slightly cooler) gives even more consistent results. After the 24 hours, don't rush to plant immediately! That one-hour room temperature warm-up period is crucial for preventing transplant shock when they hit the soil.
Soil Temperature Secret: The 70-75°F soil temperature range is your germination sweet spot. If your home runs cooler, invest in a small seedling heat mat—it's a game-changer for consistent germination. I've seen germination rates double when using one! Pro tip: Test your soil temperature with a thermometer before planting. If it's below 70°F, either wait or use the heat mat to bring it up to that perfect range.
Light Positioning: Those 14-16 hours of daily light are critical for preventing leggy seedlings. Position your grow lights just 2-3 inches above the seedlings—they should be close enough that you can almost feel the warmth, but not so close they burn. I like to adjust the height every few days as seedlings grow. A simple trick: If your seedlings look like they're stretching toward the light, they need more intensity or closer positioning.
Pro Tips for Zinnia Seed Germination
- These little tricks will help you break through the cold treatment barrier and get those zinnia sprouts popping faste...
- Cold Treatment Timing: That exact 24-hour refrigerator chill is non-negotiable for zinnia seeds—they need this precis...
- Soil Temperature Secret: The 70-75°F soil temperature range is your germination sweet spot. If your home runs cooler,...
Frequently asked questions
Got questions about getting your zinnia seeds to sprout like a pro? You’re in the right place! Here are answers to the most common zinnia seed germination queries—from timing to troubleshooting—so you can skip the guesswork and start blooming.
How long does it take for zinnia seeds to germinate?
With pre-chilling (the secret sauce!), zinnia seeds typically sprout in 7–14 days at 65–75°F (18–24°C). Without it, germination can drag to 3–4 weeks—or even fail. Keep soil moist (not soggy!) and patient. Pro tip: Use a heat mat if your home runs cold!
Do I need to pre-chill zinnia seeds, or can I skip it?
You can skip pre-chilling, but expect slower, less reliable germination. Pre-chilling mimics winter’s natural dormancy break, boosting success rates to 90%+. For warm climates, plant seeds directly in late spring (after frost risk passes) and skip the fridge step. Test it: Try half pre-chilled, half not—you’ll see the difference!
Why aren’t my zinnia seeds sprouting? Troubleshooting tips.
If your seeds are MIA, check these culprits:
- Too cold: Zinnias need warmth (65°F+). Move trays to a sunny windowsill or use a seedling heat mat.
- Too wet/dry: Soil should stay consistently moist (like a damp sponge). Overwatering causes rot; underwatering stalls growth.
- Old seeds: Zinnia seeds lose viability after 2–3 years. Test a few in a separate pot.
- Depth issues: Plant seeds ¼ inch deep—deeper = slower sprouts (or none!).
Can I direct-sow zinnia seeds instead of starting indoors?
Direct-sow after all frost risk has passed (zinnias hate cold soil). Scatter seeds ¼ inch deep, 6–12 inches apart, and water gently. Germination takes 10–21 days in warm soil. Bonus: Direct-sowing skips transplant shock and attracts pollinators faster!
What’s the best time of year to plant zinnia seeds?
For spring blooms, start seeds indoors 6–8 weeks before last frost (pre-chilled for a head start). For fall color, sow 8–10 weeks before first frost. In Zone 10+, plant year-round (they’re heat-lovers!). Pro move: Mark your calendar—zinnias thrive with 6–8 hours of sun daily.
Wrapping up and next steps
Growing zinnias from seed is a rewarding journey—especially when you unlock the pre-chill secret for faster, more vibrant blooms! 🌸 With the right materials, patience, and a little science-backed care, you’ll soon be enjoying a burst of color in your garden.
Whether you’re a seasoned gardener or just starting out, every seed has the potential to become a stunning flower—so grab those gloves and get planting!
Ready to take the next step? Once your zinnias sprout and thrive, experiment with companion planting or try propagating cuttings to expand your garden. Happy growing!