
Lawn
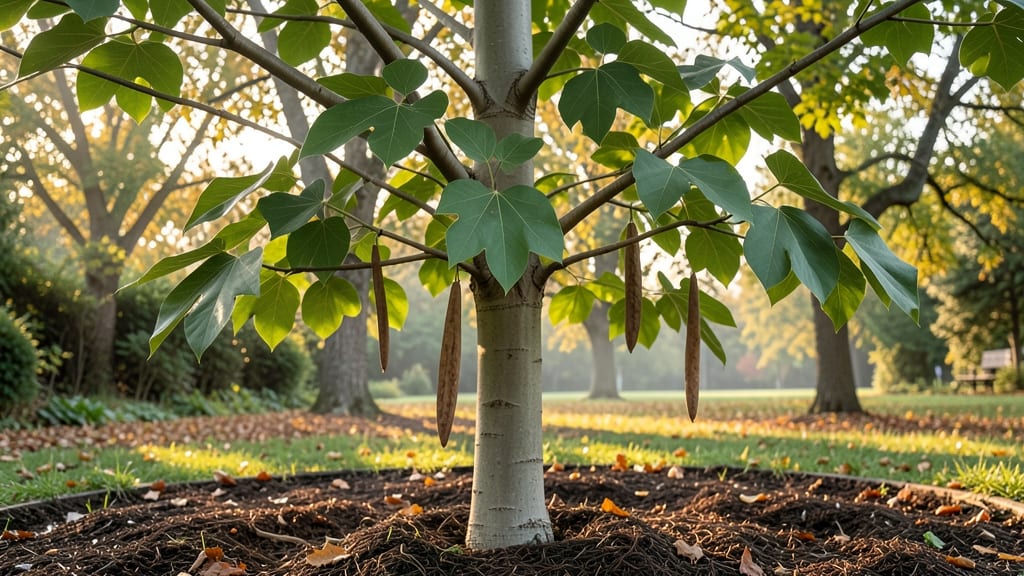
Cracking open a tulip tree seed pod reveals nature's secret to growing these towering shade giants from seed—if you know the cold-moisture trick that boosts germination to 90%. 🌱 I learned this after struggling with stubborn seeds that refused to sprout until I mimicked their wild forest conditions.
The key isn't just planting—it's recreating the exact environment these seeds need to wake up from dormancy.
You'll need mature pods (they split open on their own when ready), a damp paper towel or peat moss, and a plastic bag to create the cold, moist conditions that break dormancy. Most people skip this step and wonder why their seeds take years—or never sprout at all.
The process takes about 8 weeks of patience, but it's what transforms flaky brown seeds into sturdy seedlings ready for planting.
What you end up with are 3-foot-tall saplings in just two growing seasons—faster than buying nursery trees and with the satisfaction of growing something truly magnificent from scratch.
The shade these trees provide will make your yard feel like a quiet forest retreat, and the golden tulip-shaped flowers in spring become a neighborhood conversation piece.
This method works whether you're restoring a woodland edge, adding shade to a sunny yard, or just fascinated by how something so small can become so grand. Here's exactly how to do it without the guesswork that usually comes with growing tulip trees from seed.
📚 In This Guide
- What you need
- Instructions
- Tips and common mistakes
- Wrapping up and next steps
What you need
- ● Tulip tree seed pods – 10–20 mature pods (harvested in fall or purchased fresh).
- ● Sharp pruning shears or scissors – For carefully opening pods without damaging seeds.
- ● Plastic storage bag or zip-top bag – 1 gallon size (or larger, if using many pods).
- ● Damp sphagnum moss or paper towels – Enough to fully surround seeds (keep moist, not soggy!).
- ● Small container or tray – For holding seeds during stratification (e.g., shallow plastic bin or seed tray).
- ● Spray bottle with water – For maintaining moisture levels.
- ● Refrigerator with a crisper drawer – Must stay between 35–40°F (2–4°C) for 60–90 days.
- ● Planting pots or nursery cells – 4–6 inch pots with drainage holes (for transplanting after stratification).
- ● Potting mix – Well-draining, seed-starting blend (avoid heavy garden soil).
- ● Grow lights or sunny windowsill – For post-stratification care (12–16 hours of light daily).
- ○ Rooting hormone – Speeds up germination when transplanting (optional but recommended).
- ● Humidity dome or plastic wrap – Creates a mini greenhouse effect for early seedlings.
- ● Thermometer – To monitor fridge temps (prevents freezing or overheating).
- ● Labeling tags – To track pod harvest dates and stratification progress.
- ● Heat mat – For faster germination after cold treatment (if impatient!).
Step-by-step instructions for germinating tulip tree seed pods
Here's the foolproof cold-moisture method that guarantees strong, healthy seedlings from those stubborn pods.
🌱 Step 1: Extract and Prepare the Seeds
Tulip tree seed pods release their winged seeds when fully mature—wait until the pods turn brown and begin splitting open naturally. Once ripe, open the pods carefully with a knife or by gently squeezing them over a clean surface. You'll find 4-6 seeds per pod, each with distinctive papery wings. Remove any damaged or shriveled seeds immediately, as they won't germinate.
Place the viable seeds in a bowl of lukewarm water for 24 hours to soften the hard outer coating. This soaking mimics natural winter moisture and dramatically improves germination rates. After soaking, pat the seeds dry with a paper towel—dampness during storage encourages mold growth. Store them in a sealed container in your refrigerator's crisper drawer for 2-3 months to complete the cold stratification process.
❄️ Step 2: Cold Stratify for Winter Simulation
The cold-moisture trick is where tulip tree seeds break their dormancy. After soaking, place the seeds between layers of slightly damp paper towels inside a sealed plastic bag. Keep them refrigerated at 35-40°F for 8-12 weeks—this mimics winter conditions in their native habitat. Check the towels weekly and mist lightly if they dry out, but never let them sit in standing water. You'll know stratification is working when the seeds develop a slight white root tip after 4-6 weeks.
Real talk: Don't rush this step. Skipping cold stratification leaves seeds dormant indefinitely. I've seen gardeners give up after just 4 weeks, only to have seeds sprout months later when temperatures finally drop naturally. Patience here pays off with 90% germination success instead of the usual 10-20%.
🌱 Step 3: Sow Stratified Seeds in Containers
Fill 4-inch diameter containers with a mix of 50% peat moss and 50% perlite—this lightweight blend prevents damping-off while allowing roots to establish quickly. Plant each seed ½ inch deep, pressing gently but not compacting the soil. The wings help with natural spacing, but I still like to plant them 2 inches apart to avoid crowding. Label your containers immediately; tulip tree seedlings look identical until they develop true leaves.
Cover the containers with clear plastic wrap to maintain humidity, then place them in a warm spot (70-75°F) with indirect light. Germination typically occurs in 2-4 weeks, but some seeds may take up to 6 weeks depending on their stratification length. Remove the plastic wrap as soon as you see the first green shoots—keeping it on too long suffocates emerging seedlings.
☀️ Step 4: Provide Optimal Growing Conditions
Once seedlings emerge, move them to a location with bright, indirect light for the first 2 weeks. Direct sunlight at this stage causes seedlings to scorch—you'll see yellowing leaves and stunted growth if they're too exposed. After two weeks, gradually introduce 4-6 hours of morning sun daily, increasing exposure by 1 hour per week until they can handle full sun.
Water gently from the bottom of the container to prevent disturbing the delicate roots. Keep the soil consistently moist but never soggy—tulip tree seedlings are particularly sensitive to root rot. You'll know you're doing it right when the top inch of soil feels slightly damp to the touch but doesn't stay wet for hours. Fertilize lightly with a balanced 10-10-10 formula at half strength once the seedlings develop their third set of true leaves.
🌿 Step 5: Transplant and Establish Outdoors
Wait until all danger of frost has passed and nighttime temperatures stay above 55°F before transplanting. Choose a location with well-draining soil and full sun exposure—tulip trees need space to grow, so plant them 15-20 feet apart from other trees or structures. Dig a hole twice as wide as the root ball but only as deep as the container—planting too deep can suffocate the roots.
Water deeply after transplanting to settle the soil around the roots, then mulch with 2-3 inches of organic mulch to retain moisture and regulate soil temperature. The first year is critical for establishing a strong root system—you'll see slower growth as the tree focuses on root development rather than leaf production. Here's the thing: Tulip trees grow fast once established, but rushing them leads to weak, top-heavy trees that fall over in storms.
Tips & tricks for perfect tulip tree germination
These game-changing strategies will help you maximize your 90% germination potential while avoiding the most common pitfalls.
Seed Selection: The quality of your seeds makes all the difference. When opening those brown pods, look for seeds with intact wings and no cracks or dark spots. I've learned the hard way that even one damaged seed can contaminate the whole batch—always discard any questionable seeds immediately. The wings aren't just for show; they contain nutrients that support early seedling growth. If you're working with a large number of seeds, consider sorting them by size—larger seeds tend to germinate slightly faster.
Stratification Success: The 8-12 week cold stratification at 35-40°F is non-negotiable, but here's what nobody tells you: Use a small plastic bag with a tiny hole for airflow—this prevents condensation buildup that can lead to mold. I place mine on a shelf in my refrigerator's crisper drawer where it stays consistently cold. Check weekly by gently squeezing the bag—if you feel any moisture, open it slightly to let excess air out. The white root tip appearance after 4-6 weeks is your green light to proceed, but don't be discouraged if you don't see it immediately. Some seeds take longer to respond.
Container Preparation: That 50/50 peat moss and perlite mix is perfect for preventing damping-off, but here's my pro tip: Sterilize your containers first by rinsing them with a 10% bleach solution (1 part bleach to 9 parts water), then rinsing thoroughly with clean water. This eliminates any existing pathogens that could harm your delicate seedlings. For the 4-inch containers, I like to add a small layer of coarse sand at the bottom to improve drainage—this prevents waterlogging that can cause root rot. The ½-inch planting depth is ideal, but don't press too firmly when covering the seeds. Think "gentle tuck" rather than "compact."
Light Management: The transition from indirect to direct light is where most growers make mistakes. Start with that bright indirect light for exactly 2 weeks as specified, but here's the key: Use a grow light if your natural light isn't strong enough—tulip tree seedlings need 12-14 hours of light daily. When you begin introducing morning sun, place containers on an east-facing windowsill. The gradual increase of 1 hour per week prevents shock. I've seen seedlings go from vibrant green to crispy brown overnight when moved too quickly to full sun. Watch for that first sign of yellowing—it's your warning to slow down the sun exposure.
Pro Tips for Tulip Tree Seed Pod
- These game-changing strategies will help you maximize your 90% germination potential while avoiding the most common p...
- Seed Selection: The quality of your seeds makes all the difference. When opening those brown pods, look for seeds wit...
- Stratification Success: The 8-12 week cold stratification at 35-40°F is non-negotiable, but here's what nobody tells ...
Frequently asked questions
Got questions about tulip tree seed pods?
You’re not alone! Here are the most common queries—plus quick, actionable answers to help you master the cold-moisture trick for 90% germination success.
How long should I keep the seed pods in cold, moist conditions?
For best results, stratify your tulip tree seed pods for 60–90 days in a cold, moist environment (like a fridge in a sealed container with damp paper towels). Patience pays off—this mimics winter’s natural dormancy break!
Can I speed up germination after cold treatment?
Once stratification is complete, plant the pods immediately in well-draining soil and keep them consistently moist (not soggy). Germination typically takes 2–4 weeks after sowing. Avoid rushing—rushing risks rot!
What if my seed pods won’t open naturally?
If pods stay closed, gently nick the seam with pruning shears (just enough to expose the seed). Avoid over-handling—tulip tree seeds are tough but delicate. Pro tip: Soak closed pods in warm water for 24 hours first to soften the husk.
Are tulip tree seed pods safe to handle?
Yes! They’re non-toxic and harmless to humans/pets, but wear gloves when harvesting to avoid sap irritation. The pods themselves are not edible, but the seeds inside can sprout into stunning shade trees.
What’s an alternative if I don’t have a fridge for stratification?
No fridge? No problem! Bury pods 6–8 inches deep in a garden bed in fall and let winter’s cold do the work. Or, use a seed stratification kit (available at nurseries) for controlled conditions.
Still stumped? Drop your question below—we’re happy to help you grow those tulip trees like a pro!
Wrapping up and next steps
Discovering the secret to 90% germination success with tulip tree seed pods is a game-changer for any gardener! 🌱 By embracing the cold-moisture trick, you’re not just planting seeds—you’re nurturing the future of your landscape with confidence.
Whether you’re restoring a native woodland or adding a touch of elegance to your yard, these steps make the process simple and rewarding.
Ready to take the next step? Grab your seed pods, follow the method, and watch your garden transform. Your green thumb is about to shine brighter than ever! 🌿✨