
Propagation
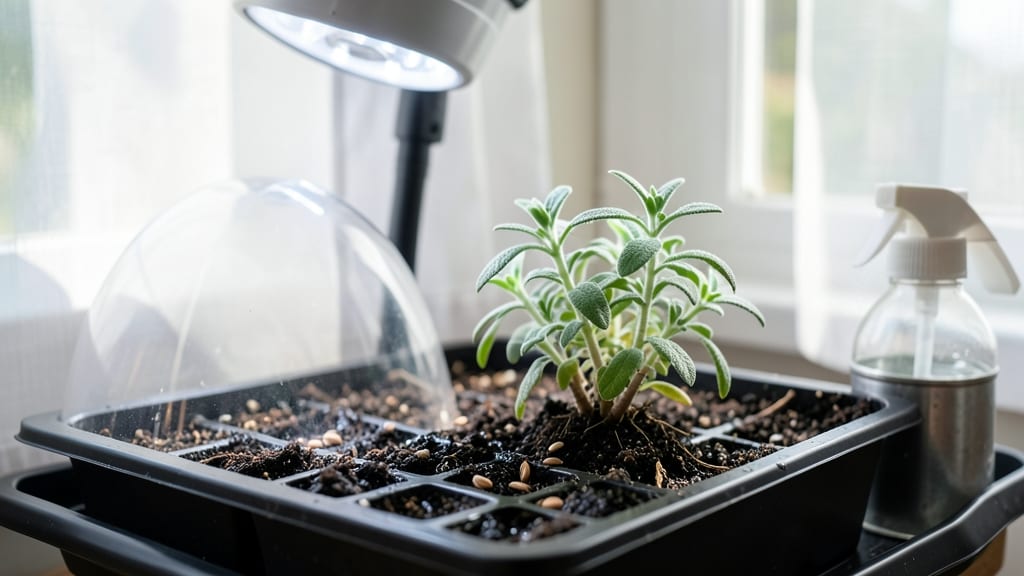
Thyme seed germination starts with the right moisture balance—too dry and they sleep, too wet and they rot. 🌱 I’ve learned the hard way that patience and precision are key, but with the right setup, those first green sprouts appear in just 7 days.
The secret isn’t complicated: it’s about keeping the soil damp (not soggy) and warm, while giving those tiny seeds the cozy conditions they crave to break dormancy.
You’ll need a shallow tray, well-draining potting mix, and a spray bottle to mist without drowning the seeds. A heat mat set to 70-75°F speeds things up, but even a sunny windowsill works if you’re consistent.
The goal is to mimic spring’s gentle rain—just enough moisture to wake the seeds, but not so much they suffocate. Most beginners overwater here, and that’s how you lose your first batch.
Once those first sprouts push through, you’ll know you’re on the right track—tiny, delicate, and full of potential. Within 2-3 weeks, you’ll have a lush mat of thyme seedlings ready to transplant.
The smell alone is enough to make you forget the waiting game, and the best part? These little plants are tough once established—they’ll outlast your mistakes.
For slower germinators, try a second batch with a little extra warmth or a light misting of hydrogen peroxide (1 tsp per cup of water) to prevent mold. And remember: thyme seeds are stubborn but rewarding.
With the right conditions, you’ll go from empty tray to fragrant harvest in no time—no green thumb required, just attention to detail.
📚 In This Guide
- What you need
- Instructions
- Tips and common mistakes
- Wrapping up and next steps
What you need
- ● Thyme seeds – High-quality, organic seeds (e.g., Thymus vulgaris or culinary thyme varieties). Aim for 10–20 seeds for a small batch.
- ● Seed-starting mix – A lightweight, sterile potting soil (e.g., coconut coir or peat-based mix with perlite). Avoid garden soil—it’s too dense!
- ● Seed trays or small pots – 2–4 inch pots or a seed tray with drainage holes (plastic or biodegradable).
- ● Spray bottle – A fine-mist sprayer (16 oz) for gentle watering.
- ○ Clear plastic dome or plastic wrap – To create a humidity tent (optional but highly recommended).
- ● Grow lights or sunny windowsill – A full-spectrum LED grow light (12–16 hours/day) or a south-facing window (6+ hours of sunlight).
- ● Tweezers or toothpick – For gently placing seeds into the soil.
- ● Small hand trowel – To lightly cover seeds (¼ inch deep).
- ○ Thermometer (optional) – To monitor soil temperature (70–75°F is ideal).
- ○ Fertilizer (optional) – A diluted seaweed or fish emulsion (1:10 ratio) for post-germination care.
- ● Label markers – To track planting dates and varieties.
Step-by-step instructions for germinating thyme seeds
Here's how to coax those tiny thyme seeds into sprouts—fast and without fuss.
🌱 Step 1: Prepare the Seed Starting Mix
Fill your seed-starting tray with a sterile, well-draining mix (I use a blend of 50% peat moss and 50% perlite). Moisten it lightly until damp but not soggy—think of a wrung-out sponge. Press the mix down gently so it's firm enough to hold seeds in place without being compacted. This prevents seeds from washing away when you water later.
Thyme seeds are tiny, so I like to sprinkle them evenly across the surface rather than trying to space them perfectly. A light misting with a spray bottle keeps the mix moist without disturbing the seeds. Cover the tray with plastic wrap to create a mini greenhouse effect—this traps warmth and humidity, which thyme seeds crave to sprout.
💧 Step 2: Maintain Consistent Moisture
Thyme seeds need constant moisture to germinate, but they’ll rot if drowned. Check the tray daily and mist the surface with water whenever the top layer feels dry to the touch. I use a spray bottle to avoid displacing seeds—just a fine mist until the soil looks uniformly damp.
Place the tray in a warm spot, ideally between 70-75°F. A seedling heat mat set to 75°F speeds things up, but a sunny windowsill works too. You’ll see the first sprouts in 7-14 days, but patience is key—some seeds take longer. Once they break through, remove the plastic wrap immediately to prevent mold.
☀️ Step 3: Provide Light and Air Circulation
Move the tray to a bright spot with indirect light as soon as sprouts appear. A south-facing window or grow light keeps them from stretching leggy. I keep the light 2-3 inches above the seedlings and raise it as they grow. Too much direct sun now can scorch the delicate leaves.
Thin the seedlings to 2 inches apart once they have two true leaves—this prevents overcrowding and gives each plant room to grow. Use small scissors to snip excess seedlings at soil level, then transplant the strongest ones to individual pots. You’ll know they’re ready for the next step when they’ve developed 3-4 sets of leaves.
🪴 Step 4: Transplant to Containers
Fill small pots with a well-draining potting mix (I add a handful of sand to improve aeration). Dig a hole slightly larger than the root ball, place the thyme seedling in, and firm the soil gently around it. Water lightly to settle the roots, but avoid soaking the soil—thyme hates soggy conditions.
Place the pots in a spot with full sun (6+ hours daily) and keep the soil lightly moist. You’ll see new growth within a week—that’s your signal everything is working. Once established, thyme is drought-tolerant, but young plants need consistent moisture to thrive.
Tips & tricks for perfect thyme seed germination
Here's what I learned the hard way about coaxing thyme seeds into thriving sprouts—without the guesswork.
Moisture Control: The key to success is keeping that seed-starting mix consistently damp, like a wrung-out sponge. I've ruined batches by either overwatering or letting them dry out. Check daily and mist just until the surface feels damp—never soggy. A spray bottle gives you the most control without disturbing those tiny seeds.
Temperature Matters: Thyme seeds love warmth, so aim for that 70-75°F range mentioned in the instructions. I use a seedling heat mat set to 75°F for the first week, but if you don't have one, place your tray on top of your fridge or near a sunny windowsill. Just avoid cold drafts—thyme seeds hate them.
Light Transition: Don't rush the light exposure after sprouts appear. Those delicate seedlings need gentle indirect light first to prevent stretching. I start with a south-facing window and gradually increase light exposure over 3-4 days. Too much direct sun too soon will scorch their tender leaves.
Thinning Strategy: When thinning to 2 inches apart, I use small scissors to snip seedlings at soil level rather than pulling. This prevents disturbing the roots of nearby plants. Save the cuttings—you can replant them if you have extra space, or compost them if not.
Pro Tips for Thyme Seed Germination
- Here's what I learned the hard way about coaxing thyme seeds into thriving sprouts—without the guesswork.
- Moisture Control: The key to success is keeping that seed-starting mix consistently damp, like a wrung-out sponge. I'...
- Temperature Matters: Thyme seeds love warmth, so aim for that 70-75°F range mentioned in the instructions. I use a se...
Frequently asked questions
Got questions about germinating thyme seeds? You’re not alone—this process can feel tricky at first! Below, we’ve rounded up the most common queries to help you grow lush thyme from scratch with confidence.
How long does it take for thyme seeds to germinate?
Thyme seeds are notoriously slow to sprout, often taking 14–21 days (or even longer) under ideal conditions. Patience is key! Use a heat mat (70–75°F) and keep soil consistently moist to speed up germination. If you don’t see sprouts in 3 weeks, don’t panic—some seeds may still wake up.
Why aren’t my thyme seeds germinating?
Thyme seeds need three things to break dormancy: moisture, warmth, and light. Common culprits include:
- Dry soil: Thyme seeds need constant moisture (not soggy) to soften their hard outer shell.
- Cold temperatures: Use a seedling heat mat or place pots in a warm spot (like on top of a fridge).
- Old seeds: Thyme seeds lose viability quickly—use fresh seeds (less than 1 year old) for best results.
Can I grow thyme from seeds indoors without sunlight?
Yes! Thyme seeds need light to germinate, but you can use a grow light (12–16 hours/day) or a sunny windowsill (south-facing is best). If natural light is weak, supplement with a LED grow bulb to prevent leggy seedlings. Once sprouted, keep lights 1–2 inches above the seedlings to avoid burning.
Should I soak thyme seeds before planting?
Soaking isn’t necessary, but it can help with stubborn seeds. Try this:
- Place seeds in a damp paper towel.
- Seal in a plastic bag and refrigerate for 24–48 hours (stratification).
- Rinse and plant immediately—don’t let them dry out.
What’s the best soil mix for thyme seed germination?
Thyme thrives in well-draining, sandy soil with a pH of 6.0–8.0. Mix:
- 50% pearlite or coarse sand (for drainage).
- 30% coco coir or peat moss (for moisture retention).
- 20% compost (for nutrients).
Pro Tip: Label your trays!
Thyme seedlings look similar to other herbs (like oregano or basil). Use toothpicks and masking tape to label trays with the date planted. This helps track germination progress and avoid confusion when thinning seedlings.
Wrapping up and next steps
Mastering thyme seed germination is all about patience, precision, and the right conditions—like maintaining consistent moisture and warmth. With these steps, you’ll watch tiny sprouts emerge in just 7 days, setting the stage for a thriving herb garden. 🌱
Now that you’re armed with the know-how, give it a try! Start small, experiment with your setup, and soon you’ll be harvesting fresh thyme for cooking or sharing with fellow green thumbs. Happy growing! 🌿