
Planting
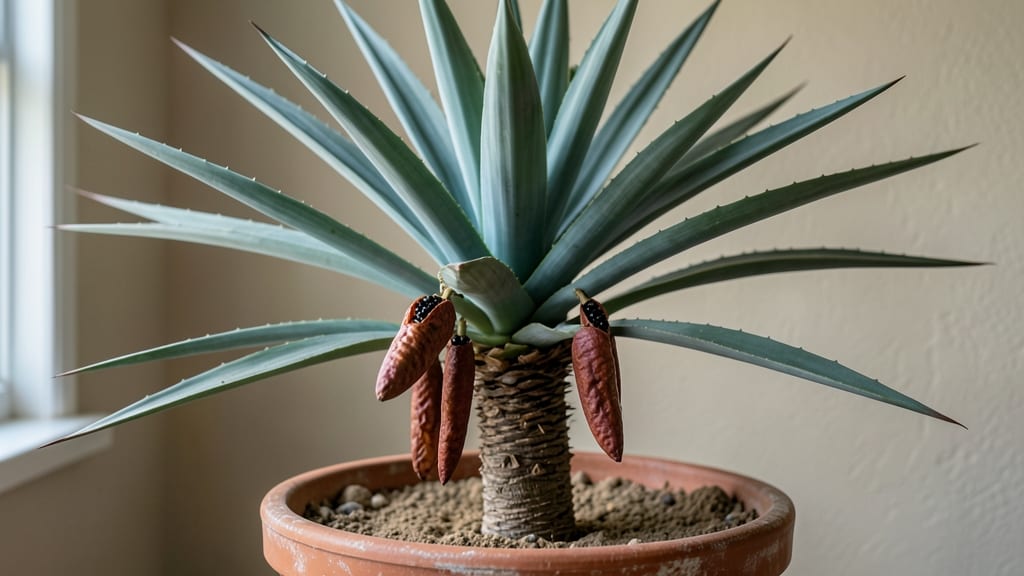
Red yucca seed pods split open on their own—nature’s way of saying, "Here’s your next plant." 🌱 I’ve watched these dramatic pods crack apart in late summer, revealing seeds ready for collection without a single tool. The timing is everything, and missing it means waiting another year for the show.
These pods turn from green to tan, then burst with a satisfying pop—often while you’re not even looking. The seeds inside are tiny but tough, and with the right approach, you can turn them into thriving plants. No fancy equipment needed, just patience and the right conditions.
By late fall, you’ll have seedlings pushing through the soil, their sword-like leaves signaling success. The key is knowing when to collect, how to store seeds, and what to do when germination feels slow. Let’s make this hands-off process work for you.
Works best in zones 7-11, but even beginners in cooler climates can try with a little extra care. Here’s how to nail it every time.
📚 In This Guide
- What you need
- Instructions
- Tips and common mistakes
- Wrapping up and next steps
What you need
- ● Red yucca plant (mature, healthy, and flowering—Hesperaloe parviflora or similar species).
- ● Seed pods (naturally ripened and split open—wait for them to turn brown and dry!).
- ● Gloves (gardening or disposable) to protect your hands from prickly pods or debris.
- ● Pruning shears or small scissors (for carefully snipping fully dried pods if needed).
- ● Paper bags or breathable fabric sacks (lightweight, 1–2 per plant to collect seeds).
- ○ Newspaper or cardboard (for drying seeds indoors—optional but helpful).
- ● Fine-mesh strainer or sieve (to separate seeds from chaff—¼-inch mesh size works well).
- ● Paper towels or coffee filters (for drying seeds thoroughly).
- ● Small paper envelopes or airtight containers (for seed storage—label with the date!).
- ● Magnifying glass (to inspect seeds for viability or pests).
- ● Seedling trays or biodegradable pots (if you’re ready to start seedlings early).
- ● Humidity dome or plastic wrap (to create a mini greenhouse for germinating seeds).
- ● Planting soil mix (well-draining cactus/succulent blend for red yucca seedlings).
- ● Spray bottle with water (for gentle misting during germination).
- ● Camera or notebook (to document pod stages—great for tracking progress!).
How to collect red yucca seeds from self-splitting pods
No digging or pruning required—nature does the work for you.
🌿 Step 1: Identify Mature Red Yucca Seed Pods
Red yucca (Hesperaloe parviflora) produces striking seed pods that turn from green to tan as they mature. Look for pods that have dried completely and developed a papery, brittle texture—this usually happens in late summer or early fall, depending on your climate. A mature pod will feel light when shaken and may even split open slightly on its own.
I like to check my plants in the morning after a dry night, when dew isn't masking the pods' true condition. If you see tiny cracks forming or seeds peeking out, that's your signal to start monitoring closely. These pods are designed to split open naturally, so you don't need to force them—just be patient and watchful.
⏰ Step 2: Wait for Pods to Split Open Naturally
The pods will open when they're ready, typically within 2-4 weeks after turning completely dry. You'll notice the pod splitting along its seams with a faint popping sound, especially after a dry spell. The seeds inside are small, black, and shiny—almost like tiny beads.
Here's the thing—don't rush this process. If you try to open the pods too early, the seeds won't be fully mature and won't germinate well. I've learned this the hard way: impatiently cracking open green pods led to seeds that either rotted or failed to sprout. Let nature take its course.
🪴 Step 3: Collect Seeds Before They Scatter
Once the pod has fully opened, place a clean, dry container (like a small bowl or paper bag) beneath it to catch the seeds as they fall. Red yucca seeds are lightweight and will easily blow away if left unattended. I use a shallow tray lined with newspaper to make cleanup easier—just fold the paper and store it in a labeled envelope.
Collect seeds within 1-2 days of the pod opening to ensure maximum viability. If you're expecting rain, do this sooner rather than later. The seeds are hardy once dry, but fresh seeds from open pods have the highest germination rates. Label your collection with the date and variety (if applicable) to track their age.
☀️ Step 4: Store Seeds Properly for Germination
Spread the collected seeds on a paper towel in a single layer and let them dry for 24-48 hours in a warm, dry place. This prevents mold and ensures they're ready for storage. Once dry, transfer them to a sealed envelope or small container and store in a cool, dark place—like a refrigerator or seed vault—where they'll remain viable for 1-2 years.
Red yucca seeds benefit from a cold stratification period to break dormancy. After collecting, place the sealed container in the fridge for 4-6 weeks before sowing. This mimics winter conditions and tricks the seeds into thinking they've experienced a natural cycle, which significantly improves germination rates.
🌱 Step 5: Sow Seeds for New Plants
Fill small pots with a well-draining cactus/succulent mix and sow seeds ¼ inch deep, spacing them ½ inch apart. Mist the soil lightly with water—red yucca seeds need moisture to germinate, but avoid soaking the mix. Place the pots in a warm spot (70-80°F) with bright, indirect light. Germination can take 2-4 weeks, so be patient.
Once seedlings emerge, move them to a sunny window or under grow lights for 12-14 hours daily. They'll grow slowly at first, but within 3-4 months, you'll have sturdy young plants ready for transplanting. I always harden them off for a week before moving outdoors to prevent shock—just like with any delicate young plant.
Tips & tricks for perfect red yucca seed collection
Nature handles most of the work—here's how to maximize your success with these self-splitting pods.
The Patience Factor: In Step 1, when pods turn completely tan and feel light, resist the urge to force them open. The 2-4 week waiting period in Step 2 is crucial—immature seeds from green pods won't germinate. I've seen pods split open naturally with just a faint pop after a dry spell, so keep an eye out for that telltale sound.
Collection Strategy: For Step 3, position your container directly beneath the opening pod to catch every seed. Red yucca seeds are tiny and lightweight—just a gentle breeze can carry them away. I use a shallow tray lined with newspaper because it's easy to fold and store once seeds are collected. Place the tray under the plant the night before collection to ensure you catch any seeds that might fall overnight.
Drying and Storage: After collecting, spread seeds on a paper towel for that critical 24-48 hour drying period in Step 4. This prevents mold and ensures they're ready for long-term storage. I like to use small envelopes with the collection date written on them—this helps track seed age, especially important since viability drops after 1-2 years. Store them in a cool, dark place like your refrigerator's crisper drawer.
Cold Stratification Secret: The 4-6 week cold stratification period in Step 4 is what makes red yucca seeds germinate reliably. Place your sealed container of seeds in the fridge's vegetable drawer (around 40°F) to mimic winter conditions. This breaks dormancy and significantly improves germination rates—trust me, your seedlings will thank you for this extra step!
Pro Tips for Red Yucca Plant Seed Pods
- Nature handles most of the work—here's how to maximize your success with these self-splitting pods.
- The Patience Factor: In Step 1, when pods turn completely tan and feel light, resist the urge to force them open. The...
- Collection Strategy: For Step 3, position your container directly beneath the opening pod to catch every seed. Red yu...
Frequently asked questions
Got questions about red yucca seed pods? You’re not alone!
Here are answers to the most common queries—from timing to troubleshooting—so you can master hands-off seed collection with ease.
When do red yucca seed pods ripen and split open?
Red yucca seed pods typically ripen in late summer to early fall (August–October, depending on your climate). Once mature, they’ll dry out and split open on their own—no need to rush! If pods stay green or closed, they’re not ready yet. Patience pays off!
What should I do if my seed pods won’t split open naturally?
If pods refuse to open, they may need a little help. Try placing them in a paper bag for 1–2 weeks to speed up drying. Avoid forcing them open—gently shake the bag daily to encourage splitting. If pods stay stubborn, they might not be fully ripe; harvest next season instead.
How long do red yucca seeds stay viable after pod splitting?
Freshly collected seeds are most viable when planted immediately, but they can stay good for 1–2 years if stored in a cool, dry place (like a sealed envelope or jar). For best results, sow them within 6 months. Pro tip: Label your seeds with the harvest date!
Can I grow red yucca from seed, or should I propagate cuttings?
While red yucca can be grown from seed, it’s slower and less reliable than propagating from cuttings (which root easily). Seeds may take 1–2 years to mature into flowering plants. For faster results, opt for cuttings from established plants—just snip a healthy stem and root it in soil!
Are red yucca seed pods attractive to pests or wildlife?
Yes! Birds, squirrels, and insects may snatch seeds before you can collect them. To protect your pods:
- Harvest them as soon as they split (morning is best).
- Use fine mesh bags over pods if wildlife is a problem.
- Avoid overcrowding plants—spread them out to reduce pest access.
Wrapping up and next steps
Discovering the red yucca plant’s unique seed pods is like unlocking nature’s effortless gardening hack—no fuss, just rewards! These striking pods split open on their own, offering a hands-off way to collect seeds for future growth.
Whether you’re a seasoned gardener or a curious beginner, embracing this low-maintenance process can expand your plant collection with minimal effort.
Ready to grow your green thumb? 🌱 Start by observing your red yucca plants this season—watch for those iconic pods, and let nature do the rest. Then, share your success with fellow plant lovers or experiment with propagating your own red yucca babies!