
Lawn
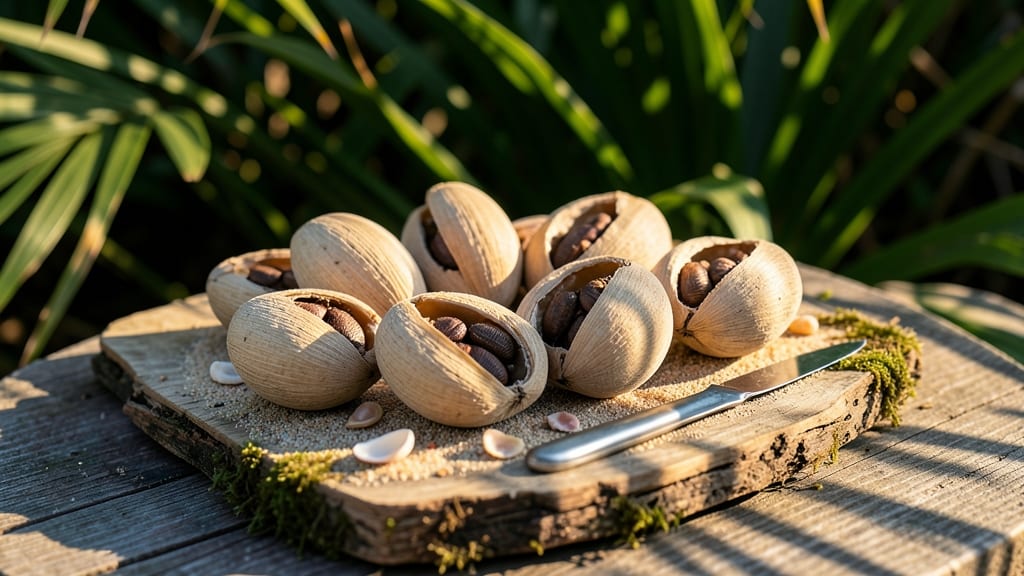
Palm seed pods turn your lawn into a natural art gallery without a single twist of wire. ✨ I stumbled onto this idea after collecting fallen pods from my neighbor’s palm tree—now they’re the star of my patio arrangements, adding organic texture that no plastic decor ever could.
The best part? They’re free, durable, and weather-resistant, so you can arrange them year-round without worrying about fading or breaking. I’ve used them in everything from rustic centerpieces to whimsical garden markers, and they always look fresh.
You’ll create effortless elegance that blends seamlessly with any outdoor style, from boho to modern. The pods’ natural curves and earthy tones make them perfect for seasonal displays, too—think Thanksgiving tablescapes or winter wreaths. No special skills needed—just gather, arrange, and admire.
Here’s how to start crafting your own natural masterpiece!
📚 In This Guide
- What you need
- Instructions
- Tips and common mistakes
- Wrapping up and next steps
What you need
- ● Palm seed pods: 10–20 pods (fresh or dried, depending on your design). Look for coconut, palm, or date pods—larger pods work best for bold statements!
- ● Natural adhesive: 1 small bottle of eco-friendly glue (like Mod Podge or a water-based adhesive) or hot glue (for quick fixes).
- ● Decorative elements: Small pebbles or river rocks (5–10 pieces)
- ○ Dried flowers or leaves (optional, for texture)
- ● Twine or jute string (1–2 yards, for hanging or securing)
- ● Safety gear: Gloves (to protect hands from sap or sharp edges) and safety goggles (if sanding pods).
- ● Cleaning supplies: Mild soap, water, and a soft brush (for prepping pods).
- ● Design tools: Acrylic paint + paintbrushes (for custom colors)
- ● Sandpaper (medium-grit, 120–150, to smooth rough edges)
- ○ Drill with small bits (optional, for adding holes to hang pods)
- ● Display setup: Stakes or a wooden base (for freestanding designs) or a sturdy hook (for hanging installations).
- ● 💡 Drying pods: If using fresh pods, let them dry in the sun for 3–5 days to prevent mold.
- ● 🎯 Size matters: Pair larger pods with smaller accents (like pebbles) for balance.
- ● 🌡️ Weatherproofing: Seal painted pods with a clear outdoor varnish to protect them from rain.
Step-by-step instructions for crafting palm seed pod decor
Turn those fallen palm seeds into striking, twist-free lawn art that lasts for years.
🌿 Step 1: Collect and Clean the Seed Pods
Gather seed pods from your yard or a local park—look for coconut or palm varieties with intact husks. Rinse them thoroughly with water to remove dirt and debris. I like to soak them in a bucket of warm water for 30 minutes to loosen any stubborn grime. This step is crucial because leftover dirt can attract pests later.
Pat the pods dry with a towel or let them air-dry in sunlight for 1-2 hours. Avoid direct heat, which can crack the husk. Once dry, inspect each pod for cracks or soft spots—discard any that feel mushy or have holes. You’ll want 4-6 sturdy pods for a balanced arrangement.
✂️ Step 2: Shape the Pods for Stability
Use a sharp knife or pruning shears to trim the top ¼ inch of each pod, creating a flat surface. This prevents them from rolling around and gives your decor a polished look. I like to sand the cut edges lightly with 120-grit sandpaper to smooth any roughness—this step ensures a clean finish and prevents splinters.
For extra stability, gently flatten the base of each pod by placing it between two heavy books for 24 hours. This won’t damage the pod but will help it sit upright in the ground. If you’re working with coconut husks, you can skip this step—they’re naturally sturdy.
🪴 Step 3: Arrange and Bury for a Natural Look
Dig small holes in your lawn, about 3-4 inches deep and spaced 6-8 inches apart. The depth ensures the pods stay upright without toppling. Place the first pod in the hole and gently pack soil around the base, firming it lightly with your fingers. Repeat for each pod, creating a circular or linear pattern—whatever suits your space.
Leave about 1 inch of the pod above ground so it’s visible but stable. Water the area lightly after planting to help the soil settle. If you’re placing the decor near a walkway or patio, consider adding a small pebble or rock around the base to weigh it down further.
☀️ Step 4: Maintain and Refresh Over Time
Palm seed pod decor holds up well in most climates, but check them every 3-6 months for signs of wear. If the pods start to look dull, give them a wipe-down with a damp cloth and mild soap. Avoid harsh chemicals—they can discolor the natural fibers. Sunlight will keep them looking vibrant, but if they fade, a light sanding can restore their texture.
If any pods become loose over time, simply press more soil around the base or add a small stake for support. With minimal care, your palm seed pod art will remain a stunning, low-maintenance feature for 1-2 years or longer. The best part? It’s completely biodegradable when it’s time to refresh your garden.
Tips & tricks for perfect palm seed pod decor
Here's what nobody tells you about making these stunning natural decorations last—without the frustration.
Selection Tip: Focus on pods with smooth, unbroken husks that feel firm to the touch. The thicker the husk, the longer your decor will hold up against wind and rain. I've found that coconut husks are naturally more durable than palm varieties, so if you're choosing between the two, prioritize coconuts for a longer-lasting display. The 4-6 pod quantity mentioned is ideal for a balanced look, but you can easily scale up for larger areas.
Prep Secret: That 30-minute soak in warm water is your best friend for stubborn grime, but don't skip the drying time! The 1-2 hours of air-drying is crucial—rushing this step can lead to mold growth later. Place pods in a single layer on a towel in indirect sunlight for even drying. Pro tip: If you're working with particularly dirty pods, add a drop of mild dish soap to the soak water for extra cleaning power without damaging the fibers.
Stability Hack: The 24-hour book-flattening trick works wonders, but here's a shortcut: Place pods between two heavy, flat objects like glass plates for just 12 hours if you're in a hurry. For coconut husks, you can skip this entirely—their natural shape provides plenty of stability. When arranging, dig holes slightly larger than the pod base (about ¼ inch wider) to make insertion easier without forcing.
Pro Tips for Palm Seed Pod Art
- Here's what nobody tells you about making these stunning natural decorations last—without the frustration.
- Selection Tip: Focus on pods with smooth, unbroken husks that feel firm to the touch. The thicker the husk, the longe...
- Prep Secret: That 30-minute soak in warm water is your best friend for stubborn grime, but don't skip the drying time...
Frequently asked questions
What types of palm seed pods work best for lawn decor?
Most palm seed pods—like those from coconut, date, or sago palms—work beautifully! Look for clean, dry pods with intact husks for durability. Avoid rotten or moldy pods, as they can harbor pests. If you’re unsure, test a few in a small arrangement first to see how they hold up in your climate.
How long does it take for palm seed pod art to dry and stabilize?
Drying time varies, but most pods take 2–4 weeks under shade (to prevent cracking) and good airflow. Check for dryness by tapping two pods together—if they sound hollow, they’re ready! For faster results, place them in a well-ventilated, sunny spot (but avoid direct heat). Patience pays off for long-lasting decor!
Can I use palm seed pods for outdoor projects year-round?
Palm seed pods are naturally weather-resistant when dry, making them perfect for outdoor use. However, seal them with a non-toxic outdoor varnish (like polyurethane) to protect against moisture and pests. In rainy climates, elevate arrangements slightly to prevent rot. With proper care, your art will thrive for years!
What’s the best way to clean or prep pods before arranging?
Start by rinsing pods with soapy water to remove dirt, then scrub gently with a soft brush. Let them air-dry completely before arranging. For stubborn stains, soak in a vinegar-water mix (1:3 ratio) for 30 minutes. Avoid bleach—it can weaken the natural fibers. Pro tip: Wear gloves if pods are prickly!
What if my palm seed pod art looks uneven or wobbly?
Uneven arrangements happen! Use twine, wire, or hot glue (sparingly) to discreetly secure pods to a base (like a wooden plank or foam board). For free-form designs, tuck pods into a sturdy mesh or woven basket for stability. If pods shift over time, add a lightweight gravel or sand layer underneath for weight.
Are there eco-friendly alternatives if palm seed pods aren’t available?
Yes! Try dried citrus shells, pinecones, acorns, or seed pods from native plants (like lotus or hibiscus). Local foraged materials add unique textures. Just ensure they’re pest-free and fully dried. For a modern twist, mix in recycled glass or driftwood—just secure them safely to avoid hazards.
Wrapping up and next steps
Transforming your lawn into a stunning natural space doesn’t have to mean hours of fussy work—palm seed pod art proves that simplicity and elegance go hand in hand! 🌿 With just a few pods, a little creativity, and the right placement, you’ve got a zero-maintenance masterpiece that adds texture, warmth, and a touch of the tropics to your outdoor oasis.
Whether you’re a seasoned crafter or a beginner, these designs invite you to play with nature’s beauty effortlessly.
Ready to take the next step? Start small—gather a few pods, sketch a simple design, and let your lawn become your canvas. Then, share your creations with the world: tag us on social media or inspire others in your neighborhood!
Your lawn deserves this artistic upgrade—go ahead and make it happen. 🌟