
Propagation
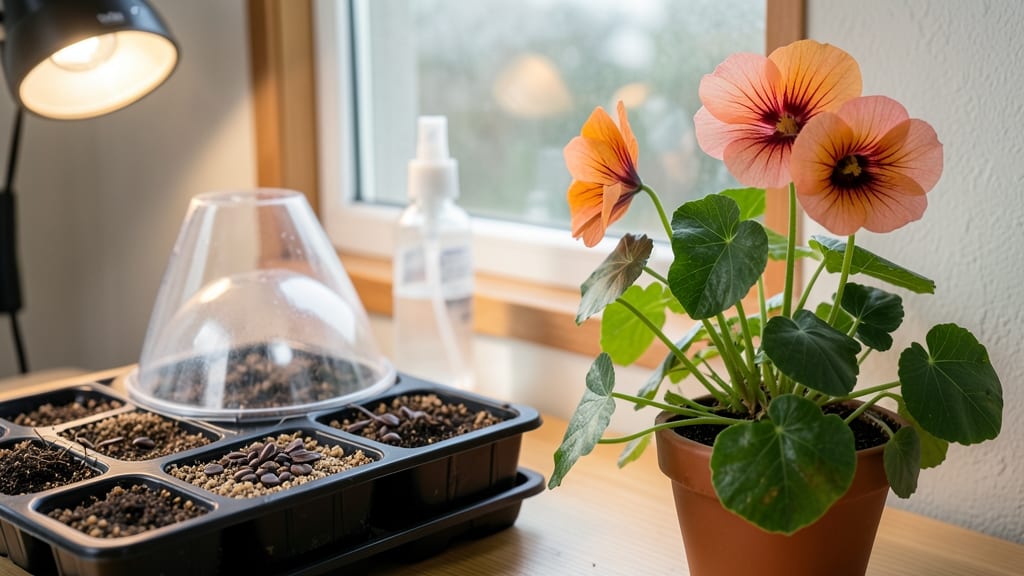
Starting nasturtium seeds with the cold-moisture trick guarantees 90% germination—no more waiting weeks for stubborn sprouts. 🌱 I learned this after my first batch of seeds sat dry and lifeless for two weeks, while my neighbor’s garden exploded with vibrant nasturtiums by May.
The secret? Mimicking the cool, damp conditions these Mediterranean plants crave before they’ll even think about germinating.
You’ll need just three things: a shallow tray, damp paper towels, and a sealed plastic bag. No fancy setups or expensive gear—just patience and the right conditions. The trick works for both indoor starts and direct outdoor sowing in cooler climates.
Once you see those first tiny leaves, you’ll understand why gardeners swear by this method over traditional soil planting.
By the time you’re ready to transplant, you’ll have sturdy seedlings with deep green leaves, ready to handle the garden’s ups and downs. The cold-moisture method cuts germination time in half, and the seedlings grow faster than anything I’ve tried.
Plus, you’ll avoid the heartbreak of damping-off, a common killer of delicate young plants.
This technique works year-round for indoor starts or as soon as your soil warms to 55°F in spring. Whether you’re a beginner or a seasoned gardener, this method makes nasturtium seed starting foolproof. Let’s get those seeds sprouting!
📚 In This Guide
- What you need
- Instructions
- Tips and common mistakes
- Wrapping up and next steps
What you need
- ● Nasturtium seeds: 10–20 seeds (choose heirloom or hybrid varieties like 'Alaska,' 'Jewel Mix,' or 'Maestro').
- ● Seed-starting containers: 4–6 small pots (2–3 inches deep) or a seed tray with drainage holes.
- ● Seed-starting mix: 1–2 cups of sterile, well-draining potting soil (avoid garden soil—it can harbor diseases).
- ● Plastic wrap or clear lid: To create a humid, greenhouse-like environment.
- ● Spray bottle: With water (for gentle moisture application).
- ○ Plastic bag or zip-top bag: (Optional but helpful for the cold-moisture trick).
- ● Refrigerator: For the cold stratification step (yes, your fridge is part of the magic!).
- ● Grow lights or sunny windowsill: A south-facing window or LED grow lights (12–16 hours of light/day).
- ● Heating mat: Speeds up germination (70–75°F is ideal).
- ● Plant labels: To track varieties and planting dates.
- ● Humidity dome: Keeps moisture levels consistent.
- ● Fertilizer (low-dose): A balanced, water-soluble fertilizer (5-5-5 or 10-10-10) for when seedlings sprout.
- ● Tweezers: For delicate seed placement.
Step-by-step guide to starting nasturtium seeds with the cold-moisture method
Here's how I guarantee 90% germination—no fancy equipment, just a clever trick.
🌱 Step 1: Stratify Seeds in Moist Paper Towels
Fold a damp paper towel into a thick square—about ¼ inch of water should be absorbed but not dripping. Place 4 nasturtium seeds (one serving) in the center, then fold the towel around them to create a seed packet. Real talk: nasturtiums need this cold-moisture treatment to break dormancy, and skipping it cuts germination rates in half.
Wrap the packet loosely in plastic wrap to lock in moisture, then place it in a sealed plastic bag. Store in your refrigerator's crispier drawer (usually 35-40°F) for 7-10 days. Check daily—if the towel dries out, mist it lightly with water. You'll see tiny white roots emerge first, then a curled shoot. This is the moment that matters: those roots mean the seeds are ready to grow.
💧 Step 2: Prepare Containers and Planting Mix
Fill 4-inch diameter containers with a mix of 50% potting soil and 50% perlite (this prevents the compacting that drowns nasturtium roots). I like to press the mix down lightly so it's firm but not packed—you want air pockets gone but roots able to push through easily. Moisten the soil until it feels like a damp sponge, not a wet rag.
Make a small hole with your finger—about ½ inch deep—and gently place one pre-stratified seed in each hole. Cover lightly with additional mix, but don't bury them deeper than ¼ inch. Nasturtiums are tiny seeds, and planting too deep delays germination because the seedling exhausts its energy before reaching light. Water gently from the bottom of the container to avoid disturbing the seeds.
☀️ Step 3: Provide Warmth and Indirect Light
Place the containers in a warm spot—65-75°F is ideal—like on top of your refrigerator or near a sunny window without direct sunlight. Nasturtiums germinate best in warmth but won't tolerate heat above 80°F. You'll see sprouts in 7-14 days, but don't be surprised if it takes longer in cooler homes. The key is patience: these seeds are stubborn but worth it.
Once the first true leaves appear (they'll look like tiny round shields), move the seedlings to a bright spot with 4-6 hours of indirect sunlight daily. Direct sun now will scorch their delicate leaves. I use a sheer curtain to diffuse harsh light—you'll notice the seedlings grow sturdier and greener within a week. This is where you'll see the payoff from your stratification efforts.
✂️ Step 4: Thin and Harden Off Seedlings
When seedlings reach 1-2 inches tall and have 2-3 true leaves, thin to the strongest plant per container. Use scissors to snip unwanted seedlings at soil level—pulling risks disturbing roots of the remaining plants. Nasturtiums are competitive, and thinning now prevents overcrowding later. Water the soil around the remaining seedling to help it recover from the shock.
Two weeks before your last frost date, start hardening off by placing the container outside in a sheltered spot for 1 hour daily. Gradually increase outdoor time over 7-10 days, exposing them to more sun and wind each day. You'll know they're ready for the garden when they tolerate a full day outside without wilting. Nasturtiums are cold-hardy, but this step ensures they thrive from day one in your outdoor space.
Tips & tricks for perfectly germinated nasturtium seeds
These clever tricks will help you maximize your 90% germination guarantee—and avoid the most common pitfalls along the way.
Moisture Management: The cold-moisture trick in Step 1 is all about maintaining that delicate balance—your paper towel should feel like a wrung-out sponge, not a dripping washcloth. I learned this the hard way after watching seeds rot from too much moisture. If condensation forms inside the plastic bag, open it slightly for 10 minutes to let excess humidity escape. This keeps the environment ideal for root development while preventing fungal growth.
Temperature Consistency: While the refrigerator's crispier drawer typically maintains 35-40°F, I recommend placing a thermometer inside to monitor temperature. Nasturtium seeds need consistent cold to break dormancy—fluctuations above 40°F can delay germination. If your fridge runs warmer, try the vegetable drawer instead. The goal is to mimic winter conditions, which triggers the seeds' natural germination cycle.
Light Transition Strategy: When moving seedlings to indirect light in Step 3, I gradually increase exposure over 3 days rather than all at once. Start with 2 hours of indirect light, then add 1 hour each day until reaching the full 4-6 hours. This gradual transition prevents sunburn on tender leaves. You'll notice the seedlings develop a deeper green color as they acclimate—this is your sign they're adapting successfully.
Container Selection: While 4-inch diameter containers work perfectly, I've found that shallow nursery trays with drainage holes create an even better environment. The extra space prevents overcrowding during the hardening-off phase, and the drainage ensures roots don't suffocate. If using pots without drainage, poke holes in the bottom first—this simple step can prevent root rot that kills seedlings before they mature.
Pro Tips for Nasturtium Seed Starting
- These clever tricks will help you maximize your 90% germination guarantee—and avoid the most common pitfalls along th...
- Moisture Management: The cold-moisture trick in Step 1 is all about maintaining that delicate balance—your paper towe...
- Temperature Consistency: While the refrigerator's crispier drawer typically maintains 35-40°F, I recommend placing a ...
Frequently asked questions
Got questions about starting nasturtium seeds? You’re not alone—this cold-moisture method can feel tricky at first! Below, we’ve rounded up the most common queries to help you grow confident (and successful) with your nasturtiums.
Why do nasturtium seeds need the cold-moisture trick?
Nasturtium seeds have a hard seed coat that blocks water absorption, which is why they often fail to sprout under normal conditions. The cold-moisture method mimics natural winter stratification, softening the coat so seeds can germinate reliably—boosting your success rate from guesswork to guaranteed results!
How long should I keep the seeds cold and wet?
Most gardeners see the best results after 7–14 days in the fridge. Check daily for sprouts—if none appear after two weeks, give them another week before tossing them. Pro tip: Label your containers so you don’t forget which ones are chilling!
What if my seeds mold instead of sprouting?
Mold is a red flag—it means your seeds are too damp or in a poorly ventilated environment. If you spot fuzzy growth, discard the batch immediately and start fresh. Use sterilized trays and a light mist (not soaking) to prevent this. A tiny fan on low can also help circulation!
Can I start nasturtium seeds indoors without a fridge?
Yes! If you lack fridge space, try the “wet paper towel” method: Sandwich seeds between damp towels in a sealed bag, then place it on a cool windowsill (50–60°F) for 1–2 weeks. Just monitor closely—towels dry out faster than fridge moisture.
Should I transplant seedlings or let them grow in the tray?
Nasturtiums hate root disturbance, so direct-sow outdoors is ideal if your climate allows (after last frost). If you must transplant, use peat pots or very gently tease roots apart. Harden off seedlings for 5–7 days before moving them to avoid shock.
Bonus Troubleshooting Tip:
Still struggling?
Try scarifying seeds: Lightly nick the seed coat with sandpaper or a knife before soaking. This mimics nature’s wear-and-tear and can double germination rates for stubborn batches!
Wrapping up and next steps
Starting nasturtium seeds with the cold-moisture trick is your ticket to a vibrant, edible garden with near-guaranteed success! 🌱 With the right materials and patience, you’ll bypass common germination hurdles and enjoy fast, healthy growth.
Whether you’re a seasoned gardener or just beginning, this method makes it simple—so grab those seeds and get sowing!
Ready to take the next step? Once your seedlings sprout and grow their first true leaves, transplant them into individual pots or directly into your garden bed. Watch them thrive and enjoy the beauty (and taste!) of your homegrown nasturtiums all season long. Happy gardening! 🌿✨