
Propagation
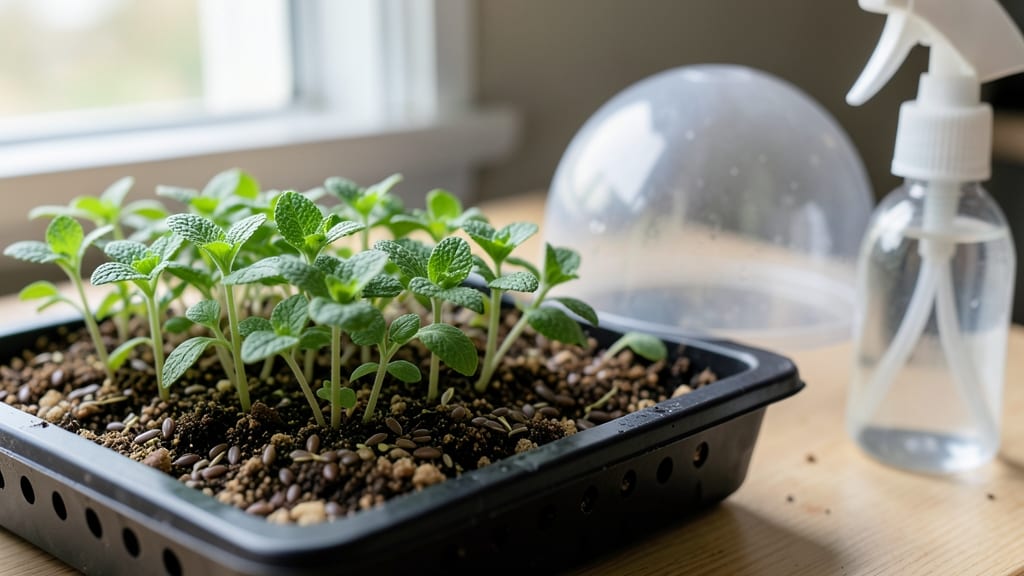
Mint seed germination feels like waiting for a stubborn friend to show up—slow, frustrating, but worth the patience. 🌱 I’ve tried forcing it with heat lamps and fancy setups, but the secret is actually simplicity: fresh seeds, warm soil, and a damp paper towel.
Most gardeners give up because they don’t know mint’s quirks—like how dried seeds often fail while fresh ones sprout in 10-30 days with the right care.
The magic happens in a shallow tray with moist, well-draining soil (think 60% peat, 40% perlite) kept at 70-75°F. Mist daily but avoid soggy soil—mint hates root rot more than anything.
I’ve seen seedlings pop up in as little as 7 days when conditions are perfect, though 30 days is the realistic window. The key? Consistency. Too much water turns your tray into a science experiment gone wrong; too little and seeds just stare at you.
What you end up with are tiny, bright-green seedlings that look like they’re made of rubber bands. They grow fast once they break the surface, but here’s the catch: mint’s aggressive roots mean you’ll need to transplant them 2-3 inches apart early or they’ll tangle like headphones.
The payoff? A bushy, fragrant plant ready for harvest in 8-12 weeks—though honestly, most gardeners (myself included) just clone cuttings instead. It’s faster and foolproof.
If your seeds aren’t cooperating, check for mold (a sign of overwatering) or stale seeds (mint seeds lose viability in 6 months). Fresh seeds from a trusted source are your best bet—but if you’re patient, even dried ones might surprise you.
Either way, this method works for peppermint, spearmint, or any variety. Let’s get those sprouts growing!
📚 In This Guide
- What you need
- Instructions
- Tips and common mistakes
- Wrapping up and next steps
What you need
- ● Mint seeds: 1–2 teaspoons (about 50–100 seeds, depending on variety). Opt for organic, non-GMO seeds for best results.
- ● Seed-starting mix: 1–2 cups of sterile, well-draining potting soil (avoid garden soil—it may contain pathogens). Look for a mix labeled "seed-starting" or "organic potting soil."
- ● Containers: Small seed trays (4–6 inches deep) or
- ● Disposable plastic cups (4 oz) with drainage holes (poke 3–4 holes in the bottom with a nail or screwdriver).
- ● Spray bottle: 8–16 oz with a fine mist nozzle (for gentle watering).
- ● Plastic wrap or dome lid: To create a humidity tent (a ziplock bag with holes also works!).
- ● Grow lights or sunny windowsill: A south-facing window with 6+ hours of sunlight or a 12–15W LED grow light (12–18 inches above seeds).
- ○ Thermometer (optional but helpful): To monitor soil temperature (ideal: 70–75°F / 21–24°C).
- ● Fine-tip tweezers: For gently placing tiny seeds.
- ● Labels & markers: To track seed varieties (especially useful if testing multiple types!).
- ○ Fertilizer (optional): A diluted fish emulsion or seaweed extract (1 tsp per gallon of water) after germination, but not during the sprouting phase.
- ○ Heating mat (optional): For faster germination if your home runs cool (70–75°F is ideal).
- ○ Fungicide (optional): 1 tsp hydrogen peroxide (3%) per cup of water to prevent mold if humidity is high.
How to germinate mint seeds without the hassle
Here's the simple method that actually works—no fancy equipment, just reliable results.
🌱 Step 1: Soak Seeds Overnight for Faster Sprouting
Place your mint seeds in a small bowl and cover them with lukewarm water for 12 hours. This softens the tough outer shell, helping them break through the soil faster. I like to use a mesh bag or paper towel to contain them—it keeps seeds from floating away and makes rinsing easier later.
Check after 12 hours. If seeds still look dry, give them another hour. You'll see them plump up slightly—that's your sign they're ready. Don't let them soak longer than 14 hours, or they'll start to rot.
💧 Step 2: Prepare a Moist, Warm Germination Environment
Fill a small seed tray or shallow container with moistened potting mix (not garden soil—it's too dense). Press it down gently until it's firm but still light. Mint seeds need warmth to germinate, so place the tray on a seedling heat mat set to 75-80°F.
Make two shallow furrows about ¼ inch deep and 2 inches apart, spacing seeds ½ inch apart along each row. Cover them lightly with a thin layer of soil—just enough to hide them from view. Mist the surface gently to keep it damp but not soggy.
☀️ Step 3: Cover and Wait for Sprouts to Appear
Cover the tray with a clear plastic dome or wrap it in plastic wrap to trap warmth and moisture. Place it in a spot with bright, indirect light—direct sun will dry out the soil too quickly. Check daily for condensation on the cover. If it's foggy inside, your setup is working.
Germination takes 14-30 days, depending on your home's warmth. You'll see tiny green sprouts first—those are the cotyledons, the plant's first true leaves. Once they appear, remove the cover immediately to prevent mold. Keep the soil consistently moist but never waterlogged.
🌿 Step 4: Thin Seedlings and Provide Proper Light
When seedlings reach 1-2 inches tall, thin them to 2 inches apart by snipping the weaker ones at the base with clean scissors. This gives the remaining plants room to grow without competing. Mint spreads easily, so thinning now prevents overcrowding later.
Move the tray to a south-facing window or under a grow light for 14-16 hours of light daily. Leggy seedlings (long, thin stems with sparse leaves) mean your light isn't strong enough. If you see this, move the light closer or add a second one.
⏰ Step 5: Transplant After 4-6 Weeks
Once seedlings have 3-4 sets of true leaves and are 3-4 inches tall, they're ready for individual pots. Use 4-inch pots filled with fresh potting mix. Gently loosen the roots before transplanting to avoid shocking the plants.
Water thoroughly after transplanting and place them in a spot with morning sun and afternoon shade. Mint grows aggressively, so you can start harvesting leaves once they reach 3 inches long. Just pinch them off just above a leaf node to encourage bushier growth.
Tips & tricks for perfect mint seed germination
These little tricks will turn your patience into a thriving mint garden without the guesswork.
Soaking Secret: The 12-hour soak is your best friend, but here's the thing—lukewarm water should feel like a warm bath, not a hot shower. If you're unsure, test it with your wrist: if it feels slightly cooler than body temperature, you're golden. After soaking, drain seeds in a fine-mesh strainer and give them a gentle shake to remove excess water. This prevents mold from forming in Step 1.
Heat Hack: No seedling heat mat? Place your tray on top of your refrigerator (not inside) for consistent warmth around 75-80°F. Just make sure it's not too close to the coils—you want gentle heat, not a sauna. I've also used a heating pad set to low under my seed tray with great results. The key is maintaining that steady temperature during germination.
Lighting Strategy: For Step 3, if you don't have a south-facing window, a simple fluorescent shop light works perfectly. Position it 6-12 inches above your seedlings for 14-16 hours daily. The light should be bright enough that you can't read a book comfortably underneath it. Rotate your tray every few days so all seedlings get even light exposure—this prevents them from leaning toward one side.
Thinning Technique: When thinning in Step 4, use clean scissors to snip seedlings at soil level rather than pulling them. This prevents disturbing the roots of your remaining plants. I like to work in small batches—thin a few plants, then water lightly to settle the soil before moving to the next section. This gives your mint better stability as it grows.
Pro Tips for Mint Seed Germination
- These little tricks will turn your patience into a thriving mint garden without the guesswork.
- Soaking Secret: The 12-hour soak is your best friend, but here's the thing—lukewarm water should feel like a warm bat...
- Heat Hack: No seedling heat mat? Place your tray on top of your refrigerator (not inside) for consistent warmth aroun...
Frequently asked questions
How long does it take for mint seeds to germinate?
Mint seeds typically sprout within 14–30 days under ideal conditions (warmth, moisture, and indirect light). Peppermint and spearmint varieties often germinate faster (10–14 days), while slower varieties may take up to 4 weeks. Patience is key—consistent moisture helps speed up the process!
Can I grow mint from seed, or should I just buy a plant?
Yes, you can grow mint from seed, but it’s slower than propagating from cuttings. Seeds take longer to establish, while cuttings root in 2–3 weeks. If you’re patient and want variety, seeds work! For faster results, try mint cuttings instead.
Why aren’t my mint seeds sprouting? Troubleshooting tips?
Check these common issues:
- Too cold: Keep soil at 70–75°F (use a heat mat if needed).
- Not enough moisture: Keep soil damp (not soggy) with a humidity dome.
- Poor light: Use a grow light if natural light is weak.
- Old seeds: Mint seeds lose viability after 1–2 years.
Do mint seeds need light to germinate?
Mint seeds do not need light to germinate—they sprout best in darkness at first. Once sprouted (1–2 inches tall), move them to bright, indirect light (6+ hours/day). Too much early light can dry out seedlings.
Can I plant mint seeds directly outside?
Direct sowing works but risks uneven germination due to soil temp fluctuations. For best results, start seeds indoors 4–6 weeks before last frost, then transplant outdoors after hardening off. If sowing outside, choose a warm, sheltered spot and cover seeds lightly with soil.
Wrapping up and next steps
Growing mint from seed is a rewarding journey that yields fragrant, fast-growing plants in just 30 days! With the right conditions—consistent moisture, warmth, and patience—you’ll soon enjoy fresh mint for teas, cocktails, or gardens. 🌱
Now that you’re armed with tips and troubleshooting advice, it’s time to take action. Grab your seeds, set up your tray, and watch those sprouts emerge like magic! Ready to turn your green thumb into a mint master? Start planting today!