
Lawn
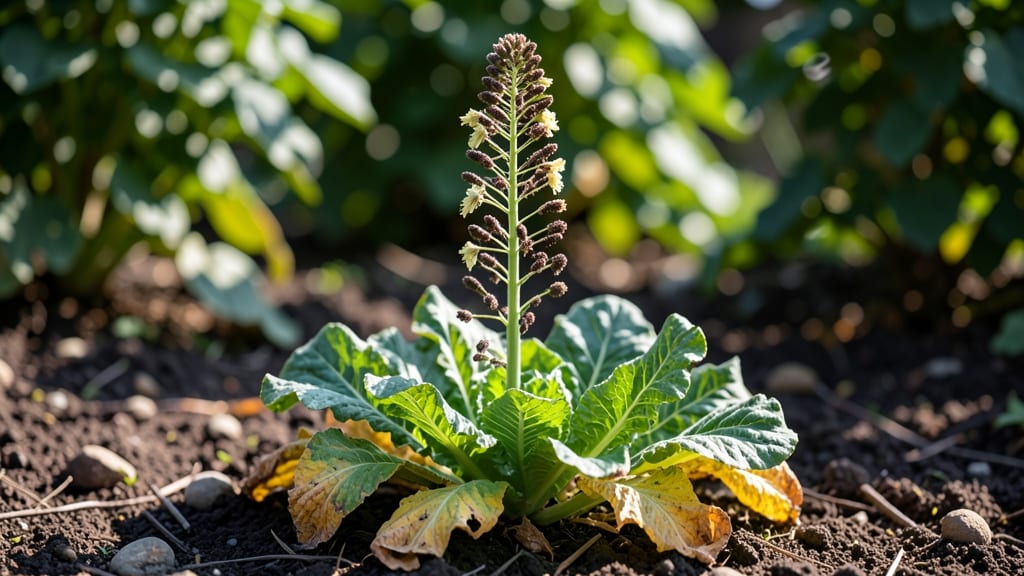
Harvesting lettuce seed pods feels like unlocking a gardener's secret stash—those tiny pods hold the future of your garden. 🌱 The trick is knowing exactly when to collect them before the birds or wind beat you to it, and how to split them cleanly without losing a single seed.
I’ve saved seeds from my own garden for years, and this method guarantees you’ll end up with viable seeds ready for next season’s planting.
Lettuce is self-pollinating, which means you don’t need to worry about cross-pollination ruining your seed stock. The pods form after the plant bolts—usually in late spring or early summer—when the center stalk elongates and the leaves turn bitter.
Once the pods turn a pale tan and start splitting open on their own, that’s your cue to act fast. Grab a small container and gently shake the pods over it to catch the seeds as they fall.
What you’ll get is a batch of crisp, dark seeds that store beautifully in a cool, dry place for up to three years. These homegrown seeds often outperform store-bought ones because they’re adapted to your local climate and soil.
Plus, there’s something deeply satisfying about watching the cycle repeat—from seed to salad and back again. The process is simpler than it sounds, and the payoff is worth every minute.
For best results, focus on disease-resistant varieties and avoid harvesting from plants that look stressed. If you’re new to seed saving, start with just a few plants to get the hang of it.
Before you know it, you’ll be stocking your seed drawer with homegrown lettuce seeds that grow even better than the last batch. It’s a skill that keeps giving back to your garden year after year.
📚 In This Guide
- What you need
- Instructions
- Tips and common mistakes
- Wrapping up and next steps
What you need
- ● Mature lettuce plants: Choose loose-leaf varieties (like Black Seeded Simpson or Buttercrunch) for best seed pod formation.
- ● Quantity: 3–5 plants (or more, if you’re saving seeds for a larger harvest).
- ● Pruning shears or sharp scissors: For cleanly snipping seed pods without damaging the plant.
- ● Brown paper bags or breathable mesh bags: Size: 1–2 quart-sized bags per plant (or larger if harvesting multiple pods).
- ● Purpose: Allows airflow to prevent mold while pods dry.
- ● Labeling tags or masking tape + marker: To track varieties (e.g., "Romaine" or "Leaf Lettuce").
- ● Small bowl or tray: For collecting dried seeds once pods split open.
- ● Desiccant (like silica gel packets): Speeds up drying in humid climates.
- ● Fine-mesh sieve: For sifting seeds to remove debris.
- ● Glass jar with lid: Airtight storage for long-term seed viability.
- ● Gloves (nitrile or cotton): If handling large quantities to avoid skin irritation from sap.
Step-by-step instructions for extracting lettuce seeds from pods
Here's how to unlock those tiny seeds without the mess—my foolproof method saves time and keeps seeds viable.
🌱 Step 1: Select and Prepare Mature Lettuce Pods
Pick fully dried pods that open easily when squeezed—these contain the most viable seeds. If pods still feel plump or sticky, leave them on the plant another week. I like to work with pods in a well-ventilated area because the drying process releases fine dust that can irritate lungs.
Spread a clean, dark-colored towel or sheet of paper on your work surface. This makes seeds stand out against the background and catches every last one. Place your pods in a shallow dish or bowl to contain any stray seeds during the process.
💧 Step 2: Gently Break Open Each Pod
Hold a pod between your thumb and forefinger, then give it a firm but controlled squeeze. You'll hear a faint pop as the pod splits open—this is your signal to stop pressing. Over-squeezing crushes seeds or sends them flying. I find using a small bowl under each pod helps catch seeds as they fall.
Work slowly and systematically. If a pod resists, let it dry another day in a warm, dry spot before trying again. Never use tools like scissors or knives—this damages the delicate seed structure and reduces germination rates. Empty pods can be composted once you've extracted all seeds.
☀️ Step 3: Separate Seeds from Chaff
Once all pods are opened, gently swirl the contents on your towel. The seeds will sink to the bottom while lighter plant debris (chaff) floats to the surface. Use a soft paintbrush to sweep the chaff away, being careful not to disturb the seeds. This is where that dark towel pays off—you'll spot every seed clearly.
For stubborn bits of debris, I place the seeds in a fine-mesh strainer and rinse under lukewarm water. Then I spread them on the towel again to dry completely. This ensures only clean seeds move to storage. Never let seeds sit damp—even slight moisture encourages mold growth during storage.
⏰ Step 4: Dry and Store Seeds Properly
Spread the cleaned seeds in a single layer on the towel in a warm, dry place with good airflow. They're ready for storage when completely dry to the touch—this usually takes 12-24 hours depending on humidity. I test dryness by pinching a few seeds between my fingers; they should feel papery with no moisture.
Transfer seeds to a small envelope or airtight container. Label it with the variety and date—lettuce seeds stay viable for 2-4 years when stored properly in a cool, dark place. I keep mine in the fridge in a sealed bag with a silica gel packet to absorb any lingering moisture.
🌿 Step 5: Test a Small Batch Before Full Planting
Before using all your seeds, plant a small test batch to check germination rates. Fill a seed tray with moistened potting mix and sow 5-10 seeds about ¼ inch deep. Keep the soil consistently moist at 65-75°F until germination, which should occur in 7-14 days. Healthy seedlings will show first true leaves in about 2 weeks.
If germination is poor (less than 50% of seeds sprout), your seeds may need another drying period. Store them in the freezer for 48 hours to break dormancy, then try again. This step prevents wasted effort when planting your entire seed harvest.
Tips & tricks for perfect lettuce seed extraction
Here's what nobody tells you about making this process even easier—and saving every last seed.
Pod Selection Secret: Look for pods that split open with just a gentle squeeze—they're ready for seed extraction. If a pod feels too firm, leave it on the plant for another week. I've learned the hard way that forcing open underripe pods leads to crushed seeds and wasted effort. The perfect pod should open with a faint pop when squeezed between your thumb and forefinger.
The Cleanup Game-Changer: Place a small bowl under each pod while you're opening them—this catches seeds that might otherwise roll away. I keep a bowl on my work surface and gently tap each opened pod over it. For extra insurance, I use a dark-colored towel that makes the tiny seeds stand out against the background, so I don't miss a single one.
Drying Strategy: When testing seed dryness in Step 4, pinch a few seeds between your fingers—they should feel completely dry and papery. If they feel even slightly damp, spread them out for another hour. I've had seeds mold in storage because they weren't fully dry, so I always double-check. For stubborn humidity, I use a small fan on low setting to speed up the drying process without disturbing the seeds.
Storage Wisdom: For long-term storage beyond the 2-4 year mark, add a silica gel packet to your seed container. I've found these packets in small envelopes at craft stores—they absorb any lingering moisture that could cause mold. Store your seeds in the fridge for maximum longevity, especially if you're in a humid climate. I label my containers with both the variety and date to track freshness.
Pro Tips for Lettuce Seed Pods
- Here's what nobody tells you about making this process even easier—and saving every last seed.
- Pod Selection Secret: Look for pods that split open with just a gentle squeeze—they're ready for seed extraction. If ...
- The Cleanup Game-Changer: Place a small bowl under each pod while you're opening them—this catches seeds that might o...
Frequently asked questions
Got questions about harvesting lettuce seed pods? You’re not alone! Here are some of the most common queries—plus quick, practical answers to save you time and frustration.
How do I know when lettuce seed pods are ready to harvest?
Lettuce seed pods are ready when they turn light brown and feel dry to the touch—usually 60–90 days after planting. If they’re still green or moist, give them a few more days. Overripe pods may burst open, so act fast!
What if my lettuce bolts (sends up a flower stalk) before producing pods?
Bolting happens when lettuce gets stressed (heat, drought, or age). While it’s frustrating, seed pods will still form—just slower. To encourage better yields, harvest outer leaves to reduce stress or plant bolt-resistant varieties like ‘Black Seeded Simpson’ for next season.
Can I save seeds from store-bought lettuce?
Technically yes, but store-bought lettuce is often hybridized to prevent seed production. If you spot pods, try it—but expect lower germination rates or inconsistent traits. For reliable seeds, grow heirloom or open-pollinated varieties instead.
Why are my seed pods moldy or rotting?
Mold or rot usually means high humidity or poor airflow. Harvest pods as soon as they’re dry, and store them in a paper bag (not plastic) in a cool, dry place. If mold appears, discard affected pods immediately to prevent spoilage.
What’s the best way to store lettuce seeds long-term?
For maximum viability, dry seeds completely (3–5 days in a warm, dry spot), then store them in an airtight container with a silica gel packet in the freezer. Properly stored seeds stay good for 2–5 years!
Wrapping up and next steps
Growing your own lettuce from seed pods is a rewarding way to enjoy fresh, homegrown greens—without the hassle of messy seed spills! 🌱 By mastering the pod-splitting technique, you’ll save time, reduce waste, and even share seeds with fellow gardening enthusiasts.
Whether you’re a beginner or a seasoned green thumb, this simple method makes seed extraction a breeze.
Ready to take the next step? Grab a few seed pods, follow the steps, and watch your garden flourish. Happy planting—and may your harvest be abundant! 🌿✨