
Propagation
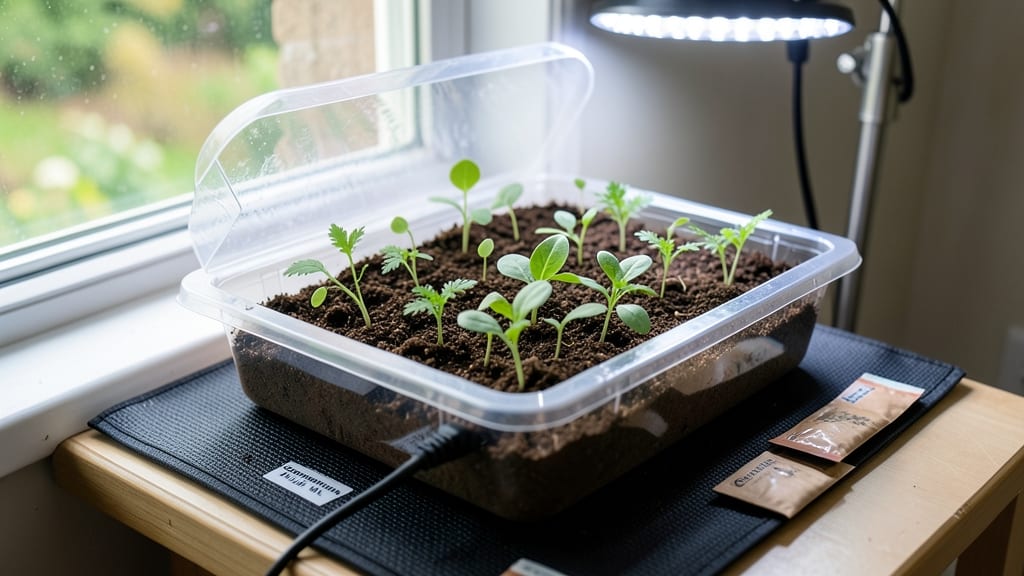
A heat mat for seed germination turns stubborn seeds into sprouts in days instead of weeks. 🌱 I remember my first batch of peppers—sitting in damp paper towels for three weeks before giving up. Then I tried a heat mat, and those same seeds cracked open in just seven days.
The difference isn’t just speed; it’s confidence that your seedlings won’t outpace their roots or flop over before they’re strong enough to handle real light.
The secret’s in the steady warmth—think of it like a cozy blanket for your seeds, keeping soil temperatures between 75-85°F without the risk of overheating. Most mats plug into standard outlets and cover entire seed trays, so you can start entire flats at once.
They’re especially game-changers for slow starters like tomatoes, peppers, and herbs, which often struggle in cool spring conditions. Even finicky seeds like okra or basil respond better when given this extra push.
By the time you’re ready to transplant, you’ll have stocky, dark-green seedlings with strong roots—no more leggy, weak stems that snap at the slightest breeze. The mat works alongside your grow light or sunny windowsill, but it’s the warmth that does the heavy lifting.
Think of it as giving your seeds a head start in the race to maturity. Here’s how to pick the right one and avoid the mistakes that’ll leave you pulling out your hair (again).
Best of all, it’s a one-time investment that pays off season after season. No more waiting for "ideal" outdoor conditions or dealing with uneven germination. Once you’ve tried it, going back to cold-start methods feels like gardening with one hand tied behind your back.
Let’s get those seeds sprouting like they’re in a tropical greenhouse—without the humidity or the mess.
📚 In This Guide
- What you need
- Instructions
- Tips and common mistakes
- Wrapping up and next steps
What you need
- ● Heat mat (electric) – Choose a 10-15W mat (e.g., 12"x24" or 18"x36") with adjustable thermostat (ideal temp: 70–85°F).
- ● Seed trays or containers – 2–4 shallow trays (6–8" deep) with drainage holes, or biodegradable pots (e.g., peat or coconut coir).
- ● Germination mix – Seed-starting soil or a 50/50 blend of peat moss and perlite (sterilized). Quantity: Enough to fill trays 2–3" deep.
- ○ Seeds – Pre-soaked (optional but recommended) or dry seeds (check packet for depth/spacing).
- ● Spray bottle – For gentle watering (avoid oversaturating!).
- ● Plastic wrap or humidity dome – To retain moisture (cover trays until germination begins).
- ○ Thermometer (optional but helpful) – A soil thermometer to monitor heat mat temp (e.g., 0–120°F range).
- ● Timer or smart plug – For heat mat (if not thermostat-equipped) to run 12–16 hours/day.
- ● Tweezers or pencil – For planting tiny seeds (e.g., lettuce, herbs).
- ○ Grow lights (optional) – LED or fluorescent (12–16 hrs/day) if natural light is less than 6 hrs/day.
- ● Label markers & tags – To track seed varieties and planting dates.
- ○ Fan (optional) – A gentle oscillating fan on low to prevent mold (place 1–2 ft away).
Step-by-step instructions for using a heat mat for seed germination
Here's how to use a heat mat to jumpstart your seeds and get sprouts in just 7 days.
🌱 Step 1: Prepare Your Seeds and Trays
Start by filling your seed trays with the moistened seed-starting mix (about 1/4 inch below the tray rim). Press down lightly to remove air pockets but don't compact the soil—you want it fluffy enough for roots to push through easily. I like to use a spray bottle to mist the soil evenly so it's damp but not soggy.
Place your seed tray on the heat mat and turn it on. Most heat mats maintain a consistent 75-85°F surface temperature, which is perfect for most seeds. Let the mat warm up for 10-15 minutes before sowing—this ensures the soil stays warm from the get-go. I always run my finger over the mat first to confirm it's warm but not scorching.
🌱 Step 2: Sow Seeds at the Right Depth
Follow the seed packet instructions for depth—usually twice the seed diameter. For tiny seeds like lettuce, that’s just a light press into the soil, while larger seeds like beans need to go 1 inch deep. I use a toothpick to make a small hole and drop the seed in gently, then cover it with a tiny amount of soil.
Don’t overcrowd! I tap the seed packet gently to release one seed at a time—planting too many in one spot leads to weak, crowded seedlings later. After sowing, give the tray a light mist with water until the soil looks evenly damp. The heat mat will help keep moisture consistent, but you don’t want the soil to feel wet or clumpy.
💧 Step 3: Cover and Monitor for Germination
Cover the tray with a clear plastic dome or plastic wrap to trap warmth and humidity. This creates a mini greenhouse effect that speeds up germination. Place the covered tray back on the heat mat and let it sit in a warm, dark spot—seeds need darkness to sprout, so avoid bright light until you see tiny shoots.
Check the tray daily for condensation on the dome. If it’s foggy inside, that’s a good sign—your humidity is just right. If you see mold or fuzzy spots, remove the dome immediately and let the tray air out for a few hours. Most seeds will sprout in 3-7 days, but some fast growers like radishes might pop up in just 2-3 days. Watch for the first tiny green shoot breaking through the soil—that’s your signal to move to the next step!
☀️ Step 4: Transition to Light After Sprouting
The moment you see the first true leaves (not just the initial seed leaves), it’s time to remove the dome and move the tray to bright, indirect light. I place mine under a grow light on a 14-16 hour daily schedule to mimic natural daylight. If using natural light, a south-facing window works, but avoid direct sun, which can overheat the tray.
Keep the heat mat on for another 3-5 days after germination to give the seedlings a strong start. After that, you can turn it off—they’ll have enough energy to grow without it. Watch for leggy seedlings (long, thin stems with small leaves)—this usually means they need more light or the heat mat was too close to the tray. Adjust as needed to keep them sturdy and compact.
Tips & tricks for perfect heat mat germination
Between us, these little details make all the difference when using a heat mat for seed germination.
Soil Temperature Check: That 75-85°F range on your heat mat is crucial—it's the sweet spot for most seeds to break dormancy. I've found that running my finger over the mat before sowing helps me confirm it's warm but not scorching. If it feels too hot, let it cool slightly before placing your tray on it. The goal is consistent warmth without overheating the soil, which can damage delicate seeds.
Depth Matters: Planting seeds at the right depth is non-negotiable. For tiny seeds like lettuce, just press them lightly into the soil—no need to bury them. Larger seeds like beans need that full 1-inch depth. I've learned the hard way that planting too shallow can lead to seeds drying out before they sprout, while planting too deep means they might not have enough energy to push through the soil. Use a toothpick to make precise holes if needed.
Humidity Balance: The condensation you see on the dome after covering your tray is actually a good sign—it means your humidity levels are perfect. If you notice mold or fuzzy spots, that's your cue to remove the dome immediately and let the tray air out for a few hours. I've found that keeping the dome slightly ajar for 10-15 minutes each day helps prevent mold while still maintaining humidity. Most seeds will sprout within that 3-7 day window, but radishes can surprise you with sprouts in just 2-3 days.
Light Transition: When you see those first true leaves appear, it's time to move your seedlings to light. I've had the best results with a 14-16 hour daily light schedule using a grow light. If you're using natural light, a south-facing window works well, but avoid direct sun which can overheat your tray. The heat mat can stay on for another 3-5 days after germination to give your seedlings that extra boost, but watch for leggy seedlings—this usually means they need more light or the heat mat was too close.
Pro Tips for Heat Mat For Seed Germination
- Between us, these little details make all the difference when using a heat mat for seed germination.
- Soil Temperature Check: That 75-85°F range on your heat mat is crucial—it's the sweet spot for most seeds to break do...
- Depth Matters: Planting seeds at the right depth is non-negotiable. For tiny seeds like lettuce, just press them ligh...
Frequently asked questions
about using a heat mat for seed germination—because every gardener deserves a little clarity!How long should I keep seeds on a heat mat for germination?
A heat mat typically speeds up germination in 3–7 days, depending on the seed type. Most seeds thrive with consistent warmth (70–85°F) for 12–24 hours daily. Once sprouts emerge, reduce heat to prevent overgrowth. Always check seed packets for specific needs!
Can I use a heat mat for ALL types of seeds?
Not all seeds need warmth—cool-season crops (like lettuce or peas) may not benefit and could rot. Use heat mats for warm-loving seeds (tomatoes, peppers, basil) or tropical varieties (avocados, citrus). For others, room temperature or a seedling heat pad with a thermostat is safer.
What’s the best alternative if I don’t have a heat mat?
Try these budget-friendly hacks:
- DIY heat mat: Use a reusable heat pad (like a pet bed warmer) with a thermostat.
- Bottom watering: Place trays in warm water (80°F) to raise soil temp.
- Sunny windowsill: Group trays near a south-facing window (but avoid direct sun).
Why aren’t my seeds germinating on the heat mat?
Check these common culprits:
- Incorrect temp: Too hot (>90°F) can cook seeds; too cold (<60°F) stalls growth.
- Moisture issues: Overwatering causes rot; underwatering dries out seeds.
- Old seeds: Viability drops after 1–2 years. Test with a paper towel germination test.
- Poor contact: Ensure seeds touch moist soil, not just warm air.
How do I know if my heat mat is working properly?
Use a seedling thermometer to monitor soil temp—it should stay in your seed’s ideal range (e.g., peppers: 80–85°F). If the mat feels unevenly warm or flickers, it may be faulty. Pro tip: Place the thermometer 1 inch deep in the soil for accurate readings!
Wrapping up and next steps
Using a heat mat for seed germination is a game-changer for gardeners eager to see faster, stronger sprouts!
With the right setup—consistent warmth, proper moisture, and patience—you’ll unlock the secret to 7-day germination magic. 🌱✨ Whether you’re a seasoned green thumb or a beginner, this method makes propagation easier and more reliable.
Now that you’re armed with the know-how, take the next step: grab your seeds, set up your heat mat, and watch your garden dreams take root! Happy growing—your future plants will thank you! 🌿💚