
Propagation
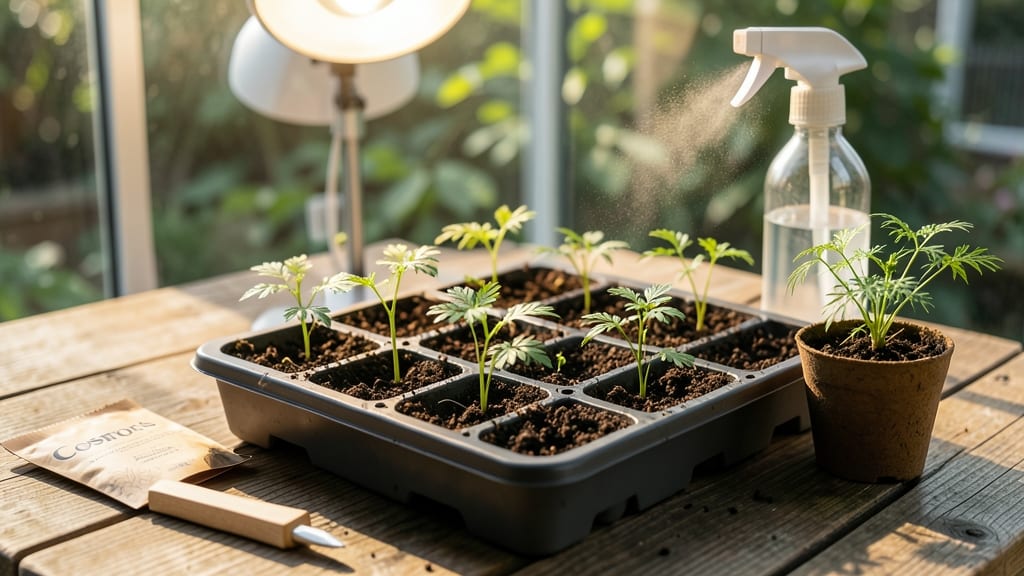
Starting cosmos seeds is the easiest way to get fast, twist-free blooms that last all summer. 🌸 I've learned that the secret isn't complicated—just a few simple tricks that make all the difference between waiting months for flowers and enjoying them by early June.
The beauty of cosmos is they're forgiving, but these steps cut down the guesswork completely.
You'll need just three things: cosmos seeds (the smaller, the better), a shallow tray or flat, and a sunny spot. No fancy lights or heat mats required—cosmos germinate quickly in plain old soil as long as it's not soggy.
The key is keeping things warm and moist until those first green shoots appear, which usually happens within 7-14 days.
Once sprouted, you'll have lush seedlings ready for transplanting in about 4-6 weeks. The trick to twist-free stems is spacing them properly—about 2 inches apart—and giving them plenty of light from the start.
Thin them carefully, and you'll end up with sturdy plants that reward you with nonstop blooms from midsummer until frost.
This method works for both indoor starts and direct sowing outdoors after your last frost date. Whether you're a first-time gardener or looking to fill gaps in your flower beds, cosmos are the perfect no-fuss annual that always delivers. Let's get those seeds growing!
📚 In This Guide
- What you need
- Instructions
- Tips and common mistakes
- Wrapping up and next steps
What you need
- ● Cosmos seeds: 10–20 seeds (non-GMO, heirloom varieties like ‘Sensation’ or ‘Bright Lights’ work best).
- ● Seed-starting mix: 1–2 cups of sterile, well-draining potting mix (avoid garden soil—it’s too dense!).
- ● Containers: Small seed trays (4–6 cells per seed) or
- ● Biodegradable pots (2–3 inches deep) or
- ● Repurposed containers (yogurt cups, egg cartons) with drainage holes.
- ● Drainage layer: Perlite, vermiculite, or coarse sand (¼ cup per container).
- ● Spray bottle: For gentle watering (avoid over-saturating!).
- ○ Plastic wrap or humidity dome: To retain moisture (optional but helpful for slow starters).
- ○ Fine-mesh screen or paper towels: For pre-soaking seeds (optional, speeds up germination).
- ● Grow lights or sunny windowsill: 12–16 hours of warmth (70–75°F) for optimal sprouting.
- ○ Heat mat (optional): For faster germination (55–60°F soil temp).
- ● Fertilizer: Balanced liquid fertilizer (5-5-5 or 10-10-10, diluted to half-strength) for post-germination care.
- ● Patience & a green thumb! Cosmos seeds germinate in 7–14 days—stay consistent! 🌟
Step-by-step instructions for starting cosmos seeds indoors
Here's my foolproof method for getting cosmos blooms in record time—no twists, no fuss.
🌱 Step 1: Soak Seeds to Speed Up Germination
Cosmos seeds have a tough outer shell that slows sprouting. Place them in a small bowl of lukewarm water for 12-24 hours before planting. You'll see the seeds swell slightly—this softens the shell so roots can emerge faster. Drain and pat them dry with a paper towel afterward.
Real talk: I used to skip this step, and germination took twice as long. Soaking cuts that wait by half. Just don't let them sit in water longer than 24 hours or they'll start to rot.
🪴 Step 2: Fill Trays with Light, Airy Mix
Use a seed-starting mix (not garden soil) in clean 2-3 inch deep trays or cells. Cosmos roots need room to spread, so avoid tiny containers. Fill each cell to 1 inch below the rim, then lightly press the surface so it's firm but not packed.
Moisten the mix until it's damp but not soggy—think of a wrung-out sponge. You want moisture that encourages germination without drowning the seeds. Tap the tray gently to settle everything evenly.
🌱 Step 3: Plant Seeds Shallow and Cover Lightly
Sow 1-2 seeds per cell at a depth of just ¼ inch. Cosmos seeds are tiny, so I use a toothpick to create small holes. Cover them with a sprinkle of additional mix—no need to press down. Mist the surface lightly with water until evenly damp.
Here's the thing—cosmos seeds need light to germinate. If you bury them too deep, they'll struggle to reach the surface. A good rule is to plant them as shallow as they'll stay covered by soil.
💧 Step 4: Provide Warmth and Consistent Moisture
Cover the tray with a clear plastic dome or plastic wrap to retain warmth and humidity. Cosmos seeds germinate best at 70-75°F. Place the tray on a seedling heat mat if possible—this keeps the soil consistently warm and speeds up germination to 7-14 days.
Check daily but resist watering until the soil surface feels dry to the touch. Overwatering now can cause damping-off, which turns seedlings to mush overnight. A spray bottle keeps moisture even without oversaturating.
☀️ Step 5: Move to Bright Light Immediately After Sprouting
The instant seedlings emerge, remove the cover and place them under grow lights or in a south-facing window. Cosmos seedlings need 12-14 hours of light daily to stay strong and avoid stretching. Keep the lights 2-3 inches above the plants and raise them as the seedlings grow.
You'll know your light is right when seedlings have thick stems and deep green leaves. If they look leggy and pale, they're reaching for more light. Adjust the height or move them closer to the window immediately.
⏰ Step 6: Thin to One Seedling and Harden Off
When seedlings have 2-3 true leaves (the first set are just cotyledons), thin to the strongest one per cell. Use scissors to snip the weaker seedling at soil level—this prevents disturbing the roots of the one you're keeping.
Two weeks before your last frost date, start hardening off by placing the seedlings outside in a sheltered spot for 1-2 hours the first day. Gradually increase their outdoor time over 7-10 days. Cosmos are tough and handle transplanting well, but this step ensures they thrive in the garden.
Tips & tricks for starting cosmos seeds indoors
Here's what I learned the hard way about getting those first sprouts to pop—because trust me, the little details make all the difference.
Soaking Secret: The 12-24 hour soak in lukewarm water is your germination game-changer. I've found that using a bowl with just enough water to cover the seeds (about ½ inch deep) works best—any deeper and they'll float around. After soaking, drain them completely and pat them dry with a paper towel. This step isn't just about speed—it's about giving those tiny roots a fighting chance against the tough seed coat.
Tray Depth Matters: When filling your 2-3 inch deep trays, resist the urge to pack the seed-starting mix tightly. Instead, press it gently so it's firm but still airy. Cosmos roots need room to breathe, and compacted soil can lead to rot. I like to tap the tray gently on the counter to settle the mix without compressing it. This creates the perfect environment for those delicate roots to establish.
Light Sensitivity: Remember in Step 3 how I mentioned planting seeds shallow? This isn't just about depth—it's about light. Cosmos seeds need light to germinate, and burying them too deep blocks that crucial sunlight. After planting, I place my trays under a grow light immediately (even before sprouting) to give them that extra boost. If you don't have grow lights, a south-facing window with supplemental fluorescent lighting works too—just keep those seedlings within 2-3 inches of the light source.
Hardening Off Hack: When it's time to harden off your seedlings, start with just 1-2 hours on that first day. I've noticed that cosmos seedlings handle this process beautifully, but the key is gradual exposure. On day 2, increase to 3-4 hours, and by day 3, they can usually handle 6-8 hours outside. The goal is to let them adjust to wind, sun, and temperature fluctuations without shock—this makes all the difference when transplanting time comes.
Pro Tips for Cosmos Seed Starting
- Here's what I learned the hard way about getting those first sprouts to pop—because trust me, the little details make...
- Soaking Secret: The 12-24 hour soak in lukewarm water is your germination game-changer. I've found that using a bowl ...
- Tray Depth Matters: When filling your 2-3 inch deep trays, resist the urge to pack the seed-starting mix tightly. Ins...
Frequently asked questions
Got questions about kickstarting your cosmos seeds? You’re not alone—germination can feel like a cosmic puzzle! Here are the answers to the most common queries to help you grow twist-free blooms with confidence.
How long does it take for cosmos seeds to germinate?
Cosmos seeds are fast germinators—typically sprouting in 5 to 14 days under ideal conditions (warmth, moisture, and light). Keep soil consistently damp (not soggy) and place trays in a sunny spot or under grow lights. Patience pays off, but if nothing emerges after 2 weeks, try a fresh batch of seeds!
Can I start cosmos seeds indoors too early?
Cosmos seeds can handle a brief chill (like a fridge for 1–2 weeks), but they’re not cold-hardy like some veggies. Start them 4–6 weeks before your last frost date in warm soil (70–75°F). If seedlings get leggy indoors, move them under bright lights or transplant early—cosmos hate being root-bound!
What’s the trick to prevent twisty cosmos stems?
Twisty stems happen when seedlings grow too fast in low light or crowded conditions. To avoid this:
- Thin seedlings to 12–18 inches apart once true leaves appear.
- Use full-spectrum grow lights (12–16 hours/day) if starting indoors.
- Hardened-off seedlings before transplanting to toughen stems.
Are there alternatives to starting cosmos from seed?
Yes! If you’re short on time or patience, try:
- Transplanting young plants from nurseries (check for healthy, stocky seedlings).
- Direct sowing outdoors after frost (cosmos self-seeds easily, so you might find volunteers next year!).
- Grafting (advanced tip: cosmos can be grafted onto stronger rootstocks for bigger blooms).
Why are my cosmos seedlings dying after sprouting?
Common culprits:
- Overwatering (cosmos roots rot in soggy soil—let the top inch dry between waterings).
- Fungal issues (like damping-off). Use sterilized soil and avoid damp leaves.
- Temperature swings (keep soil consistently warm—a heat mat helps!).
Wrapping up and next steps
Starting cosmos seeds is a rewarding journey that leads to vibrant, twist-free blooms with minimal fuss! By following these simple steps—from pre-soaking to proper spacing—you’ll unlock the secret to faster germination and healthier plants. 🌱✨
Now that you’re armed with the know-how, grab those seeds and get growing! Experiment with different containers or soil mixes, and don’t forget to share your progress with fellow gardeners. Ready for the next step? Try transplanting your seedlings or exploring companion plants to maximize your garden’s beauty and productivity!