
Lawn
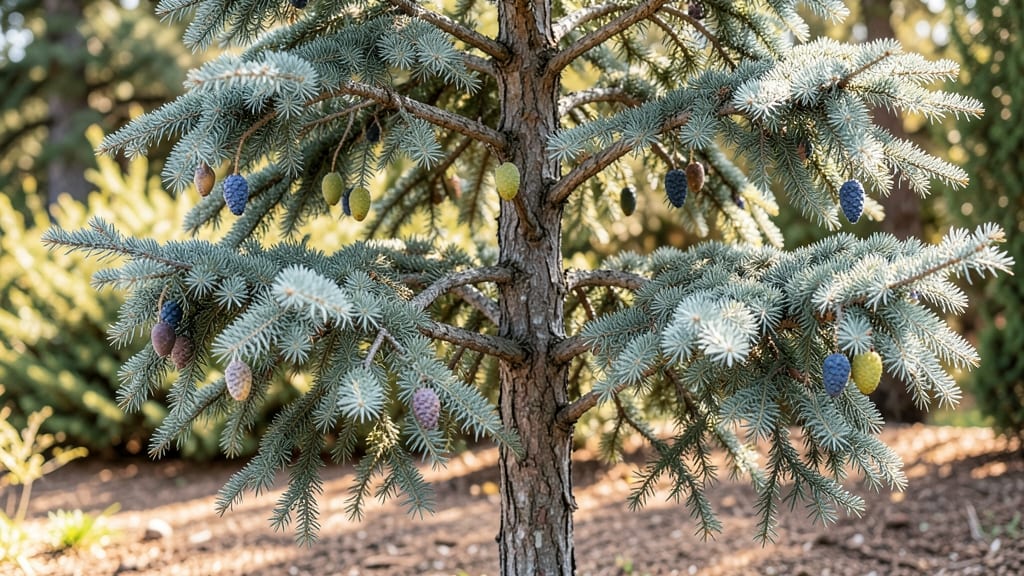
Twisting open cedar seed pods reveals a treasure trove of tiny, winged seeds waiting for their next adventure. 🌿 I’ve spent years perfecting the harvest—because those stubborn pods won’t surrender easily, and patience is key to a reliable seed stash for year-round planting.
The best time to collect them is late summer or early fall, when the cones are fully dried but haven’t yet released their seeds on their own.
You’ll need just three things: a pair of sharp pruning shears, a bucket, and a warm, dry spot to store your harvest. The twist-resistant technique involves gently pruning mature cones, then drying them indoors for a week before twisting them open by hand.
This method preserves seed viability far better than shaking them out in the field.
Once you’ve collected the seeds, you’ll have two options: direct sow them in well-drained soil for fast-growing seedlings, or store them in paper envelopes until spring. The germination rate is surprisingly high when handled properly—expect little cedar saplings to emerge within 2-4 weeks of planting.
For young plants, focus on watering deeply but infrequently—they’re drought-tolerant once established, but seedlings need consistent moisture. In just a few years, you’ll have a thriving cedar tree or shrub that provides shade, wildlife habitat, and those same seed pods for future harvests.
📚 In This Guide
- What you need
- Instructions
- Tips and common mistakes
- Wrapping up and next steps
What you need
- ● Cedar seed pods: 10–20 mature, healthy pods (harvested from Juniperus or Thuja species—ensure they’re plump and slightly greenish-gray).
- ● Potting mix: 2–3 gallons of well-draining, slightly acidic soil (pH 6.0–7.0). Mix cactus/succulent blend with perlite (1:1 ratio) for optimal aeration.
- ● Containers: 2–4 small pots (4–6 inches deep) with drainage holes. Terracotta or fabric grow bags work best.
- ● Watering can: 1 gallon capacity with a fine rose nozzle for gentle hydration.
- ● Gloves: 1 pair of nitrile or leather gardening gloves (cedar needles can be prickly!).
- ● Pruning shears: Small, sharp pair (bypass-style, 4–6 inches) for trimming excess growth.
- ○ Twist-resistant harvesting tool: Optional but helpful—a seed pod opener or small screwdriver (sterilized) for extracting seeds without damage.
- ● Seed tray: 1 shallow tray (10x20 inches) for germinating seeds (if starting from scratch).
- ● Humidity dome: 1 clear plastic cover or mini greenhouse lid to retain moisture during germination.
- ○ pH test kit: Digital or liquid kit to monitor soil acidity (optional but recommended for long-term health).
- ● Label markers: Waterproof labels + pencil to track pod maturity and harvest dates.
- ○ Sunlight meter: Basic lux meter (optional) to ensure your growing spot gets 6–8 hours of indirect light daily.
Step-by-step guide to harvesting cedar seed pods
Here’s how to collect seeds without damaging the tree—plus keep them viable for years.
🪴 Step 1: Identify Mature Seed Pods
Look for brown, dry pods that release seeds when gently squeezed—these are ready to harvest. I check trees in late summer or early fall, when most pods have turned from green to tan. Avoid green pods; they won’t yield viable seeds. Shake a few branches over a paper bag to test readiness—if seeds scatter easily, it’s time to collect.
Use a pruning saw to cut entire branches with clusters of mature pods. Work on dry days to prevent mold. I focus on the lower third of the tree, where pods ripen first. Never strip the entire tree—leave at least half the pods to feed wildlife and ensure next year’s crop.
✂️ Step 2: Extract Seeds Safely
Spread harvested pods on a clean tarp or newspaper in a dry, shaded area. I place a wire mesh screen over them to catch seeds while preventing debris from mixing in. Gently twist each pod with your fingers until it splits open—this releases the tiny, winged seeds inside. Avoid crushing the pods; forceful twisting can damage the seeds.
Sift the debris through a fine-mesh sieve (like a flour sifter) to separate seeds from chaff. I use a small fan to blow lighter debris away, leaving only the heavier seeds behind. Store these in an airtight container—no need to clean them further, as the natural oils protect them from spoilage.
🌱 Step 3: Dry and Store Seeds
Spread the collected seeds in a single layer on a paper towel or mesh screen. Place them in a warm, dry spot with good airflow for 3-5 days—until they feel crisp to the touch. Overdrying can reduce viability, so check daily. I use a small fan on low to speed up the process without damaging the seeds.
Once fully dry, transfer seeds to a sealed glass jar or airtight container. Add a silica gel packet to absorb moisture and prevent mold. Label the jar with the date and tree species—cedar seeds stay viable for 2-3 years if stored properly. Keep the container in a cool, dark place, like a pantry or seed vault.
⏰ Step 4: Test Germination (Optional)
To check seed viability, place 10 seeds between damp paper towels in a sealed plastic bag. Keep them in a warm spot (70-75°F) and check for sprouts in 2-4 weeks. If fewer than half sprout, store the remaining seeds in the freezer for another year—the cold preserves their vitality longer.
If germination rates are low, try soaking seeds overnight in lukewarm water before replanting. Cedar seeds often need this extra step to break dormancy. I’ve found that fresh seeds (harvested the same year) germinate best, so prioritize those for planting.
Tips & tricks for perfect cedar seed pod harvesting
Harvesting cedar seeds successfully takes patience and precision—here’s how to avoid common pitfalls and maximize your yield.
Timing is Everything: Cedar pods ripen unevenly, so focus on the lower branches first where pods mature earliest. I’ve learned that checking trees in late summer (August-September) gives the best balance of ripe pods without waiting too long. If you miss this window, you might find only empty pods—no seeds at all. Look for pods that turn from green to tan and release seeds when gently squeezed.
Gentle Extraction Matters: The key to preserving seed viability lies in how you open the pods. Twist them gently with your fingers until they split naturally—never crush them. I’ve ruined batches by being too aggressive, which damages the delicate winged seeds inside. For large harvests, use a pair of pliers to hold pods steady while twisting, but still apply minimal pressure.
Drying Strategy: Spread seeds in a single layer on a mesh screen or paper towel, then place them in a warm, dry spot with airflow for the full 3-5 days as specified. I’ve found that using a small fan on low speeds up drying without damaging seeds. Check daily—they’re ready when they feel crisp to the touch. Overdrying reduces germination rates, so don’t rush this step.
Storage Wisdom: Once dry, store seeds in airtight containers with silica gel packets to absorb moisture. I’ve kept cedar seeds viable for up to 2-3 years this way, but for long-term storage, consider freezing seeds after their first year. Label containers with the harvest date—fresh seeds (harvested the same year) germinate best, so use those first.
Pro Tips for Cedar Seed Pods
- Harvesting cedar seeds successfully takes patience and precision—here’s how to avoid common pitfalls and maximize you...
- Timing is Everything: Cedar pods ripen unevenly, so focus on the lower branches first where pods mature earliest. I’v...
- Gentle Extraction Matters: The key to preserving seed viability lies in how you open the pods. Twist them gently with...
Frequently asked questions
Got questions about growing, harvesting, or using cedar seed pods?
You’re not alone! Here are some of the most common queries—plus straightforward answers to help you master this twist-resistant seed source.
When is the best time to harvest cedar seed pods?
Harvest cedar seed pods in late fall to early winter (November–January) when they’re fully dry and brittle. Avoid wet conditions—they’ll mold or lose viability. Look for pods that open easily with a gentle twist and release seeds effortlessly. Pro tip: Morning harvests (when dew is light) yield the cleanest pods!
Why do some cedar seed pods resist opening?
Twist-resistant pods are often underripe or still too moist. Let them dry further indoors (on a screen or paper towel) for 1–2 weeks. If they’re genetically tight (common in some cultivars), soak them in warm water for 10 minutes before twisting. Never force them—this can damage the seeds inside!
Can I grow cedar seed pods from store-bought seeds?
Yes, but freshness matters! Store-bought seeds may be viable for 1–2 years if stored dry and cool. For best results, harvest your own from mature trees (5+ years old) and test germination by planting a few in moist soil. If they sprout within 2–3 weeks, they’re ready to grow!
How do I prevent pests or diseases in my cedar seed pods?
Cedar seed pods are naturally resistant to most pests, but aphids or fungal spores can still target stressed trees. Prune for airflow, avoid overhead watering, and apply neem oil if you spot infestations. Dry pods thoroughly after harvest to prevent mold—store in a paper bag (not plastic) in a cool, dark place.
Are cedar seed pods edible, or just for birds?
While not toxic, cedar seed pods aren’t typically eaten by humans—they’re high in tannins and bitter. Birds (like finches and sparrows) love them! If you’re curious, roast the seeds lightly to mellow flavors, but moderation is key. For culinary use, focus on other edible conifers like pine nuts.
| Quick Troubleshooting | Solution |
|---|---|
| Pods won’t open at all | Check ripeness (should be brown and hollow-sounding when tapped). If still green, wait 2–4 more weeks. |
| Seeds sprout poorly | Soak seeds in lukewarm water for 12 hours before planting. Use a heat mat (70–75°F) to speed germination. |
| Mold on stored pods | Discard affected pods immediately. Store remaining pods in a desiccant packet with silica gel. |
Wrapping up and next steps
Cultivating cedar seed pods is a rewarding journey that ensures a steady supply of seeds for landscaping, wildlife support, or even crafting—without the frustration of brittle branches! 🌲 By selecting the right varieties, preparing your soil, and mastering twist-resistant harvesting techniques, you’ll enjoy year-round reliability and healthier cedar trees.
Whether you’re a beginner or a seasoned gardener, these tips make the process simple and sustainable.
Ready to take the next step? Start small—plant a few cedar seedlings or source seed pods from a trusted nursery—and observe how your efforts transform your outdoor space. Happy growing, and may your cedar trees thrive for seasons to come! 🌱