
Lawn
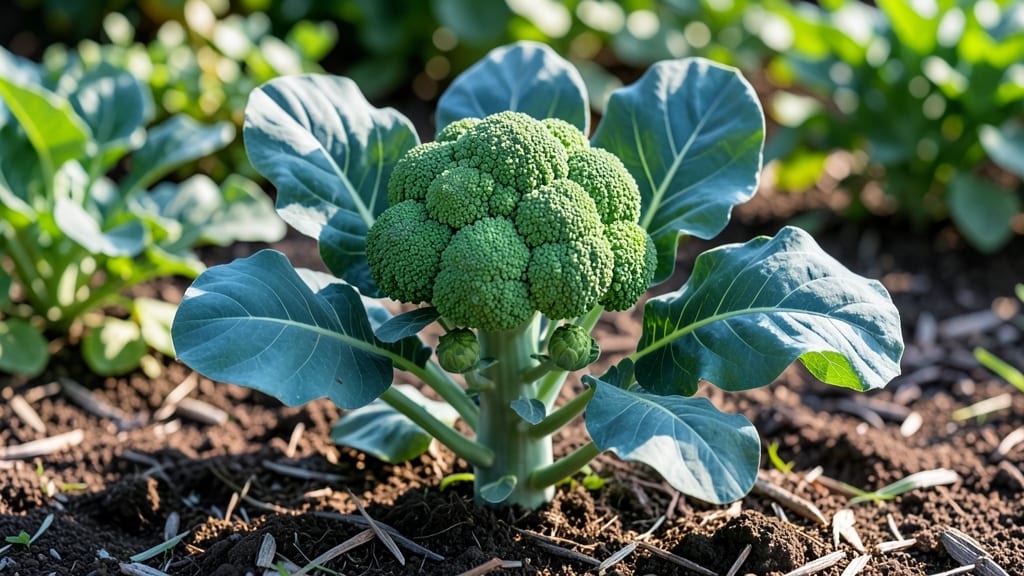
Saving broccoli seeds starts with those twist-resistant pods that feel like nature’s little puzzles. 🌱 I’ve spent years perfecting the process—from spotting the right pods to storing seeds that’ll sprout like clockwork next spring. The key? Patience and knowing exactly when to harvest, because those pods won’t open themselves.
You’ll need just a few basic tools: sharp scissors, a dry paper bag, and a sunny windowsill. The pods themselves are the trickiest part—they resist twisting open until they’re fully mature. That’s when you’ll hear the satisfying pop that signals it’s time to collect seeds.
Most gardeners skip this step, but saving your own seeds cuts costs and ensures plants that thrive in your specific climate.
Once you’ve cracked open the pods, you’ll see tiny black seeds that look like miniature coffee beans. Let them dry completely on a tray before storing in an airtight container.
These seeds aren’t just viable—they’re packed with the genetic memory of your garden’s best performers. By next planting season, you’ll be harvesting broccoli that’s even more robust than store-bought varieties.
This method works for any home garden, whether you’re growing in raised beds or containers. The only real challenge is timing—harvest too early, and the seeds won’t germinate. Too late, and they’ll scatter on their own. But once you master it, you’ll never buy broccoli seeds again.
📚 In This Guide
- What you need
- Instructions
- Tips and common mistakes
- Wrapping up and next steps
What you need
- ● Mature broccoli plants: Choose healthy, disease-free plants with fully developed seed pods (typically from second-year growth). Aim for at least 3-5 plants for a reliable seed harvest.
- ● Seed pods: Harvest fully brown, dry pods (they should rattle when shaken). Avoid green or partially mature pods—they won’t yield viable seeds!
- ● Paper bags or brown lunch bags: Use 2-3 medium-sized bags (one per plant or per harvest batch) to collect pods. Opt for breathable, unbleached paper to prevent moisture buildup.
- ● Scissors or pruning shears: A sharp pair for cleanly snipping pods from the stem. Sterilize with rubbing alcohol before use to avoid cross-contamination.
- ● Labeling supplies: Waterproof markers or tags
- ● Pencil and paper (for notes on variety, harvest date, etc.)
- ○ Gloves (optional): Lightweight gardening gloves to protect hands from prickly stems or debris.
- ● Fine mesh sieve or colander: Helps separate seeds from chaff during cleaning. A ¼-inch mesh works best.
- ● Envelope or seed packet: For long-term storage (e.g., Mason jars with airtight lids or paper seed envelopes from a craft store).
- ○ Desiccant packets (optional): Place 1-2 silica gel packets in storage containers to absorb excess moisture and extend seed viability.
- ● Notebook or garden journal: Track seed varieties, harvest dates, and germination tests for future reference.
- ● A garden space or access to broccoli plants (or purchase seeds from a reputable supplier if growing from scratch).
- ● Patience! Broccoli seed pods take 60-90 days to fully mature after flowering.
- ● Knowledge of your USDA hardiness zone (broccoli thrives in zones 3-11 but prefers cooler climates for seed production).
Step-by-Step guide to harvesting and saving broccoli seeds
Here’s how to collect seeds from your homegrown broccoli plants—no twisty pods or wasted effort.
🌿 Step 1: Identify and Select Mature Seed Stalks
Wait until your broccoli plants bolt after harvest—this is when they send up tall flowering stalks. Look for stalks with yellow flowers that have turned brown and dried into papery seed pods. These pods will feel crispy to the touch and rattle when shaken lightly. Avoid green or still-flowering stalks; their seeds won’t be ready.
If you’re growing multiple plants, focus on the healthiest stalks first. The pods at the top of the stalk mature first, so harvest them as they dry. Use clean scissors to snip the entire stalk or just the clusters of pods, depending on how many you need. I like to leave a few stalks unharvested so pollinators can continue visiting.
🌱 Step 2: Dry and Clean the Seed Pods
Spread the harvested pods on a flat tray or screen in a dry, well-ventilated area out of direct sunlight. This prevents mold and ensures even drying. It should take 7-10 days for the pods to fully dry—they’ll turn brittle and open easily when pinched. If your climate is humid, prop up the tray to improve airflow.
Once dry, place the pods in a paper bag and gently shake or rub them between your hands to release the seeds. The seeds will fall to the bottom while the empty pod husks stay behind. I like to do this over a clean sheet of paper to catch any strays. Discard the empty pods—they’re not useful for planting.
💧 Step 3: Separate and Store the Seeds
After shaking, you’ll notice some seeds are black and shriveled—these are the viable ones. The lighter, shriveled bits are chaff and can be blown or sifted away. Spread the seeds on a clean surface and use a fan or gentle breath to remove the debris. Store the clean seeds in a paper envelope or glass jar with the variety name and harvest date written on it.
Keep the seeds in a cool, dry place (like a pantry or seed vault) where they’ll stay viable for 3-5 years. Labeling is key—broccoli varieties can look similar, and you’ll want to remember which ones performed best in your garden. I also include a note about any pests or diseases I observed that year to avoid repeating mistakes.
⏰ Step 4: Test and Plant Your Saved Seeds
Before committing to a full garden, test a few seeds by planting them in small pots with seed-starting mix. Keep the soil moist and place the pots in a warm spot (around 65-75°F) until germination, which should happen in 7-14 days. If the seeds sprout well, you’re ready to plant them outdoors after the last frost.
When planting, follow the same spacing and care as you would with store-bought seeds. Broccoli grown from saved seeds may take slightly longer to mature—sometimes 10-14 days extra—but the flavor and hardiness often improve. I like to plant a few extra seeds just in case, since germination rates can vary with home-saved seeds.
Tips & tricks for perfect broccoli seed pod harvesting
Here's what I've learned from years of saving seeds—these little details make all the difference between a frustrating harvest and a bountiful one.
Timing is Everything: The 7-10 day drying period in Step 2 might seem long, but patience pays off. If your climate is humid, consider using a small fan on low heat setting to speed up drying while preventing mold. I've found that pods dried in indirect sunlight (like on a covered porch) maintain better seed viability than those exposed to direct sun, which can overheat and damage seeds.
Visual Cues for Perfect Pods: In Step 1, look for pods that rattle when shaken—this is your best indicator of seed readiness. If you're unsure, pick a pod and pinch it gently. If it crumbles easily, the seeds are ready. Avoid harvesting pods that still have green stems attached, as these seeds won't be fully mature and may not germinate properly. The top pods mature first, so harvest them progressively down the stalk.
Seed Separation Strategy: When separating seeds from chaff in Step 3, I've discovered that using a fine mesh sieve works better than breath alone for larger quantities. Simply pour the seeds onto the sieve and gently tap it—viable seeds will fall through while lighter chaff stays behind. This method is especially helpful if you're saving seeds from multiple plants. Store seeds in glass jars rather than plastic to prevent moisture buildup that can reduce viability.
Germination Test: Before planting your saved seeds, conduct a simple germination test by placing 10 seeds between damp paper towels in a warm location (around 75°F). Check daily—if 80% or more sprout within 7-14 days, your seeds are ready for planting. This test gives you confidence in your seed viability and helps you adjust planting quantities accordingly.
Pro Tips for Broccoli Seed Pods
- Here's what I've learned from years of saving seeds—these little details make all the difference between a frustratin...
- Timing is Everything: The 7-10 day drying period in Step 2 might seem long, but patience pays off. If your climate is...
- Visual Cues for Perfect Pods: In Step 1, look for pods that rattle when shaken—this is your best indicator of seed re...
Frequently asked questions
Got questions about broccoli seed pods? You’re not alone! Here are some of the most common queries from gardeners—plus clear, actionable answers to help you master seed saving with ease.
What makes broccoli seed pods twist-resistant?
Broccoli seed pods have a natural dehiscent design—meaning they split open on their own when mature—but their tough, fibrous walls resist twisting or snapping during harvest. This built-in durability protects seeds from damage while drying, ensuring higher germination rates. Think of it as nature’s built-in seed-saving tool!
How do I know when broccoli seed pods are ready to harvest?
Wait until the pods turn brown and dry, and the florets inside look like tiny, crunchy "trees." If you shake a pod and hear seeds rattling, it’s ready! Harvest on a dry day to avoid mold. Pro tip: Don’t wait too long—overripe pods may scatter seeds prematurely.
Can I save seeds from store-bought broccoli?
Technically yes, but it’s risky. Store-bought broccoli is often hybridized for traits like size or disease resistance, which won’t breed true—meaning your seedlings may not grow like the parent plant. For reliable seeds, grow an open-pollinated variety like ‘De Cicco’ or ‘Calabrese.’
What’s the best way to dry broccoli seed pods?
Spread pods in a single layer on a screen or paper towel in a well-ventilated, dry spot (like a garage or shed). Avoid direct sunlight or humidity—aim for 1–2 weeks until completely dry and brittle. For extra protection, place them in a paper bag to catch any stray seeds.
Why did my broccoli seed pods rot or mold?
Mold or rot usually means too much moisture during drying. Check for these red flags:
- Humid climate: Use a fan or dehumidifier.
- Wet pods at harvest: Let them air-dry indoors first.
- Storage issues: Store seeds in airtight containers with silica gel.
Can I grow broccoli from seed pods in any climate?
Broccoli thrives in cool seasons (spring/fall) and struggles in extreme heat or frost. For warm climates, try rapini (broccoli raab) or grow broccoli in shade during summer. Hardiness zones 3–10 work best. Always check your local frost dates to time planting!
Wrapping up and next steps
From their ingenious twist-resistant design to their eco-friendly seed-saving benefits, broccoli seed pods prove nature’s brilliance in action! 🌱 Whether you’re a gardener or just curious about how plants adapt, these pods showcase the beauty of evolutionary engineering—right in your backyard. Ready to put this knowledge to use?
Start by harvesting your own broccoli this season and observe those fascinating pods up close. Who knows? You might just unlock a new way to save seeds, reduce waste, and connect with nature’s clever designs—one twist at a time!