
Size
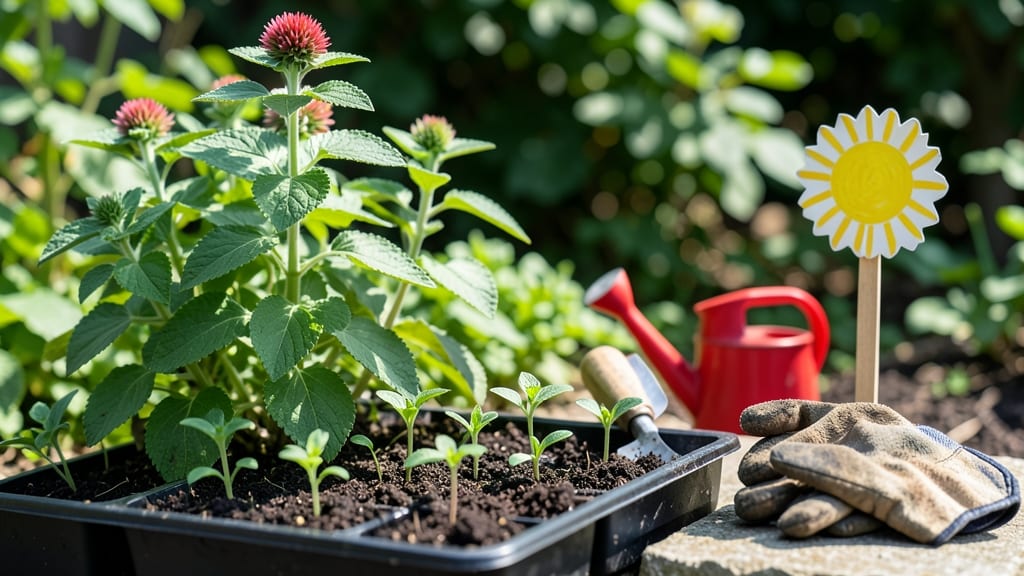
Growing bee balm seed in a garden delivers fragrant blooms that hummingbirds and bees adore—no nursery plants needed. ✨ My first batch of Monarda emerged after weeks of patience, but once those first leaves appeared, I was hooked on the bold, minty scent and vibrant red spikes.
The key is understanding how these twist-free pods behave differently than other seeds.
Start with well-draining soil and a sunny spot—bee balm thrives in full sun but tolerates partial shade. Plant seeds just ¼-inch deep in early spring, after the last frost, or indoors 8-10 weeks before transplanting.
Keep the soil consistently moist but never soggy; these seeds need warmth to germinate, so a heat mat helps if your spring stays cool.
You’ll see tiny seedlings in 2-4 weeks, but don’t rush transplanting—wait until they’re 3-4 inches tall with sturdy stems. Space plants 18-24 inches apart to give them room to spread; they’ll reward you with 3-foot-tall blooms by midsummer.
The real magic happens when pollinators discover them—watch bees and hummingbirds flock in.
Troubleshooting slow starts? Try soaking seeds overnight or mixing them with sand for better contact with soil. If seedlings get leggy, move them closer to light immediately. With the right care, your bee balm will multiply yearly, spreading into a pollinator powerhouse that keeps coming back stronger.
📚 In This Guide
- What you need
- Instructions
- Tips and common mistakes
- Wrapping up and next steps
What you need
- ● Bee balm seeds: Purchase Monarda seeds (e.g., Monarda didyma for classic red blooms or Monarda fistulosa for lavender varieties). Aim for 50–100 seeds for a small patch or 200+ seeds for a full garden bed.
- ● Seed-starting mix: 2–3 cups of sterile, well-draining potting soil (avoid garden soil—it can harbor diseases). Look for mixes labeled "seed-starting" or "organic potting soil."
- ● Containers: For indoor starting: Small pots (3–4 inches deep) or seed trays with cell packs (1 seed per cell). Use 4–6 containers for 50 seeds.
- ● For direct sowing (outdoors): A shallow tray or 6-inch pots if transplanting later.
- ● Grow lights or sunny windowsill: A full-spectrum LED grow light (12–16 hours/day) or a south-facing window with 6+ hours of sunlight for seedlings.
- ● Spray bottle: For gentle watering (avoid over-saturating seeds).
- ● Small hand trowel: For transplanting seedlings or mixing soil.
- ● Twine or plant labels: To mark seed trays or garden beds (bee balm varieties can look similar!).
- ○ Misting nozzle (optional): Helps maintain humidity for germination.
- ○ Heat mat (optional but helpful): Keeps soil 70–75°F to speed up germination (especially in cool climates).
- ● Patience: Bee balm seeds can take 10–21 days to germinate—stay consistent with care!
- ● Space: Mature bee balm plants need 12–18 inches of space (thin seedlings to avoid overcrowding).
- ● Sunlight commitment: Full sun (6+ hours/day) for best blooms (partial shade tolerates Monarda fistulosa).
- ● Watering routine: Keep soil evenly moist (not soggy) during germination; reduce watering once seedlings sprout.
Step-by-step guide to growing bee balm from seed
Here’s how to coax vibrant bee balm from seed—no twist-free pods needed, just patience and the right conditions.
🌱 Step 1: Start Seeds Indoors for Strong Starts
Bee balm seeds need warmth to germinate, so I start them indoors 8-10 weeks before the last frost. Fill small seed trays with sterile seed-starting mix (never garden soil—it’s too dense) and moisten it until damp but not soggy. Press the mix down gently to create a firm, even surface.
Sow seeds ¼ inch deep, spacing them ½ inch apart in rows. A gentle misting with a spray bottle keeps them moist without disturbing the seeds. Cover the tray with plastic wrap or a humidity dome to trap warmth—bee balm seeds thrive at 70-75°F. Place the tray in a bright, indirect light spot (like a south-facing windowsill) and wait for sprouts in 10-21 days.
☀️ Step 2: Provide Light and Transplant After True Leaves Form
Once seedlings emerge, remove the cover immediately to prevent damping-off. You’ll see first true leaves (not the tiny cotyledons) in 2-3 weeks. At this stage, move them under grow lights for 14-16 hours daily—natural light alone won’t cut it. Keep the lights 2-3 inches above the seedlings to avoid leggy growth.
When seedlings have 3-4 sets of leaves, harden them off by placing them outside in partial shade for 1 hour daily, gradually increasing exposure. After 7-10 days, transplant them into the garden 12-18 inches apart in well-draining soil with morning sun and afternoon shade—too much heat wilts the blooms.
💧 Step 3: Water and Feed for Lush, Fragrant Blooms
Bee balm hates soggy roots, so water deeply once a week (or when the top 2 inches of soil feel dry). Mulch with 2-3 inches of organic mulch to retain moisture and suppress weeds. Feed with a balanced liquid fertilizer (10-10-10) every 4-6 weeks during the growing season—this encourages those signature pink, red, or purple blooms that hummingbirds adore.
Deadhead spent flowers regularly to prolong blooming. Pinch back leggy stems in early summer to encourage bushier growth. By mid-summer, you’ll have a fragrant, pollinator-friendly plant that thrives with minimal fuss.
✂️ Step 4: Divide and Maintain for Next Year’s Growth
Every 3-4 years, bee balm clumps get crowded. In early spring or fall, dig up the plant and divide it into sections with 3-4 stems each. Replant divisions in fresh soil, water deeply, and watch them rebound. This keeps your patch vigorous and prevents disease from stagnant roots.
Overwintering is easy—cut back foliage to 2 inches tall in late fall, leaving the crown intact. The roots survive winter, and new growth emerges in spring. With this method, you’ll have years of fragrant blooms from those tiny twist-free seeds.
Tips & tricks for growing bee balm from seed
These insider tricks will help you turn those tiny seeds into a thriving pollinator magnet without the common pitfalls.
Germination Environment: The 70-75°F warmth requirement is non-negotiable for bee balm seeds—colder temps will delay or prevent germination. I place my seed trays on top of my fridge (which stays around 72°F) for consistent warmth. If your home runs cooler, consider using a seedling heat mat set to low. Remember, those 10-21 days to sprouts can stretch if conditions aren't ideal.
Light Transition Strategy: When moving seedlings under grow lights for 14-16 hours daily, I start with just 8 hours the first day to avoid shocking them. Gradually increase by 2 hours each day until reaching full light exposure. This prevents the leggy growth that comes from sudden bright light exposure. Keep those lights 2-3 inches above the seedlings—the closer they are, the more compact your plants will grow.
Transplanting Timing: The 7-10 day hardening off period is crucial for survival after transplanting. I begin with just 1 hour in partial shade, then increase by 30 minutes each subsequent day. Watch for wilting—if you see this, the plant isn't ready for longer exposure. Morning sun and afternoon shade in the garden is perfect, but if you must plant in full sun, choose a spot with afternoon shade during summer's peak heat.
Maintenance Secret: The 2-3 inch mulch layer isn't just for moisture retention—it also helps regulate soil temperature. In hot climates, this keeps roots cooler, while in cooler areas it adds insulation. I use shredded hardwood mulch because it breaks down slowly and improves soil structure over time. And that 10-10-10 fertilizer? I actually use it every 4 weeks during peak bloom season for maximum color intensity.
Pro Tips for Bee Balm Seed Grow A Garden
- These insider tricks will help you turn those tiny seeds into a thriving pollinator magnet without the common pitfalls.
- Germination Environment: The 70-75°F warmth requirement is non-negotiable for bee balm seeds—colder temps will delay ...
- Light Transition Strategy: When moving seedlings under grow lights for 14-16 hours daily, I start with just 8 hours t...
Frequently asked questions
Got questions about growing bee balm from seed? You’re not alone! Here are answers to the most common queries to help you cultivate fragrant, pollinator-friendly blooms with ease.
How long does it take for bee balm seeds to germinate?
Bee balm seeds can be a bit slow to sprout—typically 3 to 6 weeks in ideal conditions. Cold stratification (chilling seeds for 4–6 weeks) often speeds this up. Keep soil moist and warm (around 70°F) for best results. Patience is key!
When is the best time to plant bee balm seeds indoors vs. outdoors?
For indoor starts, sow seeds 10–12 weeks before your last frost date. Transplant seedlings outdoors after the soil warms (when night temps stay above 50°F). For direct outdoor planting, wait until spring or early summer—bee balm thrives in warm weather and dislikes cold snaps.
Why aren’t bees visiting my bee balm plants?
Bees love bee balm, so check these fixes:
- Timing: Plant in full sun (6+ hours/day) for peak blooms.
- Water: Keep soil consistently moist but not soggy.
- Pests: Rule out aphids or mites that may deter pollinators.
- Deadhead: Remove spent flowers to encourage new blooms.
Can I grow bee balm from store-bought seeds, or should I buy specific varieties?
Store-bought seeds can work, but opt for heirloom or organic varieties for better germination and disease resistance. Popular picks include ‘Marshmallow’ (pink blooms) or ‘Jacob Cline’ (red spikes). If seeds are old (<1 year), soak them overnight in water to boost viability.
What should I do if my bee balm plants get powdery mildew?
Powdery mildew (white, dusty spots) thrives in humid, shaded conditions.
- Prevent: Space plants 18–24 inches apart for airflow.
- Treat: Spray with a 1:1 water-vinegar mix or neem oil.
- Avoid: Overhead watering—use drip irrigation instead.
Wrapping up and next steps
Growing bee balm from seed is a rewarding journey that brings vibrant blooms, pollinators, and a fragrant garden to life—all from those tiny, twist-free pods! 🌸 With the right soil, sunlight, and patience, you’ll soon enjoy clusters of pink, purple, or red flowers that attract bees and butterflies while adding charm to your outdoor space.
Whether you’re a seasoned gardener or just starting out, your bee balm garden is just a few seeds away.
Ready to dive in? Start by gathering your supplies—like seeds, containers, and a sunny spot—and take the first step toward a thriving, pollinator-friendly garden today!